|
Testing
Water and Soil
Experiment #12: Creating a Combination
Filter (old
name lab1, part 1)
Read the whole experiment
before starting it. It will give you a better idea of the whole process.
|
|
|
What we learned from experiment #11 can help us design
a combination filter that will filter most pollutants.
We learned that the dual resin will remove any positive
or negative ions. These might be salts, such as sodium chloride (NaCl)
which is Na+ and Cl- in water. It can also trap any organic compounds
that have a plus or minus charge. It won't trap large neutral molecules,
but activated charcoal will.
|
|
|
Let's begin with the items that would be useful for this
lab (but not mandatory) that you can buy at a grocery store. There are
two items.
#1. Distilled water: This is not the same as bottled
drinking water. Distilled water is made from steam that
is cooled and collected. It is supposed to be free of any salts
(minerals). An alternative to distilled water is deionized water.
Deionized water is water that has been passed through resins that capture
all dissolved salts. You use these to rinse off glassware so there are
no mineral spots or where you want pure water.
|
|
|
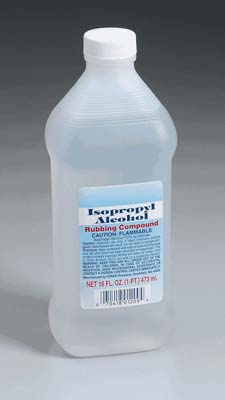
#2: Isopropyl
alcohol (rubbing alcohol). This is not required for the lab, but after
washing out used test tubes, it helps to rinse them out with rubbing alcohol;
it makes them dry faster. Isopropyl alcohol at 70% concentration is called
rubbing alcohol. If you find isopropyl alcohol at a higher percent, get
that instead. |
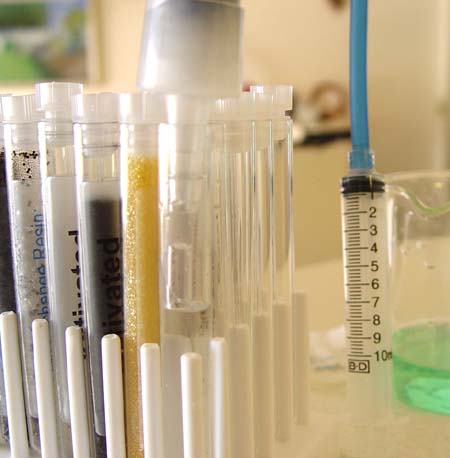
| The following items to use
in this lab should be in your chemistry kit. |
|
|
|
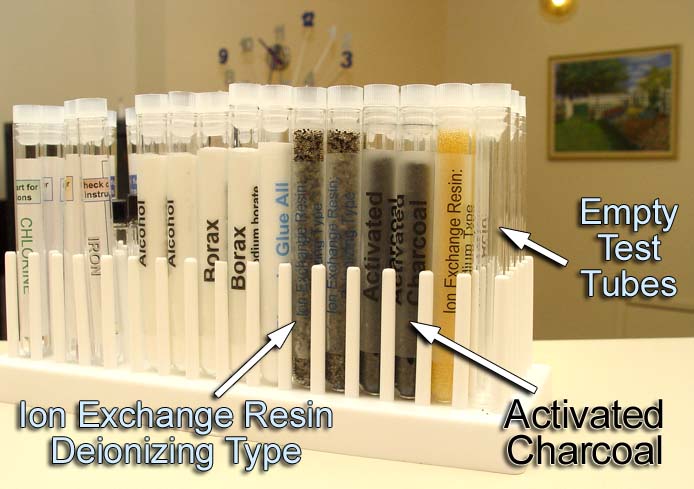
#1. Ion Exchange Resin: Deionizing
type. This resin is capable of pulling all dissolved salts (minerals)
out of water.
#2. Activated Charcoal: Activated charcoal
traps non-salts like solvents, such as, acetone, alcohol, gasoline, etc.
It also traps drugs, insecticides, and chlorine.
#3. Two empty test tubes: You will use these
to collect purified water and the red cabbage extract.
|
|
|
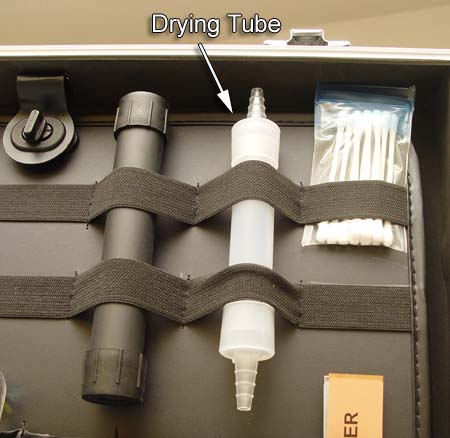
#4. Drying Tube: This plastic tube with tapered
(barbed) ends is normally packed with material to absorb water and dry
air. Hence, the name "drying tube." We will pack it with materials
that will absorb impurities from water. The drying tube has two caps,
each with tapered (barbed) ends.
|
|
|
#5. Cotton
swabs: In this experiment we will be pulling the
cotton off of the end of a swab and using it as a plug in the glass pipette. |
|
|
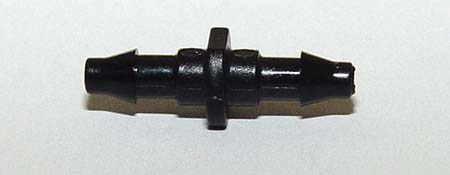
#6.
Plastic connectors: You will need a couple of
the smaller plastic connectors. These are short pieces of plastic tubing.
Your kits has two sizes. You need the smaller size, which is 5/16"
outside diameter with a 3/16" inside diameter. |
|
#7.
Tubing: You have about 16 inches of tubing, which you have used earlier. We will use it again for this experiment. It's shorter than what the photo is showing. |
|
#8.
Two-sided barb connector: This will connect the
plastic connector to the blue tubing. |
|
|
#9. Food coloring:
You have a small vial of food coloring. It's kind
of hidden in the center of the test tube tray in between the tall test tubes. |
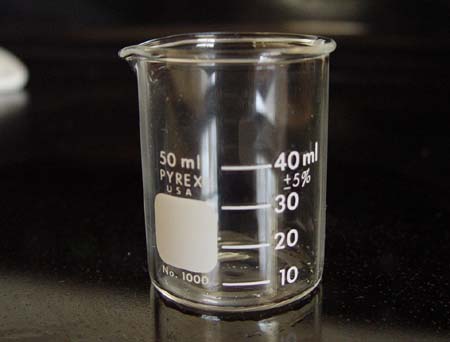 |
#10. 50 mL
beaker: |
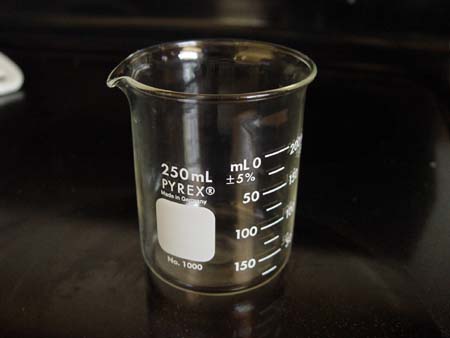 |
#11. 250 mL
beaker: |
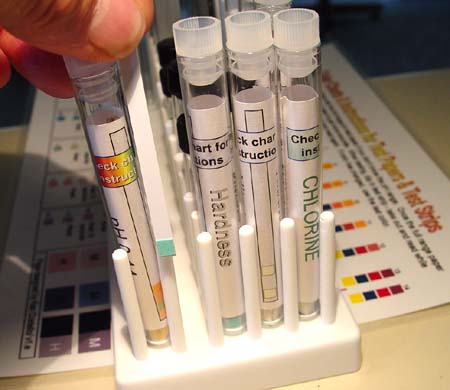 |
#12. Hardness
test strips and color chart: The hardness strip
will test the hardness of the tap water before and after running through
the filter. |
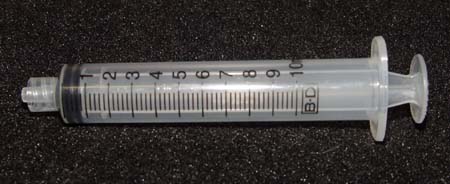 |
#13. Plastic
Syringe: You will use this to push tap water through
the filter. |
|
Instructions: Purifying water.
|
| Many chemistry labs are presented
in cookbook manner. It ensures success, but the student is following the
instructions somewhat blindly. Cookbook approaches do not encourage students
to do their own thinking. I will try to present the overall picture of the
lab, so that you can understand the steps that I show, but also understand
that they don't have to be done in the same order I give. In other words,
you have some freedom to do common sense adjustments. |
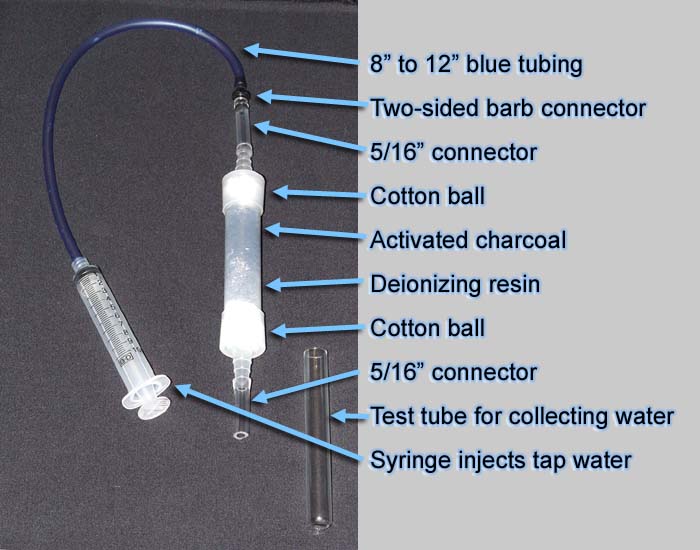
| Below is the filtering apparatus we are making.
Some of you can probably make it with just this illustration; however, I
go through each step in my cookbook steps below. |
|
|
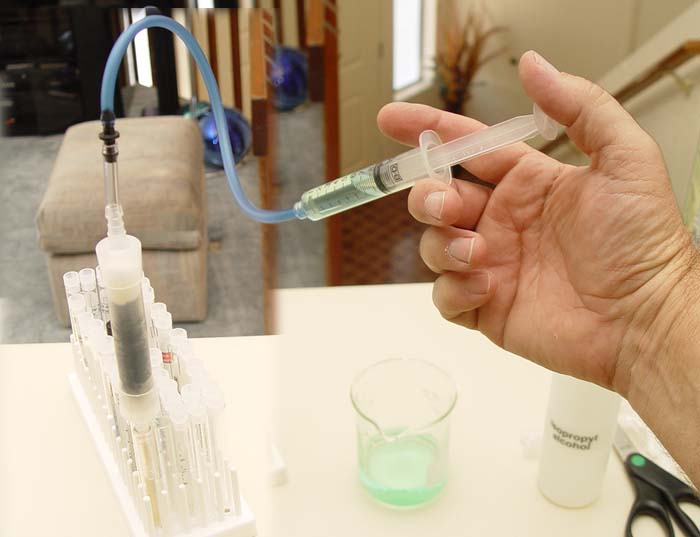
| The below image shows the filtering apparatus
in operation. The syringe draw water from the beaker with tap water that
has a drop of food coloring. This is injected slowing through the filter.
A test tube held in the test tube tray catches the filtered water. The food
coloring is to help us see that the filter is working, because the color
will be trapped if the filter is working correctly. This is the essence
of the experiment. Details are given below. |
|
|
|
Below
are step by step instructions for doing this experiment.
|
|
|
Take off one end of the drying
tube |
|
|
|
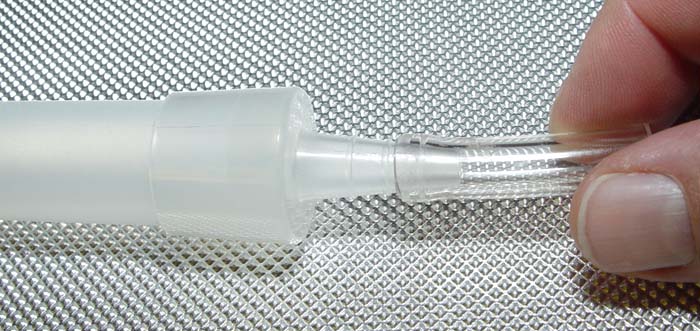
Push the smaller 5/16" plastic connector
onto the other end of the drying tube. It will be a tight fit so you will
have to be persistent. It doesn't have to go on very far.
|
|
|
Take a cotton
ball and push it into the open end of the drying tube. Try not touch it
with the fingers. Here I'm using a test tube to push the cotton ball down
to the bottom of the tube. |
|
|
Here the cotton ball has been
pushed to the bottom of the drying tube. Notice that the drying tube has
its plastic connector sitting down in an empty test tube. The test tube
sitting in the holder will support the drying tube. |
|
|
Open up one of the test tubes labeled, "Ion Exchange
Resin Deionizing Type." Pour the contents into the drying tube.
The resin is damp so it sticks to itself, so you will have to tap on the
test tube to get most of it to pour into the drying tube.
The word "ion" means something that has a charge.
The name "Ion Exchange Resin" hints that one ion (charged particle)
will be exchanged with another ion. The name "Deionizing type"
indicates that all ions will be removed. Remember "De" means
to take out.
|
 |
You may notice that this resin
actually consists of two types of beads, light ones and dark ones. Here
is a close up of those beads. The dark ones grab onto metal ions like sodium
(Na+). The light beads grab onto the negative non-metal ions like chlorine
(Cl-). In doing so one releases a positive hydrogen (H+) and the other a
negative oxygen bonded with hydrogen (OH-). H+ and OH- then
combine to make water (H2O). In other words,
salt ions (also called minerals) comes in, but they are replaced by pure
water. The drawback to this filter material is that it doesn't stop particles
that don't have a charge. That's where the activated charcoal comes in. |
|
|
The
resin from the one test tube fills up about half the drying tube. A different
filter material will now be put into the tube... |
|
|
Uncap one of the activated charcoal test tubes. The activated
charcoal pours very easily, so be careful that it doesn't spill over.
The only thing that dissolves charcoal is molten iron.
You may not have room for all of the activated charcoal
from the test tube. It's OK to leave some in the test tube.
|
|
|
Activated charcoal has numerous
very small pores that are capable of trapping large molecules (a molecule
is a collection of atoms joined together to make a compound) In the graphic,
the word "organic" refers to substances that are built from chains
of carbon. This includes substances excreted from living things and chemicals
like pesticides & drugs. The word "adsorption" means sticking
to the surface as opposed to "absorption" which means soaking
into surface. |
|
|
After pouring in the activated charcoal, place another
cotton ball into the top of the drying tube. You will probably have to
use fingers to pack it inside. Fortunately, the filter can trap contaminants
from the fingers.
(Take a picture at this point. See
if you can set your camera to either 1600x1200, 1280x960, or 1024x768.
If you own a 2 megapixel camera, just use the highest setting [3 stars].)
|
|
|
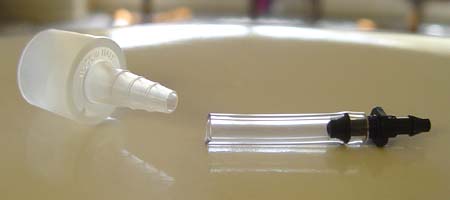
Now take the two-sided black barb and push on another small
5/16" plastic connector. The connector will then be pushed onto the
barb of the other drying tube cap. |
| Below you see that the approx. 1 foot of blue
tubing is connected to the other side of the barb connector. This cap will
placed on top of the "drying tube." |
|
|
|
|
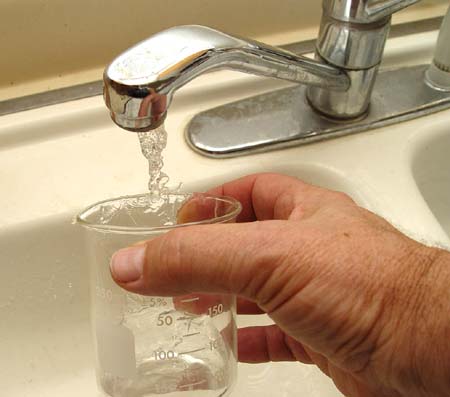
First we need some tap water.
Fill the larger, 250 ml beaker with about 100 milliliters (ml) of tap water. |
|
|
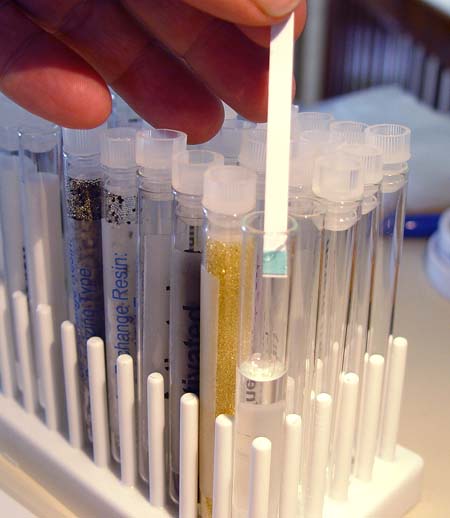
Take a strip from the Hardness
tube. Read the instructions for the Hardness test on the Color Chart. |
|
|
And then dip the hardness
strip into the tap water. The Color Chart says to wait 15 seconds and then
compare the strip's color to the colors on the chart. |
 |
For my tap water, the color
hue of the test strip best fit the color for the high level of 180 ppm,
which is 180 parts per million. Hardness is mostly from dissolved calcium
carbonate (CaCO3). 180 ppm means for every million
grams of water (about 250 gallons) there's 180 grams of calcium carbonate
(22 sticks of chalk). We will do this test again with the tap water that
goes through the filter. Make a note what you reading was. |
|
|
Food colorings are extracts from plants. Activated charcoal
is good at absorbing organic compounds (substances in plants or animals).
To see that our activated charcoal is doing its job, we need
to add a drop of food coloring to water the 250 mL beaker. This is the
water we will filter. You can use the plastic pipette to do the transfer.
The small 50 mL beaker has distilled water in it for rinsing out the pipette.
I use a saucer to protect the counter top from the food coloring.
|
|
|
Use pipette
to draw up a little food coloring. Unlike me, you might want to hold the
food coloring vial with your other hand to steady it. |
|
|
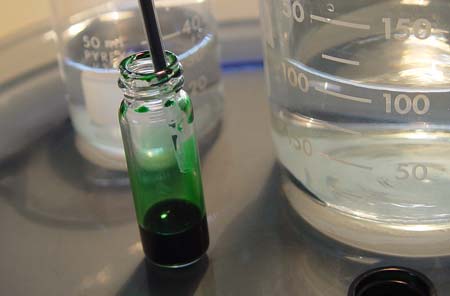
Add one or two drops of the food coloring. Return the
remainder of the food coloring to the food coloring vial. Then you can
use the pipette to stir the food coloring in the beaker by sucking water
up into the pipette and squeezing it out.
Be sure to put the cap back on the food coloring vial.
|
|
|
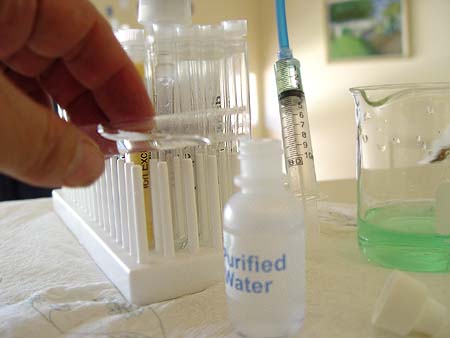
To clean the
pipette, draw the distilled water in the 50mL beaker up into it a couple
of times. If you don't have distilled water, you can wait until you make
your own pure water and use that to clean the plastic pipette. |
|
|
So here's the setup before you begin using the syringe
to inject water into and through the filtering tube. It might not be a
bad idea to have it all sitting on a paper towels to catch any leaks.
 (Take
a digital picture of your setup at this point. If your camera is a 2 megapixel
camera or higher, you can reduce the resolution to save space. Good sizes
are 1600x1200 or 1024x768. On the cameras that use the star (***) system,
two stars are fine. A picture from a cellphone camera is not the best,
but it would be OK if you don't have a digital still camera.) (Take
a digital picture of your setup at this point. If your camera is a 2 megapixel
camera or higher, you can reduce the resolution to save space. Good sizes
are 1600x1200 or 1024x768. On the cameras that use the star (***) system,
two stars are fine. A picture from a cellphone camera is not the best,
but it would be OK if you don't have a digital still camera.)
|
|
|
Draw some of the tap water into the syringe. The blue
tubing will push onto the tip of the syringe.
|
| Below you see me pushing the syringe slowly
to get the water into the filter. The first syringe will probably just get
the filter wet and not produce any filtered water. Refill the syringe again
and inject the water until you get the test tube about 3/4 full. |
|
|
|
|
Once you fill the test tube to over half way, pick up
the "drying tube" filter and move it to an empty test tube next
to it. Notice the green color is gone from the water, so the activated
charcoal is working. But we need to see if the ion exchange resin is taking
out the minerals.
|
|
|
Get
another hardness test strip and dip it into the filtered water in the test
tube. |
|
|
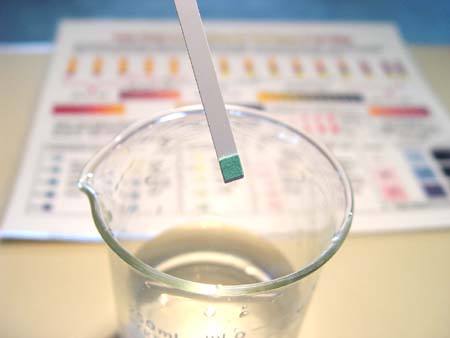
Notice the hardness test strip has a color hue that is
closer to color square for 0 ppm. It is more turquoise rather than the
purplish color before the water was filtered. Report what reading you
get with your filtered water.
Take a photo of your color chart with your hardness test strip next to
it. This is a close up, so if you camera has a "tulip" icon
for taking close-ups, try using that.
|
|
|
In past labs, I had students our the filtered water
from the test tube to the bottle labeled, "Purified Water."
But now, we are filling the "Purifed Water" bottle with store
bought distilled/deionized water to be sure we have pure water.
|
|
|
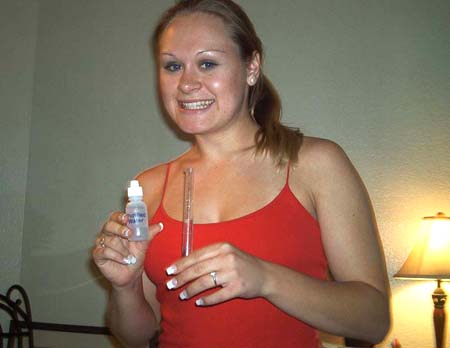
To prove you were there, I need a picture of you. This
is Melissa from the 2004 spring class. She's holding a graduated cylinder
and purified water bottle, but you might hold the "drying tube"
filter or something else that seems appropriate. Sometimes students' children
help out, so it's fine to include them in photos as well.
Send your photos and data to me at costello107@chemistryland.com.
Also, note your "Sent" folder may store a copy, which can cause
your e-mail storage quota to go over, preventing receiving any e-mails.
So you might want to erase the photos from your "Sent" folder
after you send the photos.
Congratulations on finishing Experiment #12.
|