|
Air We Breathe: Experiment
#2:
Detecting water vapor and CO2 in Car
Exhaust
|
|
|
Car Exhaust contributes a great deal to
pollution. It also contributes to global warming by the emission of carbon
dioxide and water vapor. The warming isn't from the hot exhaust (which
does contribute some) but from the fact that carbon dioxide and water
soak up heat from the sun and from heat radiating from the ground.
In this experiment we want to detect water
vapor and carbon dioxide coming from car exhaust.
|
| For now you will just confirm that car exhaust
contains water vapor. I'm postponing the experiment for detecting
carbon dioxide. However, I did the experiment for you, which you will study
here. |
|
|
The source of the water and the carbon dioxide is from
the burning of the gasoline in the engine cylinders. Gasoline is a mixture
of hydrocarbons. Hydrocarbons are chains of carbons with hydrogen atoms
attached. In the picture carbon atoms are gray and hydrogen atoms are
white.
Gasoline and oxygen enter the cylinder and a spark ignites
the mixture. The spark begins the break up of the gasoline molecules and
the oxygen molecules. Oxygen starts combining with the carbon atoms to
form carbon dioxide (CO2) and oxygen also combines with the hydrogen atoms
to form water (H2O). Both of these reactions give off energy. Some of
the energy starts the break up of other gasoline molecules, which further
allows more oxygen to combine with the freed up carbon and hydrogen atoms.
In a flash a trillion trillion gasoline molecules are disintegrated and
now just water and carbon dioxide.
|
| All of the energy released as the gasoline
molecules break up and combine with oxygen creates high pressure of carbon
dioxide and water vapor in the engine cylinder. After this pressure is used
to push the cylinder down and make the car go, the hot gases are released
to the exhaust system shown below... |
|
|
| In the above picture, the exhaust manifold
is the first set of pipes that combine the exhausted gases from the cylinders
into one pipe. The exhaust is then routed to the muffler to reduce the explosive
sound that came from the gasoline exploding in the cylinders. A catalytic
converter (not shown) comes before the muffler and converts unburned gasoline
to carbon dioxide and water. The exhausts exits the tail pipes. It's at
the tail pipe where we want to detect the water vapor. |
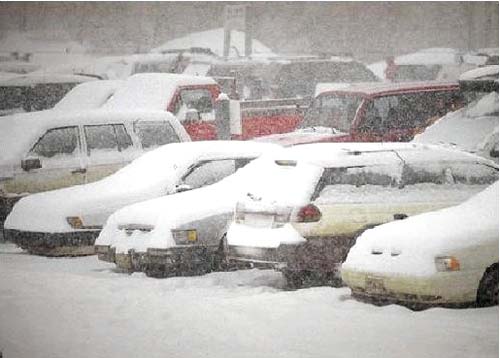 |
The key to detecting water vapor from car exhaust is to
start with a car with a cold engine.
No, it doesn't have to be this cold.
|
|
|
Evidence #1 (cloud): However, if the air is cold,
the normally invisible water vapor turns to droplets of water and a cloud
forms behind your tail pipe. If this is the case,
just take a picture of your car (or someone's) whose exhaust is showing
the presence of water by condensing into visible water droplets (a cloud).
 By the
way, if this was burning oil, it would be blue smoke. If it was excess
unbent gasoline, then it would be black smoke. By the
way, if this was burning oil, it would be blue smoke. If it was excess
unbent gasoline, then it would be black smoke.
|
|
|
Evidence #2a (liquid water): Again, detecting water
is best done when a car engine has just started up. (Note: The water is
always there, but when the exhaust is very hot or the weather is hot,
then it's harder to get the water to condense). When I started up my Jaguar,
in a matter of seconds water was dripping from the tail pipe. If the engine
was hot, then the water would not have condensed on the tail pipe and
could not have been seen. Warning: turn off
engine before taking pictures. If you see water
on the tail pipe, take a picture.
|
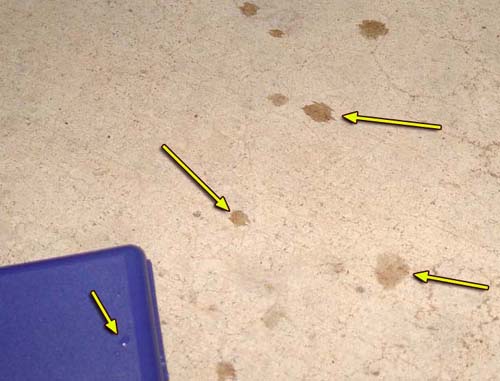 |
Evidence #2b (liquid water): On
my friend's Honda, I noticed water spitting from the tail pipe. I first
noticed it by feeling the exhaust from about 1 foot away. Drops of water
was hitting my hand and felt cool as they evaporated. I also could see
drops of water on the driveway. If
you see drops of water on the ground coming from tail pipe, take a picture. Again, turn off engine before
taking pictures. I don't want you getting run over by your own car.
|
|
|
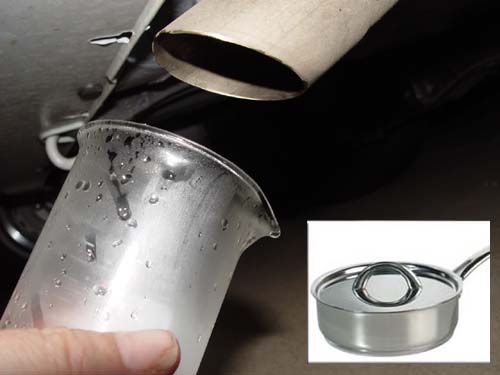
Evidence #3 (Condensation on cool object): If you
can't see liquid water on tail pipe or on the ground, you can try holding
a cool object near the tail pipe. Make sure car
is in park! Here I'm using the 250mL beaker to show that it
fogs up when it came near the exhaust. Actually I got quite a bit of water.
A shiny cooking pan might work better. Note: The condensation may only
last for a few seconds. Just place the glass or metal in the exhaust for
a few seconds and remove it after you see condensation. You might have
time to take a picture before it evaporates. In
hot weather, you may have to put some ice in the beaker. Of course, there
will be some condensation even without the exhaust. However, you should
see a lot more condensation when you bring it near the exhaust pipe.

|
| |
|
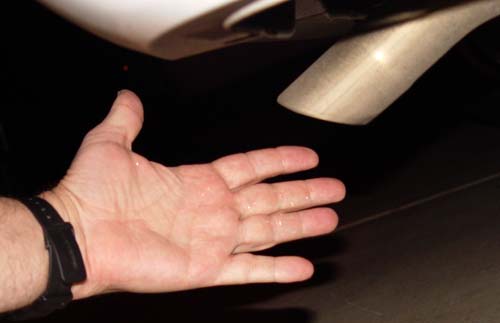 |
Evidence #4 (Feeling of moisture): Even
when there's no condensation, you can feel moisture in the air. Car
in Park! In this picture there are water drops on my hand from
the tail pipe, so it was easy. But even without liquid water, you can sense
the moisture. If the other methods fail, this might work for you. If
so, take a picture of your hand. It doesn't need to be near the
tail pipe. |
|
|
 Like
all labs, I want at least one photo with your face in the picture.
For this lab, either sit in or stand by the vehicle that you detected
water vapor. Like
all labs, I want at least one photo with your face in the picture.
For this lab, either sit in or stand by the vehicle that you detected
water vapor.
Would you believe I was testing the original Batmobile?
(this was me before shaving my mustache)
|
|
DETECTION OF CARBON DIOXIDE: Below I show how I detected
carbon dioxide by measuring the pH of a solution before and after it was
exposed to the carbon dioxide in the exhaust. (Don't do this part of the
lab). You will do the following part of the lab. Let's first discuss what
happens when carbon dioxide makes contact with water.
|
 |
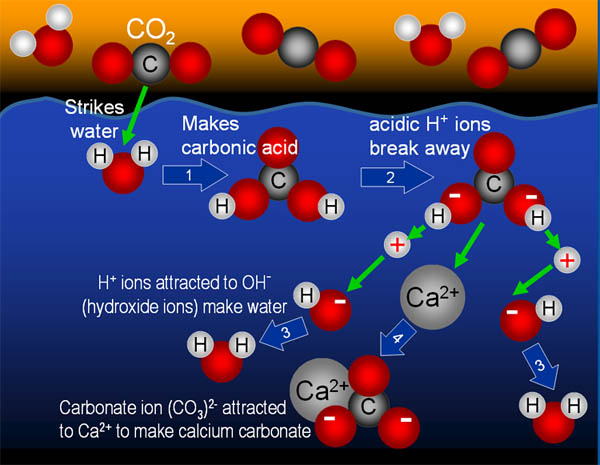
Whether carbon dioxide comes out of the tail pipe of the
car or out the nozzle of soda fountain machine, it reacts the same with
water. When water and carbon dioxide gas combine, they form a compound
called carbonic acid. This is where we get the name "carbonation"
or "carbonated." Carbonic acid is what makes carbonated drinks
acidic. It's an acid because the two hydrogen atoms (the small white spheres)
come off. When a hydrogen atom comes off, it leaves its one and only electron
behind, which makes the hydrogen positively charged.
In your mouth the free hydrogen atoms (H+) give your taste
buds a feeling of tartness. The fizz you feel or see is the reaction reversing
(going from carbonic acid to CO2 and water)
Since carbon dioxide makes an acid when it contacts water,
we can use the acids to neutralize an alkaline solution. Alkaline is just
the opposite of acid.
|
|
|
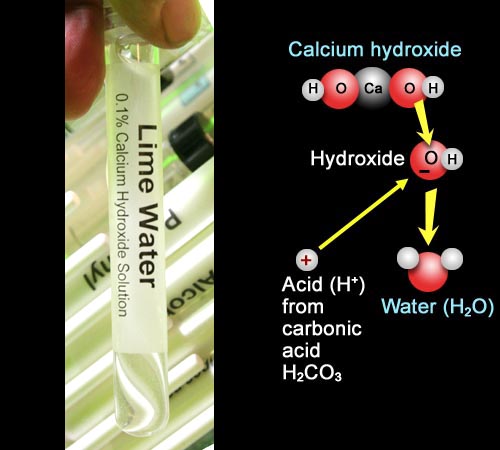
Lime water is the alkaline solution I will neutralize.
No, it's not make from the lime fruit.
Lime water gets it's name from the mineral known as lime
(chemically called calcium oxide / CaO) not the lime fruit. When lime
(CaO) is added to water, it becomes calcium hydroxide [Ca(OH)2].
The picture shows what calcium hydroxide looks like. In water the OH-
(hydroxide) breaks away . The black minus sign represents an extra electron
that the hydroxide pulls off the calcium and keeps. Hydroxide neutralizes
acids H+. Or you can say the reverse, "acids neutralize hydroxides."
Either way, when neutralization occurs, the OH- and the H+
combine to make water.
|
 |
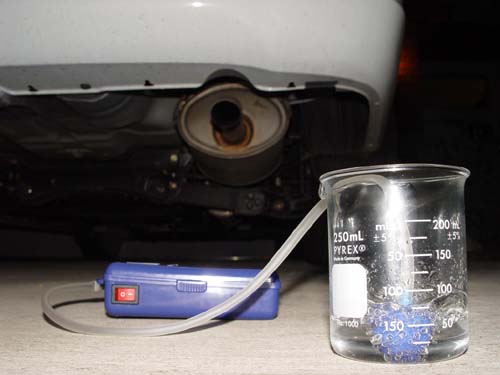
The tail pipe
on the Jaguar shot straight back so I had to set the pump and beaker on
a short stool. Here I knew the exhaust had water in it because it felt like
a wet sauna sitting behind the Jaguar with the engine running. (I didn't
sit there long). I let the engine and air pump run another 15 minutes. (
I had also moved the lime water to a smaller beaker to make the liquid deeper
and more likely to absorb the carbon dioxide.) |
 |
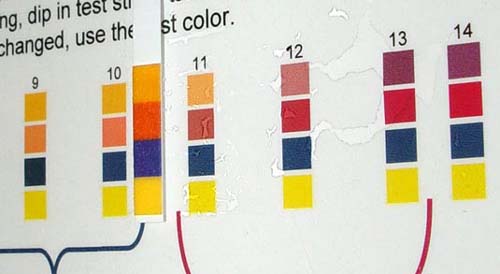
Using the pH
test strips for 6.5 to 10 range, I tested the lime water after car exhaust
had bubbled through it and found that the pH dropped from 10 to about 7.
That means it completely neutralized the hydroxides in the lime water. At
pH 7, water is neither acid or alkaline because the concentration of both
the H+ and the OH- are equal and both are quite low. |
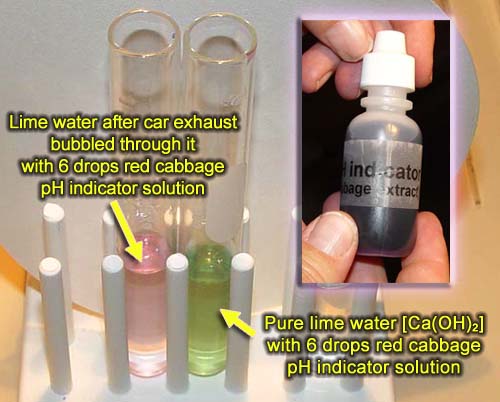 |
As a double
check of the pH test paper strips, I also used red cabbage indicator solution
(something you will make in experiment #10). The greenish color of the pure
lime water with the indicator indicated a pH of 11. The pale purple color
of the lime water after exposure to exhaust looks close to pH 7. This confirms
that the pH dropped significantly and that carbon dioxide is a component
of car engine exhaust. |
 |
pH Scale for
Red Cabbage indicator. |
| DETECTION OF CARBON DIOXIDE USING A DYE (This
part of the lab you do): A compound called phenolphthalein is used commonly
in laboratories to indicate when a solution goes from acid to alkaline or
the reverse. Above we showed carbon dioxide neutralizing lime water. When
that happens a phenolphthalein solution will go from pink to clear. |
 |
Your kit has a bottled labeled, "Phenolphthalein." Phenolphthalein is pronounced "fee nol they lean."
The middle "ph" is silent.
|
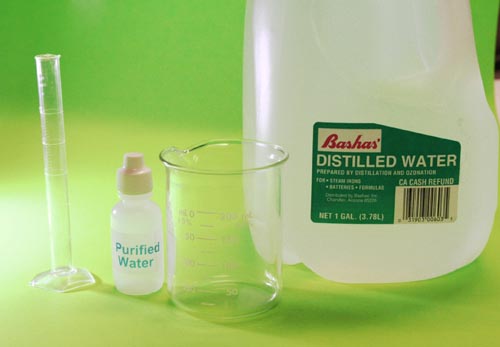 |
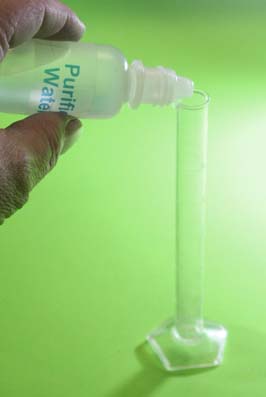
In this experiment
we need to place 3 milliliters (3 mL) of distilled water into the 10 mL
graduated cylinder on the left. Pouring from a big jug into the small 10
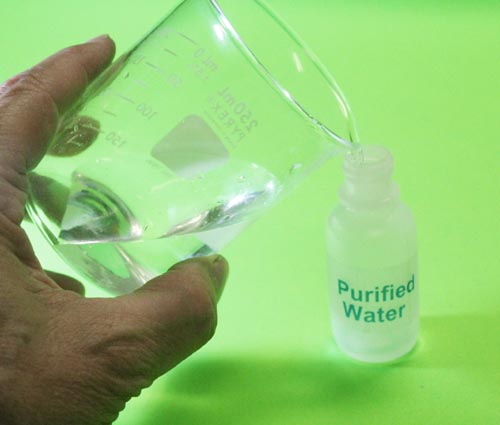
mL graduated cylinder is not a good idea. One way is to pour some distilled
water into a beaker and then pour from the beaker to the smaller bottle
labeled "Purified Water." The small bottle has a dripper nozzle
that let's you control the amount going into the graduated cylinder.
Your bottle of "Purified Water" is probably already filled. If not, then refill as mentioned here. |
|
|
The
Purified Water bottle holds about 30 ml of water, so place enough in the
beaker to fill up the Purified Water bottle. After pouring remember to put
the dripping nozzle back onto the Purified Water bottle. |
|
|
Add 3 ml of
purified (distilled) water to the graduated cylinder. Look closely at the
graduated cylinder to see where the 3mL mark is. |
|
|
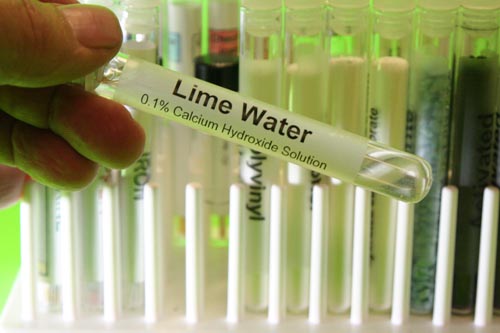
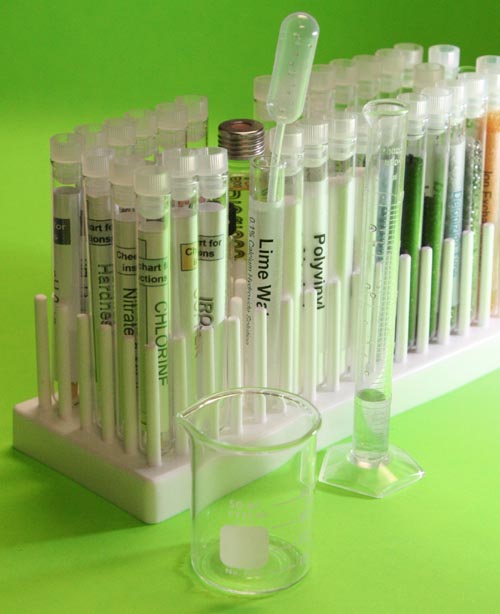
Locate the lime
water test tube in your kit. Lime water is water that has the maximum amount
of calcium hydroxide dissolved in it. That's about 0.1% w/v (meaning 0.1
grams calcium hydroxide in 100 ml of water). It's a weak alkaline solution.
|
|
|
Get one of the plastic squeeze bulb pipettes from your
kit and use it to transfer 1 mL of lime water to the graduated cylinder.
The graduated cylinder should read close to 4 mL because
there was already 3 mL of water in it.
We will then have a solution of lime water that is about
25% the strength of normal lime water. We could have used the full strength
lime water for this experiment, but it's better if it is weaker because
the car exhaust will neutralize it faster. |
|
|
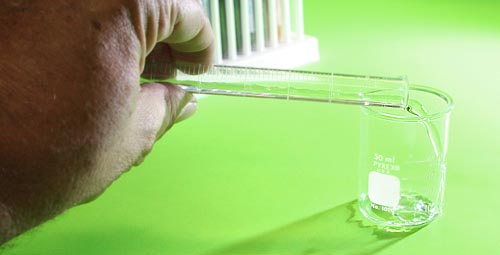
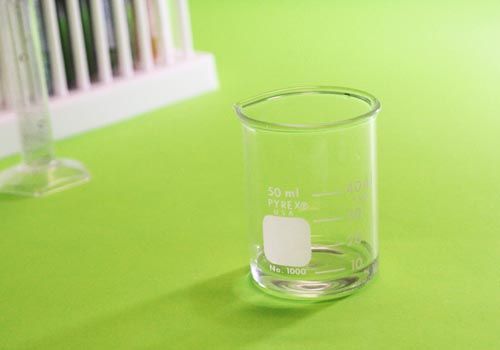
Now you can pour the 4 mL of the diluted lime water out
of the graduated cylinder and into the 50 mL beaker. |
|
|
Add two or three drops of the phenolphthalein solution
to the beaker. You will see a pinkish purple appear. That means the phenolphthalein
is changing colors because its in an weak alkaline solution.
If the solution doesn't turn pinkish purple, then it's possible that the lime water got neutralized by carbon dioxide (CO2) in the air. That can happen if the seal to the test tube isn't tight enough. If you see no color, take just a few grains of baking soda from the test tube labeled "Sodium bicarbonate (baking soda)" and add that to the solution and stir. That should make the solution turn purple. If not, add a little more baking soda.
 Take a picture of your beaker with the solution showing
a pinkish purple color.
|
|
|
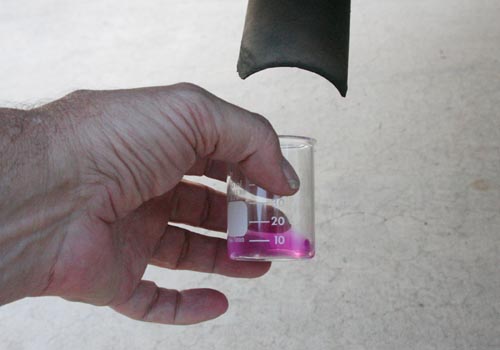
Take your beaker out to your vehicle. Start up the vehicle
and hold the 50 mL beaker somewhat close to the exhaust pipe (don't burn
any fingers).
If our theory is right, carbon dioxide is a by-product
of gasoline and will produce carbonic acid in the water in the beaker. That
will begin to neutralize the calcium hydroxide (lime water) or the baking soda if you had to add that. |
|
|
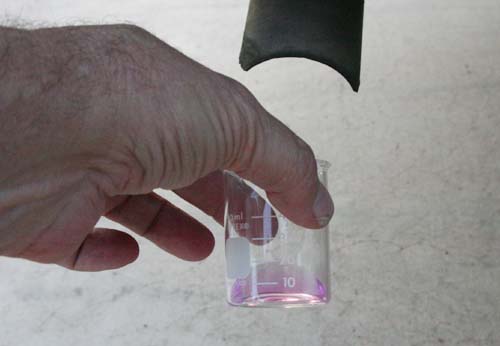
About 30 seconds
later I noticed the pink color was getting fainter. Apparently the hydrogen
ions (H+) coming off of the carbonic acid being created was neutralizing
the hydroxide ions in the lime water. |
|
|
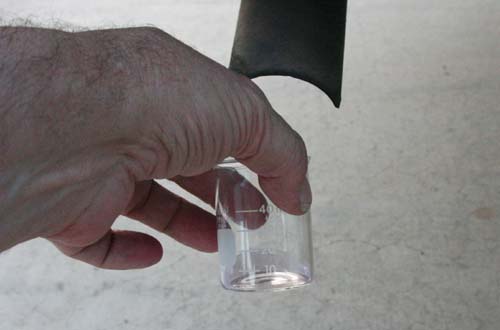
Another 30 seconds
and the pink color disappeared. Apparently, enough carbon dioxide had entered
the water and, in essence, carbonated the water with carbonic acid. The
acid (hydrogen ions=H+) neutralized all of the hydroxide ions
(OH-) and forms water (H2O). What remains is calcium
ions and carbonate ions. These combine to make calcium carbonate, which
is chalk. You might see a bit of cloudiness because of this.
If you had to use some baking soda, it's possible that it won't turn clear but turn from a dark pink or purple into light pink. If you don't get a color change after 30 seconds, then stop anyway. There's no need to breath too much exhaust. |
|
|

Take
a picture of your beaker after the carbon dioxide from the exhaust caused
the pink phenolphthalein to go clear (or pink if using baking soda).
Now we have confirmed carbon dioxide three
ways. One using pH paper, one using red cabbage pH indicator, and the
last one of using phenolphthalein. |
 |
Remember the beaker, graduated cylinder, and the plastic
pipette need to be cleaned. Rinse with tap water first followed by some
of the distilled water. A further rinse with some of the isopropyl alcohol
will help with drying.
Also, be sure to place the cap back on the lime water
test tube or carbon dioxide in the air will slowly neutralize it.
Congratulations on finishing the lab.
Phoenix College students should send pictures to chm107@chemistryland.com |


 By the
way, if this was burning oil, it would be blue smoke. If it was excess
unbent gasoline, then it would be black smoke.


 Again, turn off engine before
taking pictures. I don't want you getting run over by your own car.


 Like
all labs, I want at least one photo with your face in the picture.
For this lab, either sit in or stand by the vehicle that you detected
water vapor.
