Introduction
A substance can be identified by observing its chemical and physical properties. Physical properties are those that a substance can exhibit without undergoing a change in chemical composition. Chemical properties are those that a substance exhibits only by undergoing a change in chemical composition (i.e. a chemical reaction).
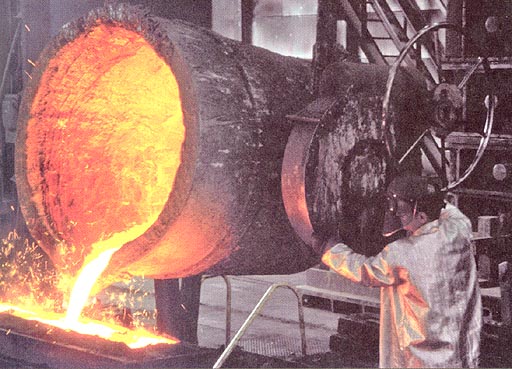
Example: Iron is a metal that readily combines with oxygen to form iron (III) oxide. That behavior is a chemical property of iron because it involves how iron can undergo a chemical change. Iron melts at 1538°C (2800°F). That is a physical property because it doesn't require iron to undergo a chemical change (no other elements combined with it nor did it decompose).
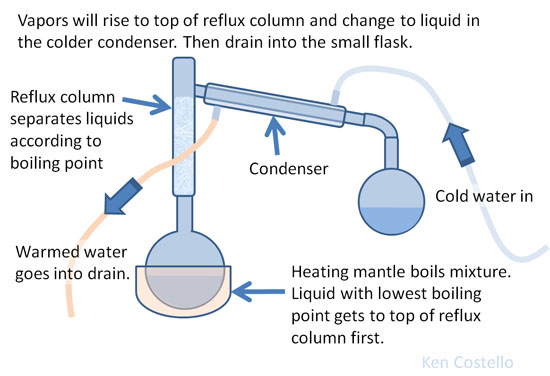
The identification of a substance by its physical properties is the more desirable method because the sample is not destroyed in the determination. Some of the more common physical properties are: color, odor, density, solubility, state (solid, liquid, or gas at 20°C[room temperature]), melting point, boiling point, and refractive index. Probably the major difficulty is that in order to determine accurate values, one must be using a pure substance. Most materials found in nature are not pure. The last paragraph makes some good points. The identification of a substance by measuring its physical properties depends on the substance being pure. Tables that contain physical properties of various substances are assuming it is pure. For example, pure water boils at 100°C; however, if contaminated with salts or another liquid, the boiling point will not be 100°C. So identifying it as water from its boiling point physical property will not be possible. This is why a lot of chemistry has to do with purifying samples. Once you have a pure substance, its identification is much easier. Liquids are often purified using distillation. See setup on the right for doing that. A mixture of liquids will be collected at different temperatures.
In this experiment you will identify an unknown liquid (a pure substance) after measuring values of the following physical properties:
- density
- boiling point
- refractive index
Measuring density will be almost the same as you did in the previous lab.
Many organic liquids are toxic and flammable, so you should exercise care whenever handling them. Do not breathe the vapors. Do not allow unknown liquids to come in contact with your skin. If this happens flush the area with copious amounts of water.
These tips are not only good for working in a chemistry lab, but also for handling solvents and cleaning solutions around the home. Your skin is pretty good at repelling water-based liquids because of the natural oils (sebum) in the skin, but non-polar organic (carbon-based) liquids will wash away these oils and so organic compounds will pass through the skin and enter the blood stream. Some first aid for organic liquid skin exposure not only includes flushing with water but also applying anti-bacterial creams because skin without these oils is more susceptible to bacteria.
The unknowns are flammable. Keep them away from all flames.
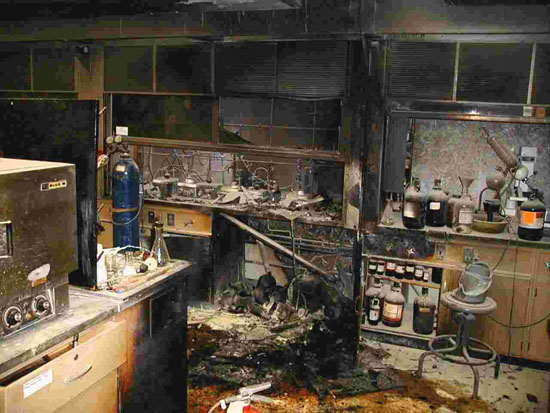
On the right is a photo of a lab fire at Texas Tech University. A 4 liter bottle of flammable liquid broke. It was in the hood with some hot plates, which provide the source of ignition. 6 feet away were about 100 gallons of other flammable liquids. Fortunately, those did not catch fire. To read more about the incident visit: http://www.nmsu.edu/safety/news/news-items/tt-chem-lab-fire2.htm
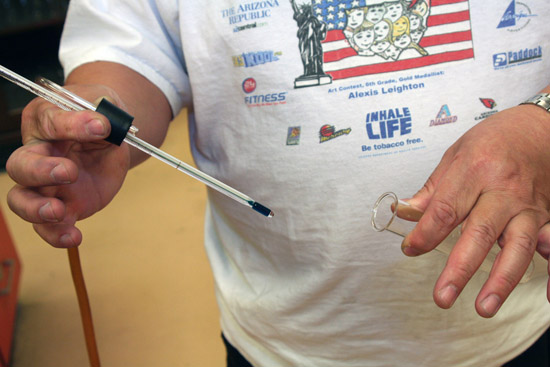
The boiling point of the liquid uses a test tube (25mm wide and about 150mm to 200mm tall). Also, you need a rubber stopper with a thermometer inserted into one hole and a right-angle bent glass tube inserted in the other hole. Rubber tubing is attached to the end of the glass tubing.
Safety
Do not push or pull the thermometer or bent glass to change their position. They will easily break if you try to move them.

Procedure
The density of a substance is a measure of its mass per unit volume. Density units for liquids may be expressed as g/mL, g/cm3, or g/cc, but all have the same numerical value. The density of a liquid will vary with the temperature but this change is usually negligible if the temperature change is small.
Note that instead of putting the volume in the denominator (after /) some sources use a negative exponent and place a dot between the units. So you may see:
g·mL-1, g·cm-3, or g·cc-1
Density can also be given in kilograms per cubic meter.
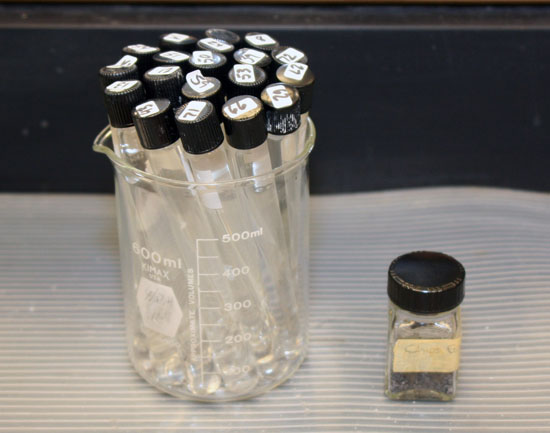
Pickup your unknown liquid. Each one has a unique number. Write the number on the Data Sheet on page 19.
The small jar has boiling chips in it. You will need one or two for the boiling point determination.
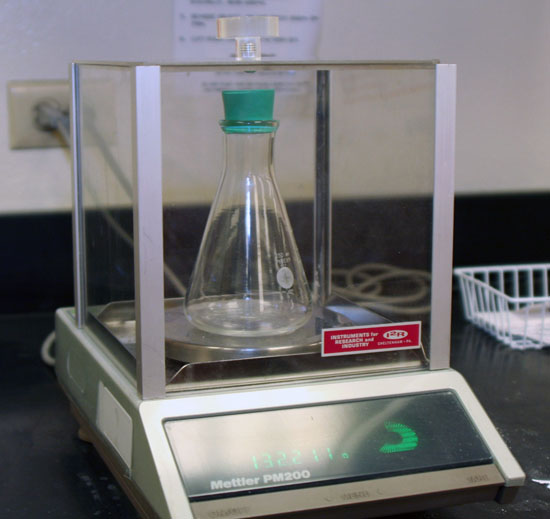
Weigh a clean, dry, small stoppered Erlenmeyer flask as accurately as possible.
Use the technique from the density lab which says to handle the flask with a paper towel because fingerprints will alter the mass of the flask. Also, follow the other techniques used in the density lab as far as using the analytical balance.
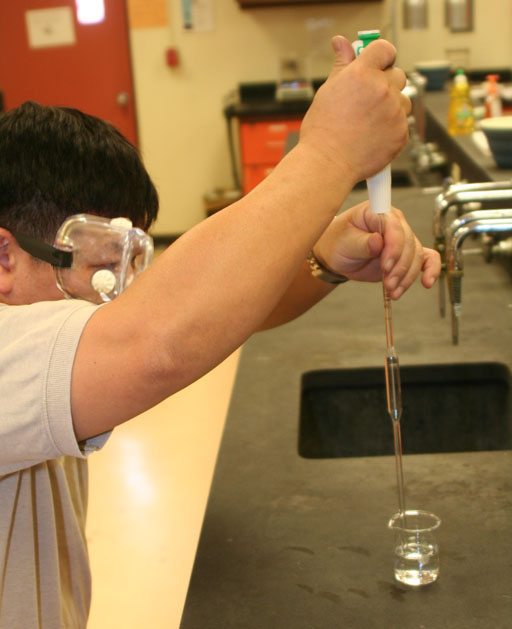
Pipet 10.00 mL of the unknown liquid into the Erlenmeyer flask.
To review the techniques for using the pipette, the below link will open up a tutorial for using a pipette in a new window. Just close that window when finished.
In this lab you don't have enough unknown liquid to rinse out the pipette. So make sure your pipette is clean and dry before measuring out the 10.00 mL.
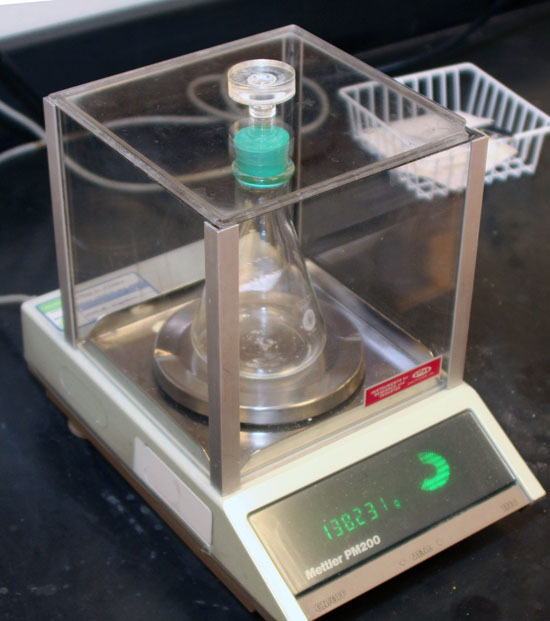
Replace the stopper avoiding any contact between the stopper and the liquid. (Some liquids dissolve rubber stoppers. The green (neoprene) stoppers used here are more resistant to solvents, but getting an unknown liquid on the stopper should be avoided from that standpoint and the fact that you could loose some of the mass of the liquid from evaporation off the sides of the stopper.)
Weigh the Erlenmeyer flask, stopper and added liquid on the same balance used for the initial measurement.
(If a balance is weighing a little high or low, weighing the flask on the same balance will cancel that error when subtracting the flask weight from the weight of the flask and liquid.)
Calculate the mass of the 10.00 mL of unknown liquid in the flask. Calculate the density of the unknown to four significant figures. This is necessary since many of the unknown liquids in Table 3.1 have very similar densities. Once the density has been calculated, try to eliminate compounds that have densities far from this experimental value (of course, you need to be sure that your density determination is accurate).
(Since the volume is measured with four significant figures and the calculated liquid mass will also have four significant figures, you are justified in having four significant figures in the calculated density.)
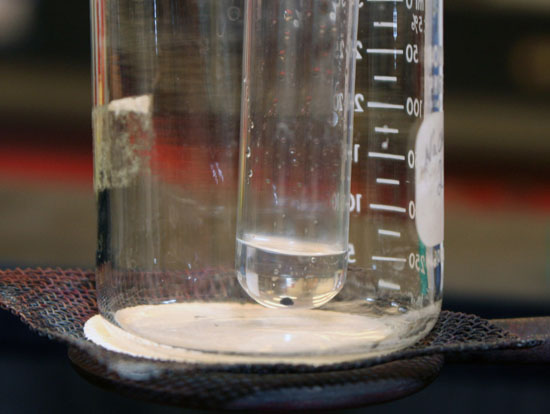
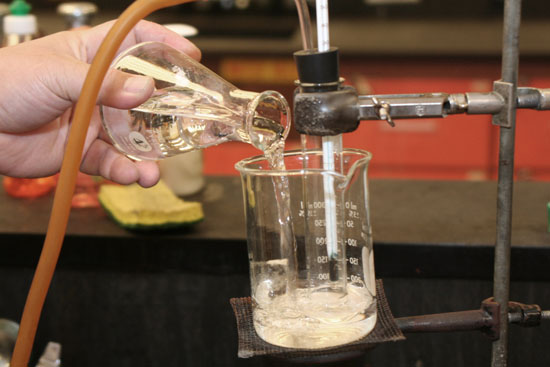
Add approximately 5 mL of an unknown liquid to a 25 x 200 mm pyrex test tube. A boiling chip may be added to the liquid in the test tube to avoid bumping or uneven boiling of the liquid.
This boiling chip is black. Sometimes they are white. They are an inert material that usually is porous, which gives many sites for the liquid to initiate their change from liquid to gas (to boil). They call these sites nucleation sites. The test tubes used in this lab are not always 200 mm tall. Some are a little shorter.
Run the rubber hose from the bent glass tube into the sink to keep flammable vapors away from the Bunsen burner. Below is the boiling point setup diagram shown in the lab manual.
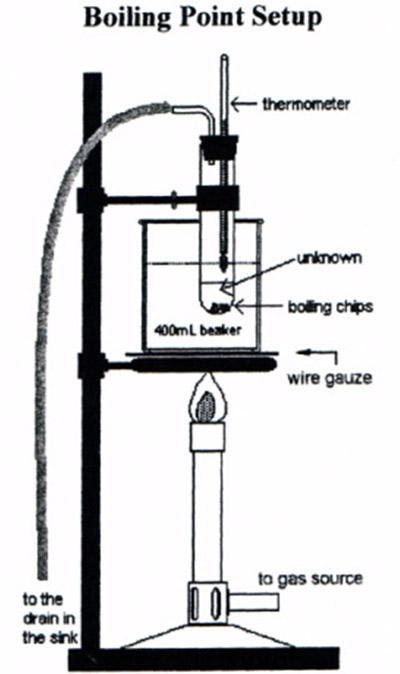
Adjust the liquid level so that the thermometer bulb is about 1 cm above the surface of the liquid. Do not attempt to slide the thermometer in the stopper; it will break!
In other words you want to achieve the 1 cm distance by adding or removing your unknown liquid rather than sliding the thermometer up or down.
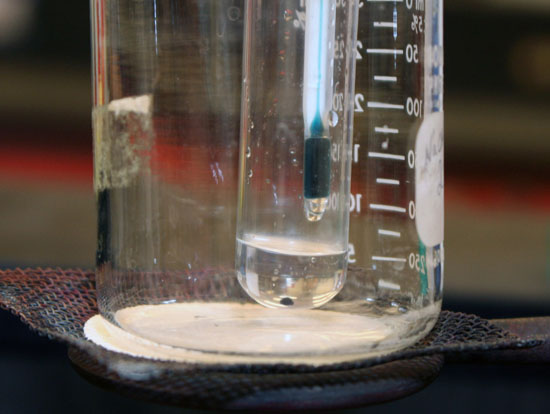
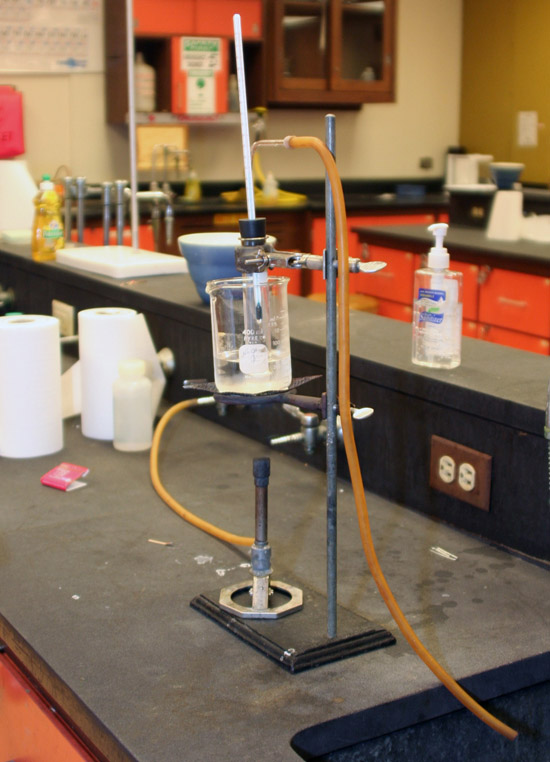
Support a 400 mL beaker half-full of water on an iron ring and a wire gauze. Clamp the test tube to a ring stand. The test tube should be immersed in the beaker of water so that the unknown liquid is below the water level but the thermometer bulb is above the water level. Use care to assure that the thermometer does not touch the inside of the test tube and the test tube does not come in contact with the beaker. See Figure 3.1.
Heating the liquid in the test tube by heating a beaker with water provides a much more even heating of the unknown liquid than heating the test tube directly with the Bunsen burner. Using water in the beaker works because the unknown liquids in this experiment boil below the boiling point of water. If the unknown liquids had boiling points higher than water, they would never boil because the boiling water would prevent the water from going over 100°C. In that case you would use oil in the beaker because its much higher boiling point. The oil will still distribute the heat evenly around the unknown liquid in the test tube.
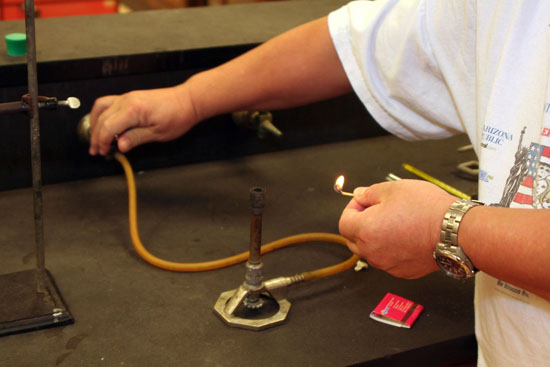
To light a Bunsen burner, first light the match and then turn on the gas. If you turn on the gas first, then there will be a build up of gas around the barrel of the Bunsen burner causing a big flash of flames.
Bring the match towards the Bunsen burner from an inch or so below the barrel. That way when the burner lights, your fingers will be below the flame.
Heat the beaker of water gradually.
If the water gets too hot, it may cause the unknown liquid to boil so rapidly that most of it may turn to vapor and exit through the rubber tubing. Also, overheating will cause a higher reading for the boiling point.

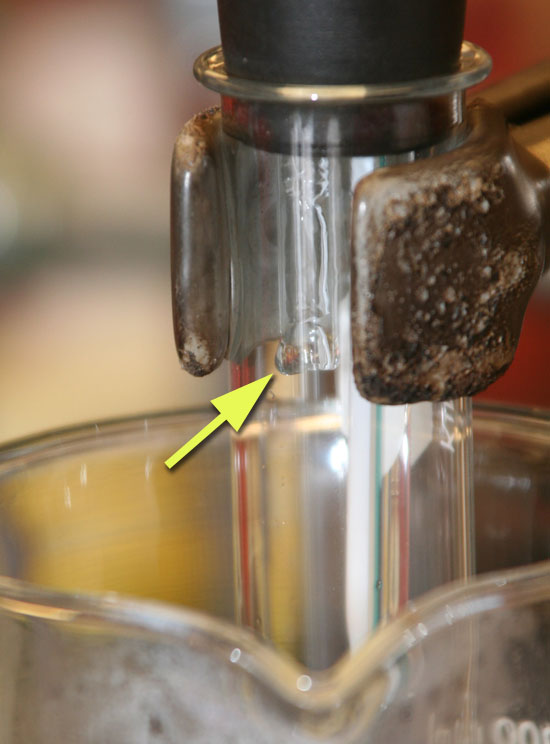
On this small black boiling chip you can see small bubbles rising. Your liquid has started to boil.
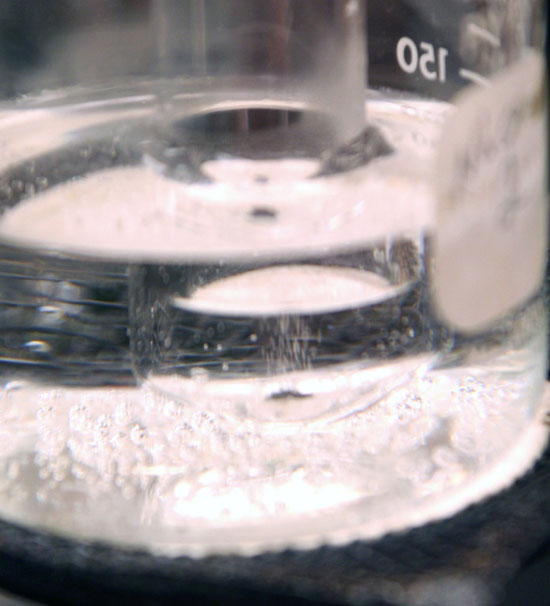
Record the temperature at which the liquid in the test tube boils freely, then remove the burner. In addition to boiling freely, look at the top of the test tube for condensation on the glass tubing. That means your unknown liquid has been boiling sufficiently to send vapors to the top of the test tube. That also means the thermometer has probably reached the boiling point of the unknown liquid. Now you can read the thermometer to get the boiling point of your unknown liquid.
If you wish to recheck this boiling point temperature, allow the water-bath temperature to fall until the unknown liquid stops boiling, then reheat the beaker of water. Again, using this experimental boiling point value, eliminate unknown possibilities that have boiling points far from this determined value. See Table 3.1 below.
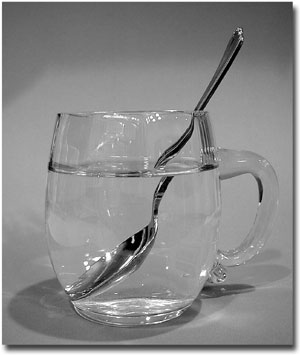
Refraction is responsible for the bent spoon effect observed when a spoon is partially submerged in water. Refractive index measurements can be used to determine solution concentrations, ascertain purity and identify a compound.
Refractive index is also called Index of Refraction.
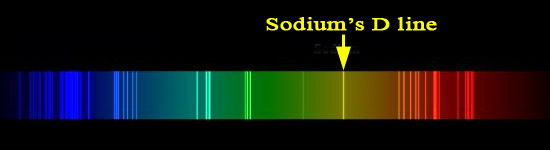
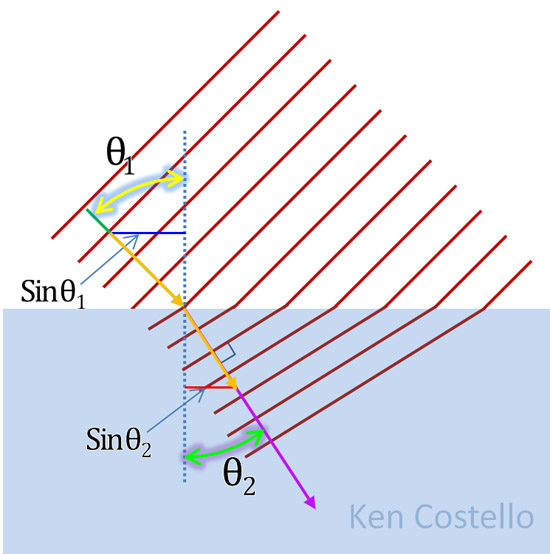
The index of refraction, expressed as nD20, is the ratio of light’s velocity in a vacuum to the variable velocity of light through a medium. The number 20 represents the Celsius temperature of the sample while D represents the monochromatic D line of the sodium spectrum. The refractive index of a substance changes if the temperature changes, or if the color of the light used changes.
Below is the D line of sodium's spectrum. When sodium in sodium chloride (NaCl) is placed in a flame, it creates a bright yellow flame. That is mostly coming from the D line.
The illustration on the right shows how light entering a liquid will slow down. That essentially changes its direction. The angle in the liquid is less than then the angle it was traveling before entering the liquid. The sine of those angles are the horizontal lines (assuming gold arrows are length of 1). These horizontal lines are proportional to the speed of light traveling before and after entering the liquid. If you divide sin(θ2) into sin(θ1), it tells you how much faster light travels in a vacuum compared to its speed in the liquid. That is the index of refraction of that liquid. You can see that the more the light slows down, the smaller sin(θ2) becomes. That makes the index of refraction higher, because that smaller sin(θ2) will divide into sin(θ1) more times.
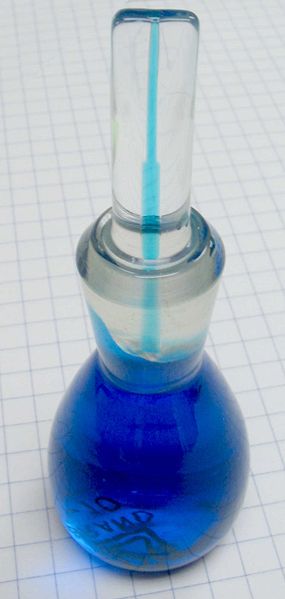
Before making a refractive index measurement of the unknown liquid, your instructor should brief you on the proper operating procedure for the refractometer. Next, for practice, determine the refractive index of distilled water. When you are confident, determine the refractive index of your unknown liquid. The refractive index should be read to at least four decimal places.
The refractive index (index of refraction) for water is 1.3330. In other words, light travels 1 and 1/3 times faster in a vacuum (or air) than it does in water.
For general instructions for using the refractometer, see the following panels.
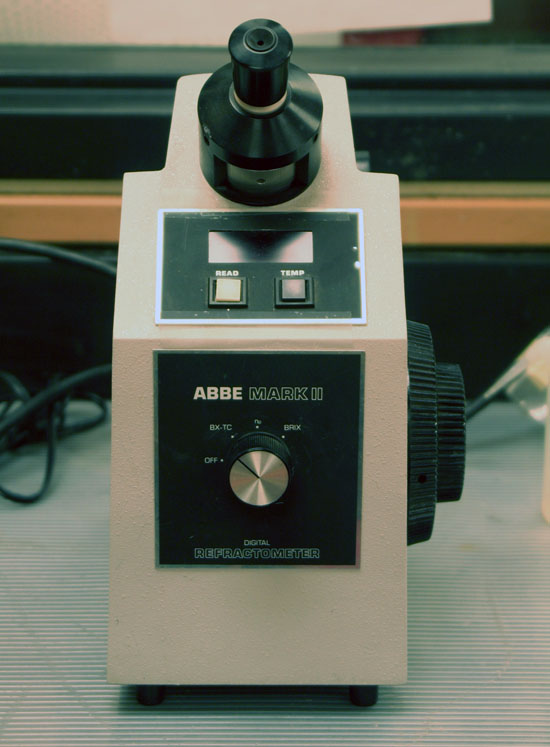
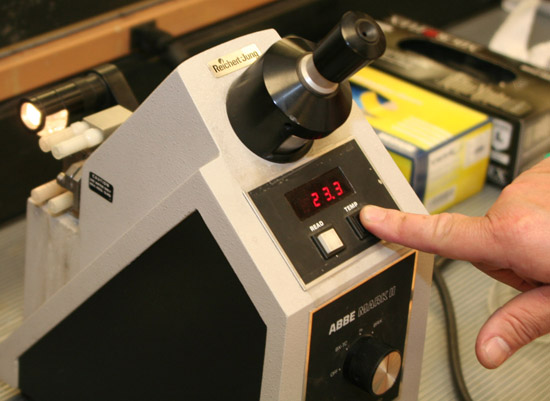
This is an Abbe type refractometer. Ernst Abbe worked for the Zeiss Company in Germany in the late 1800's. He built a device that sandwiched liquid (or transparent solids) between two prisms.
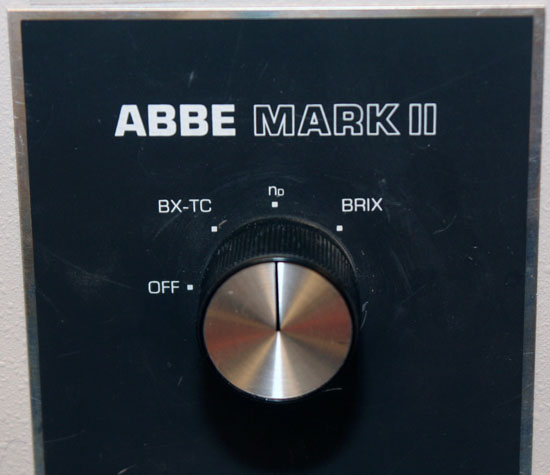
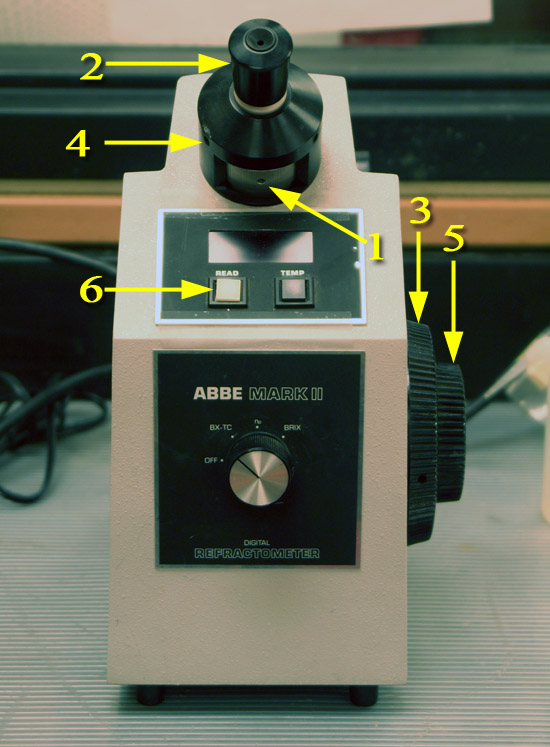
On the front of the refractometer is the mode selector dial. Make sure it is set to nD, which means it will read out the index of refraction (n) using the D line of sodium's spectrum.
The BRIX setting is for measuring the concentration of sugar in water. The wine, beer, sugar, juice, and honey industries utilize this measurement. The BX-TC is the same as BRIX except TC means Temperature Compensated. So the device will adjust the index of refraction based on the temperature of the sample.
In veterinary medicine a refractometer is used to measure blood plasma protein. Gemologists use refractometry to identify gems.
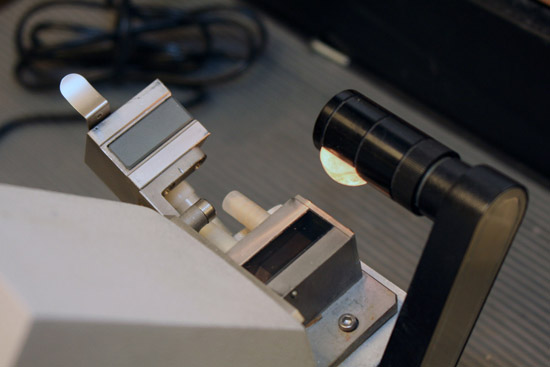
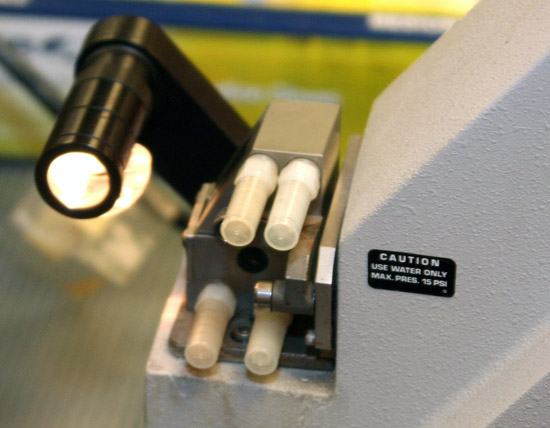
Place distilled water onto the bottom prism surface. You can use an eye dropper or just pour a little onto the surface.
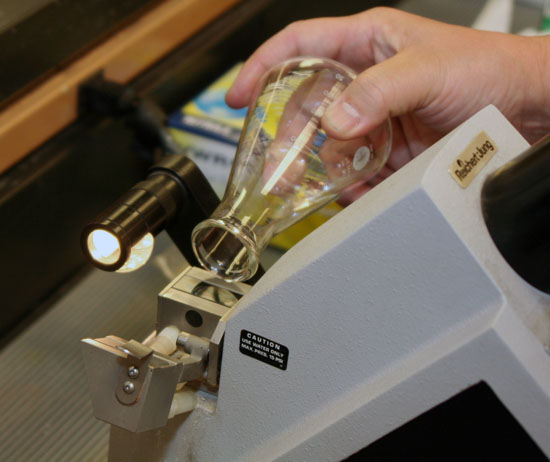
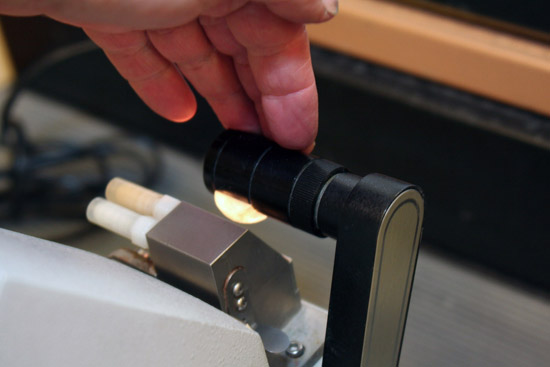
Bring the top prism down and latch into place over the bottom prism. The liquid is now sandwiched between the prisms. Adjust the light source to better illuminate the liquid.
1. Make sure the crosshair adjustment access hole is at the six o’clock position (bottom).
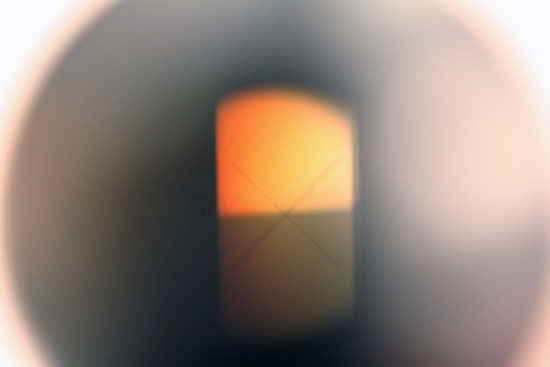
2. Rotate the eyepiece to bring the crosshair into focus. (See image below for view of crosshairs)
3. Move the shadow line to the crosshair with the coarse
adjustment control. (See image below for view of crosshairs and shadow line)
4. Rotate the dispersion correction wheel to eliminate any red or
green color at the edge of the shadow line.
5. Turn the adjustment control to center the shadow line to the
crosshair. The shadow line must be perfectly centered to obtain
an accurate reading.|
6. Press the READ button to read the index of refraction. Record that on the data sheet. The value of the test sample will
be digitally indicated in the display window above the READ button. Record that on the Data Sheet as the observed index of refraction (nDT)
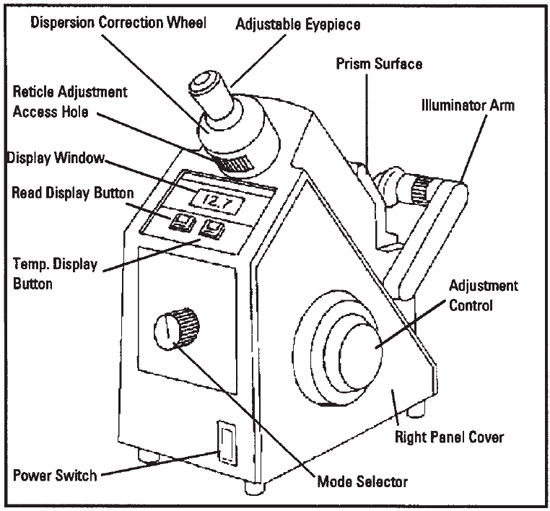
The Mark II Abbe Refractometer is equipped with fittings that allow temperature controlled water to pass around the prisms. That can keep the sample at 20°C which eliminates the need to make adjustment calculations to the index of refraction. Since the laboratory is not equipped with a constant temperature bath, the temperature of the refractometer will probably be higher than 20°C. The nD values decrease as the temperature rises (nD is sometimes called “optimal density”). To compare your experimental value with the values given in Table 3.1, add 0.00045 for each degree above 20°C. The corrected value of the index of refraction is made by using the following formula:

For example: if your measurement nDT = 1.3323 is made at a temperature T = 24°C, the corrected value is:

Here is the diagram from the users manual for the Mark II Abbe Refractometer.
Repeat the steps above using your unknown liquid. Use Kimwipes to remove any distilled water left on the prism surfaces. When finished measuring the index of refraction of your unknown liquid, wipe it off using a Kimwipe.
Never wipe a dry prism surface with a dry Kimwipe. One or the other ought to be wet with a liquid.
Volatile Liquid Compound |
Boiling Point (°C) |
Density (20°C) (g/mL) |
nD20 |
| methanol [CH3OH] | 65.0 |
0.7914 |
1.3288 |
| ethanol [CH3CH2OH] | 78.5 |
0.7893 |
1.3611 |
| 1-propanol [CH3CH2CH2OH] | 97.4 |
0.8035 |
1.3850 |
| 2-propanol [CH3CH2(OH)CH3] | 82.4 |
0.7855 |
1.3776 |
| methyl acetate [CH3-O-C(=O)-CH3] | 57.0 |
0.9330 |
1.3593 |
| ethyl acetate [CH3CH2-O-C(=O)-CH3] | 77.1 |
0.9003 |
1.3788 |
| acetone CH3C(=O)CH3 | 56.2 |
0.7899 |
1.355 |
| methyl ethyl ketone (2-butanone) [CH3C(=O)-CH2CH3] | 79.6 |
0.8054 |
1.3788 |
| hexane [CH3CH2CH2CH2CH2CH3] | 69.0 |
0.6600 |
1.3750 |
| water [H2O] | 100.0 |
0.9972 |
1.3330 |
A. |
Density of unknown | ||
| Wt. of Erlenmeyer flask, stopper & unknown | _______ |
g | |
| Wt. of Erlenmeyer flask & stopper | _______ |
g | |
| Wt. of 10.00 mL aliquot of unknown | _______ |
g | |
| Density of unknown | _______ |
g/mL | |
B. |
Boiling point of unknown | _______ |
°C |
C. |
Refractive index of liquids |
Temperature at refractometer |
nDT (observed) |
nD20 (corrected) |
|
| Refractive index of water | _______________ |
_______________ |
_______________ |
| Refractive index of unknown | _______________ |
_______________ |
_______________ |
D. Identity of unknown liquid: _______________________________ |
|||
Boiling Pt. |
Density |
nD20 |
|
| Found values | _______________ |
_______________ |
_______________ |
| True values | _______________ |
_______________ |
_______________ |
If your figures do not agree very well with the true values, give possible reasons. |
|||
1. Define the following terms and give an example of each.
a. physical property
Example ________________________________________
b. chemical property
Example ________________________________________
c. boiling point
Example ________________________________________
2. In this experiment, it is important to keep the flask in which you weigh your density sample stoppered except when you are adding liquid to it Why?
3. If this experiment were conducted in Denver (elevation 5,000 ft.) what would be the effect on the observed boiling points of the liquids?
4. Which of the following are not physical properties?
Molar mass, density, refractive index, heat of reaction, heat of vaporization, flammability, melting point, water solubility, boiling point
5. If none of your determinations (density, boiling point, and refractive index) agree exactly with the possible unknown values, what is the most likely source of error?