This lab teaches skills in measuring the density of a liquid, and the liquids used are solutions of salt (NaCl). This lab also stresses techniques to get the most accurate measurement of density for a liquid.
If you ever own a salt water aquarium, you can check the salt level (salinity) by doing a density measurement. You can even use the techniques learned here to do that.
Determining density is a straightforward measurement and quite useful for many situations.
Introduction
In this experiment you will determine the density of an unknown liquid. You will measure the mass of a known volume delivered from a pipet and use the expression:
M V |
||
D |
= |
|
where D = density, M = mass and V = volume to calculate the density of the unknown liquid.
Mass can be any unit of mass (grams, pounds, tons, etc.) and volume can be any unit of volume (liters, gallons, milliliters, cubic centimeters, etc.). However, the typical units when measuring density is grams for mass and milliliters for volume.
By dividing by grams by the milliliters, you find the mass per one milliliter (g/mL).
Procedure
Part A
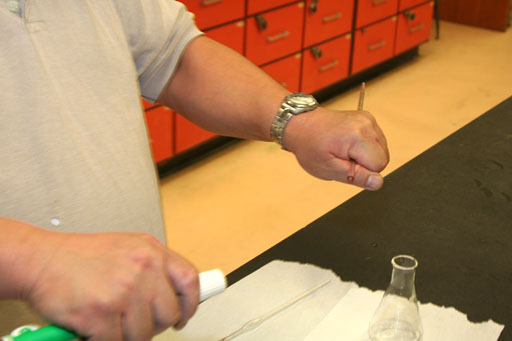
Obtain a 10.00mL pipet (preferably a class A pipet), a pipet bulb, a 125 mL Erlenmeyer flask (should be in your drawer), and an unknown from the stockroom. (Note: pipet can also be spelled pipette). The unknowns are solutions of salt dissolved in water.
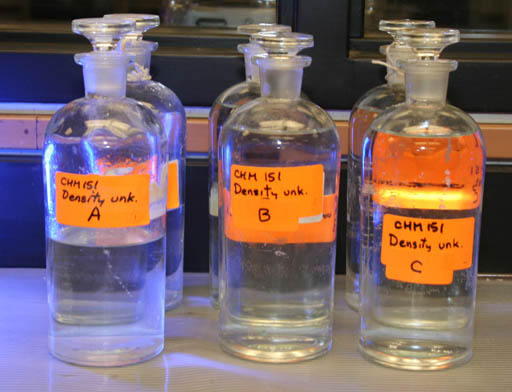
The CHM151 density unknown will probably be sitting in the lab rather than being in the stockroom. Record the number (or letter) of your unknown before you begin work!!
Here's the collection of items that you need for Part A:
The 125 Erlenmeyer flask (middle).
A 100mL beaker (left).
A 200 mL waste beaker (upper left).
The 10mL pipette (second from bottom).
Instead of a pipet bulb, you will be using a pipette pump (green cylinder on bottom).

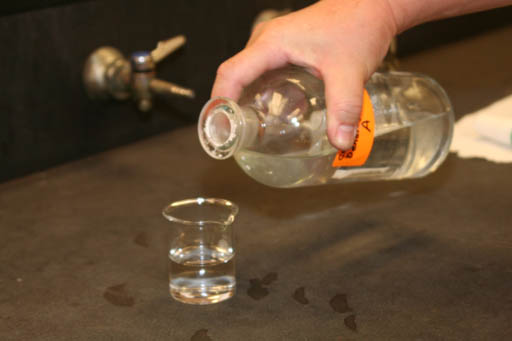
Again, instead of getting the unknowns from the stockroom, the unknowns are likely to bewhere reagents for the lab are usually stored. You will be using either unknown A, B, or C.
Next to these bottles is a sign under the protective plastic that says:
DO NOT CONTAMINATE REAGENT BOTTLES
THIS MEANS: NOTHING GETS POURED BACK.
(Roll cursor over the image on the right to see this sign.) You will be taking about 40 mL out of one of these bottles. You will also have some of this solution left over. Do not pour your leftover solution back into any of these bottles. By doing so you could contaminate these solutions.
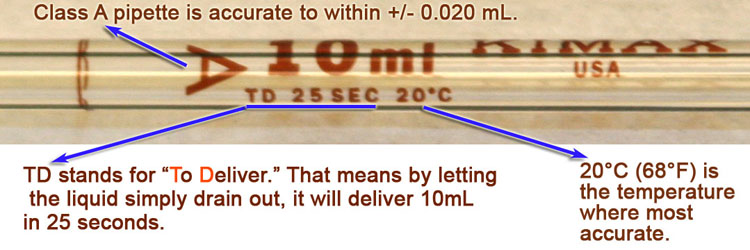
The 10mL volumetric pipettes are stored on the same table as the Unknown solutions. They are stored upside down to facilitate draining.
Volumetric pipettes have only one mark. That's the line that marks the printed volume. Some pipettes have several marks and are called "graduated pipettes". They aren't as accurate as the volumetric types.
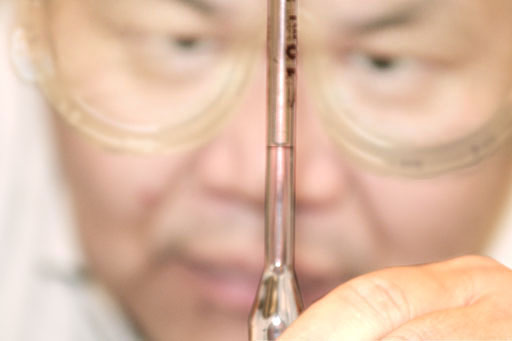
If you look close at the printed label, you will get more information. See below image for details.

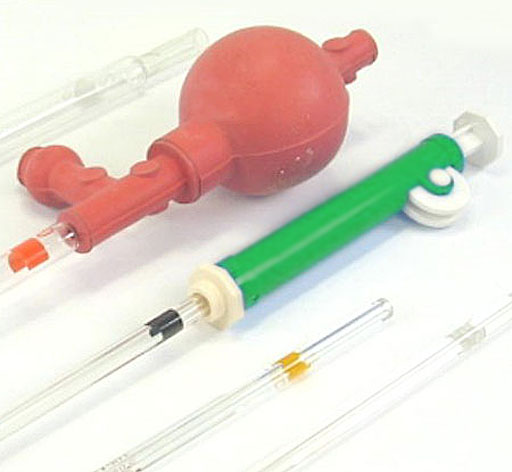
The lab manual mentions the pipette bulb and shows a diagram of how to use it. The pipette bulb is one way of drawing up liquid and releasing it. It is the red spherical object in the image on the right.
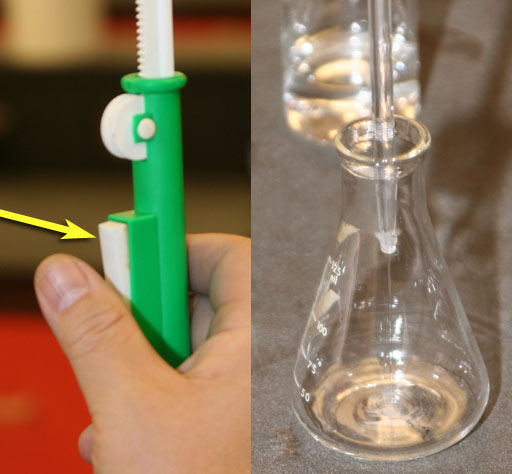
Another device is for doing that is the pipette pump (green and white). It has a thumb-wheel that lets you draw up liquid. As the wheel in turned, a plunger goes up. A partial vacuum will cause air pressure to push liquid up into the pipette. The pipette pump is a little easier to use than the pipette bulb, so that will be the type you will use in this lab.
Roll cursor over the image on the right to see the bin of pipette pumps you will be using in the lab.
Part A Procedure (continued)
Pour about 30 to 50 mL of your unknown into a clean 100 mL beaker.
You will first use this unknown liquid to rinse your flask and pipette. Then you will measure out 10mL for measuring density.
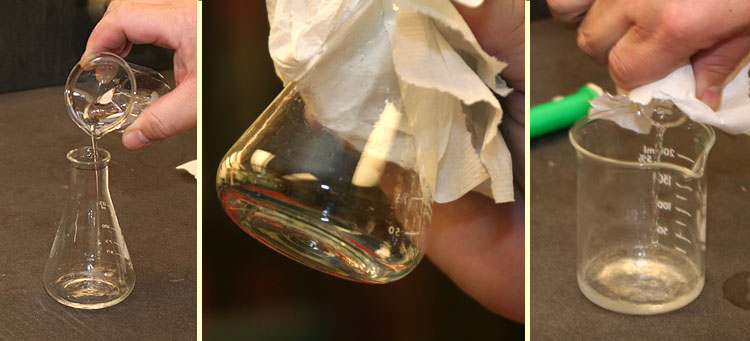
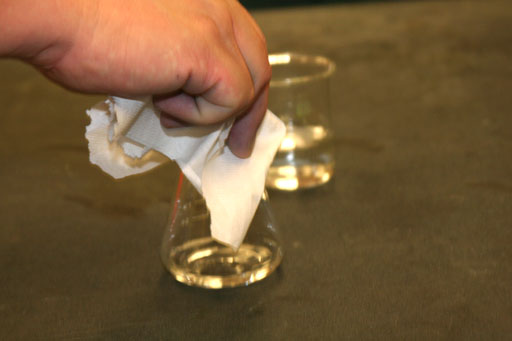
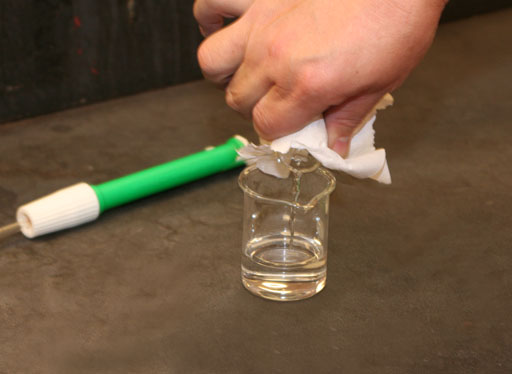
Now you want to weigh the flask. Grab the flask with a paper towel to keep your fingerprints off of the flask. That's because fingerprints add weight. Also, wipe off any liquid that might be on the outside of the flask.
Instead of using a paper towel, you could wear gloves instead.
The lab manual says to use tongs to carry the flask. This could be done, but tongs have a tendency to slip. Since the flask is not hot, you can carry it using piece of a paper towel. If it were hot, then tongs would be used.
It is OK that there is some residue of unknown liquid in the flask because ou will be subtracting the weight of the flask and residual liquid.

Again, you are holding the flask with a paper towel to prevent fingerprints.
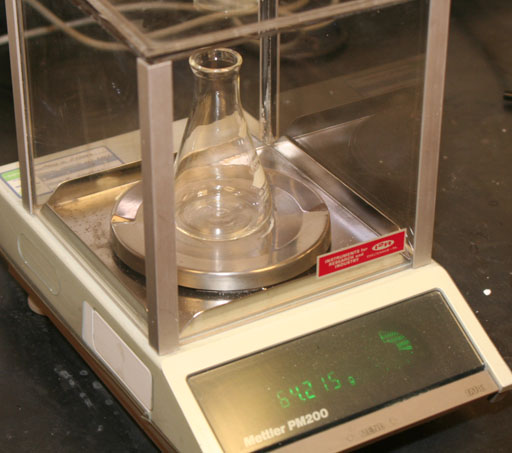
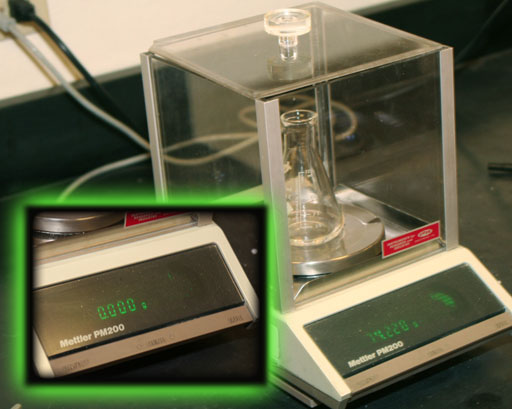
Set the flask down gently on the balance pan. Close the lid and check the weight.
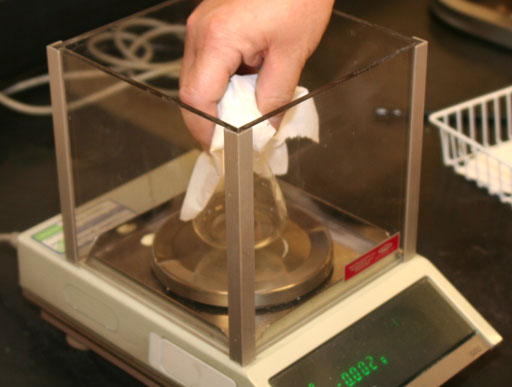
Record the gram reading in your lab manual. This is the weight of an "empty" flask. Again, the residual liquid is counted as part of the empty (or beginning) weight of the flask. When you add 10 mL of liquid and reweigh the flask, you will be subtracting the starting flask mass. That will give you just the mass of the 10 mL of added liquid.
Weigh the stoppered flask on the Mettler Balance to 0.001 g. Record the weight on line 2 of the data sheet. (Having a rubber stopper on the flask is optional. If you use it now, you have to use it after adding the 10 mL of unknown solution to consistent). This flask weighed 64.215 g. Yours will be different.
Trail 1 |
Trail 2 |
Trail 3 |
|
| 1. Mass of container and unknown | g |
g |
g |
| 2. Mass of container | 64.215 g |
g |
g |
| 3. Mass of unknown | g |
g |
g |
| 4. Volume of unknown used | 10.00 mL |
10.00 mL |
10.00 mL |
| 5. Calculated density | g/mL |
g/mL |
g/mL |
| 6. Average density of unknown | |||
You will now use the 10 mL pipette to add 10 mL of the unknown solution. Before you do that, you need to rinse out the pipette. See below for details.
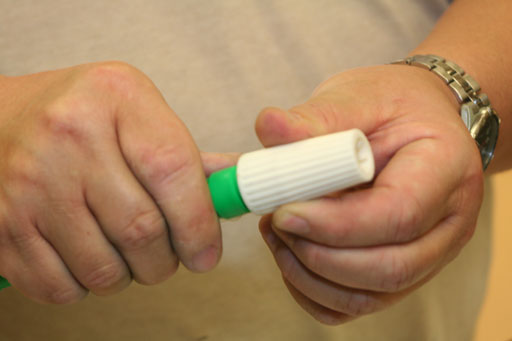
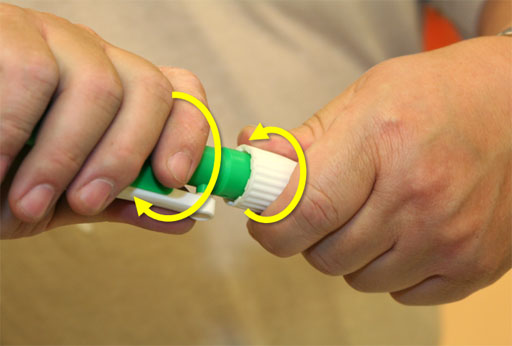
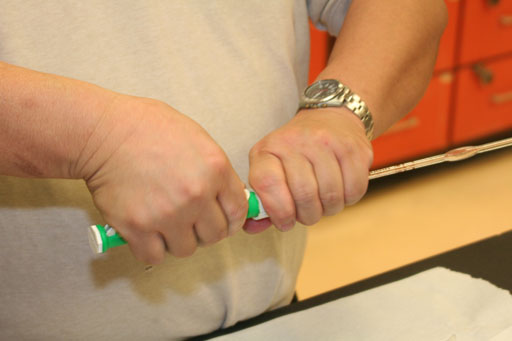
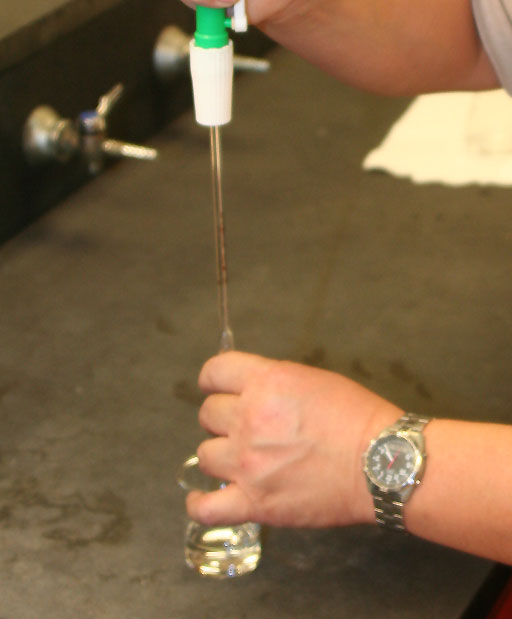
Before you can rinse out the 10 mL pipette, you need to attach it to the pipette pump.
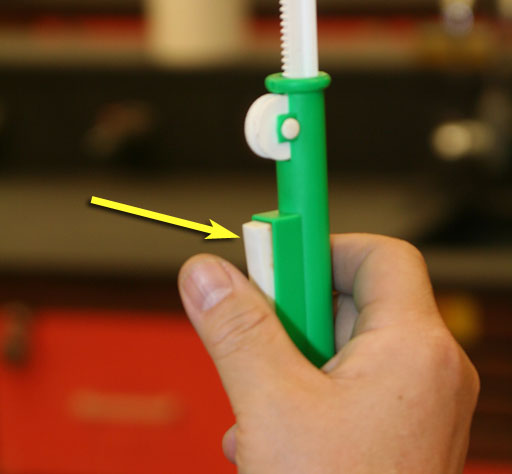
Unscrew the white collar a few revolutions. This widens the internal compression ring so the pipette can go in without too much force.
To rinse out the 10 mL pipette, set the tip into the beaker with the unknown liquid.
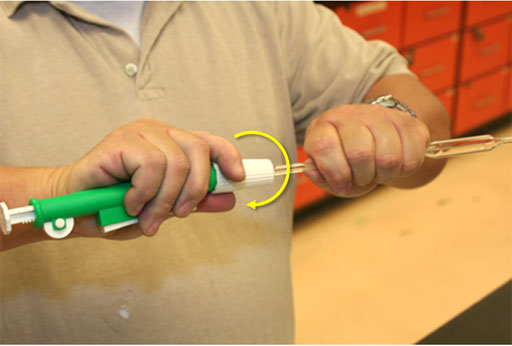
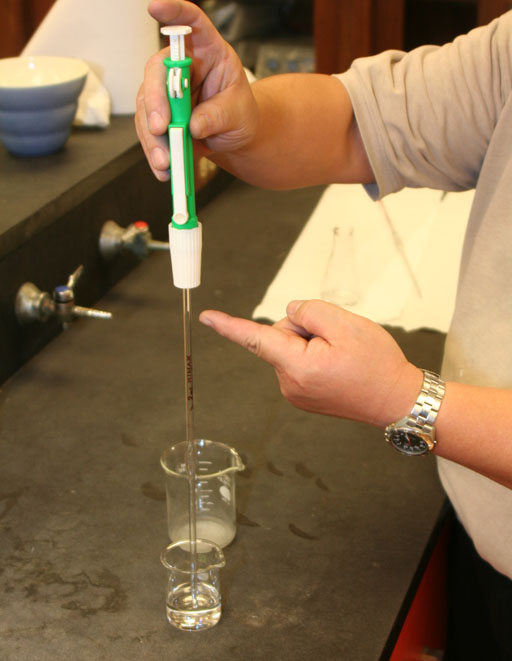
Turn the thumbwheel to draw up liquid (roll cursor over image to see use of thumbwheel).
Turn thumbwheel slowly to draw liquid up towards the top of the pipette (about 2 inches below the white collar of the pipette pump).
You will now discard this liquid because it is just being used to rinse out the pipette. See the the below image on how to cause the liquid to drain out.
On the side of the pipette pump is the white fast-release lever. Press this when you want to let the liquid flow out of the pipette.
The liquid you drew up first is only for rinsing out the pipette. Push the fast-release lever to let the liquid drain into the waste beaker.
After discarding the liquid, draw up more liquid to fill the pipette about half way. Tilt the pipette at an angle and turn it to let the liquid rinse off the sides. Don't tilt it so much that it runs into the pipette pump. Drain the the liquid out into the waste beaker. You can press the plunger down to get the liquid out faster.
Draw up the liquid a third time to fill the pipette about one third full. Tilt the pipette at an angle to do a final rinse of the sides. Discard this rinsing into the waste beaker.
Now you will draw up the liquid a fourth time. Bring the level about and inch or two above the 10 mL mark.
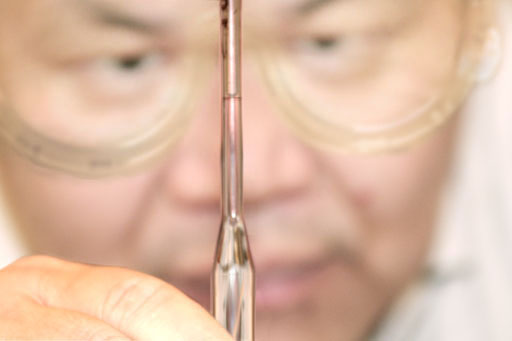
Raise the pipette so that its tip is above the surface of the unknown liquid. That's because when the tip is below the surface, water pressure pushes liquid upwards giving a false high reading.
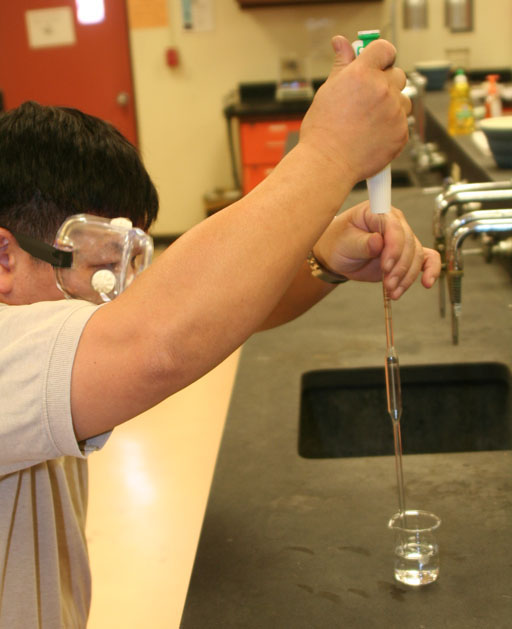
Push the release lever to bring the meniscus (bottom of curved surface) of the liquid to be level with the 10 mL mark. Your eyes need to be level with the mark. See below image for a better view.
Press the white fast-release lever to allow the 10 mL to drain into the flask.
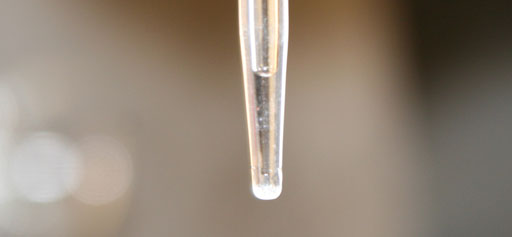
When the liquid stops draining, there will often be a drop of liquid clinging to the tip of the pipette. Simply touch it to the inside of the flask and it will come off.
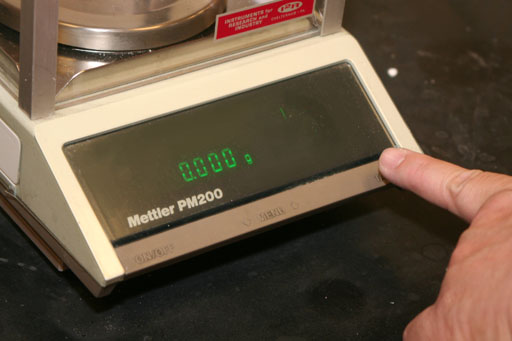
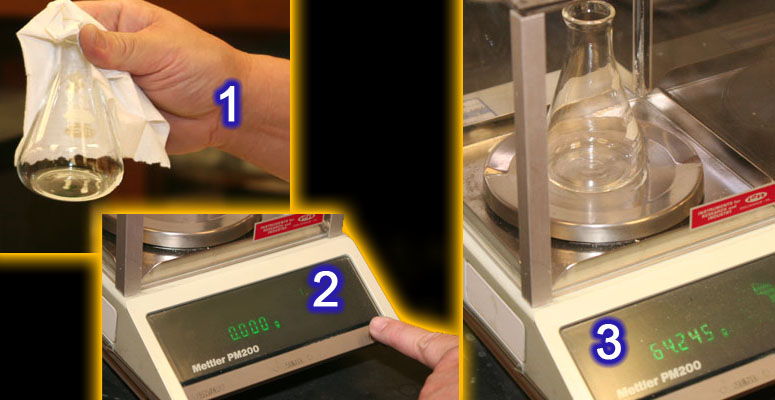
Like always, press the TARE or the 0/T button on the balance to zero out the balance. Then carefully place the flask on the balance.
Record the weight of the flask with th 10 mL unknown liquid in line 1 of the data sheet (Here is 74.228) . You can now subtract the container's mass from the mass of flask and unknown liquid just to get the mass of the unknown liquid. In our example, the liquid weighed 10.013 g. We find density by dividing the mass by the volume. So 10.013g / 10.00 mL equals 1.0013 g/mL, which is slightly more dense than water.
Trail 1 |
Trail 2 |
Trail 3 |
|
| 1. Mass of container and unknown | 74.228 g |
g |
g |
| 2. Mass of container | 64.215 g |
g |
g |
| 3. Mass of unknown | 10.013 g |
g |
g |
| 4. Volume of unknown used | 10.00 mL |
10.00 mL |
10.00 mL |
| 5. Calculated density | 1.0013 g/mL |
g/mL |
g/mL |
| 6. Average density of unknown | |||
Pour the liquid back into the 100 mL beaker (not the waste beaker). After you pour the unknown liquid back into your 100 mL beaker, do not rinse out the flask.
If any liquid is on the outside of the flask, wipe that off.
Trail 1 |
Trail 2 |
Trail 3 |
|
| 1. Mass of container and unknown | 74.228 g |
g |
g |
| 2. Mass of container | 64.215 g |
64.245 g |
g |
| 3. Mass of unknown | 10.013 g |
g |
g |
| 4. Volume of unknown used | 10.00 mL |
10.00 mL |
10.00 mL |
| 5. Calculated density | 1.0013 g/mL |
g/mL |
g/mL |
| 6. Average density of unknown | |||
True Value ______________
Absolute Error ______________
Percent Error ______________
Just like you did for Trial 1, measure out another 10.00 mL of your unknown liquid using the 10 mL pipette. Add it to your flask and reweigh the flask. Put that reading in line 2 for Trail 2. Repeat these steps one more time to get the Trail 3 data.
After you calculate the density for all three trials, get the average of all three densities. Round the answer to 4 significant figures. Find out the True Value from you instructor and then you can calculate Absolute Error and Percent Error.
Part B
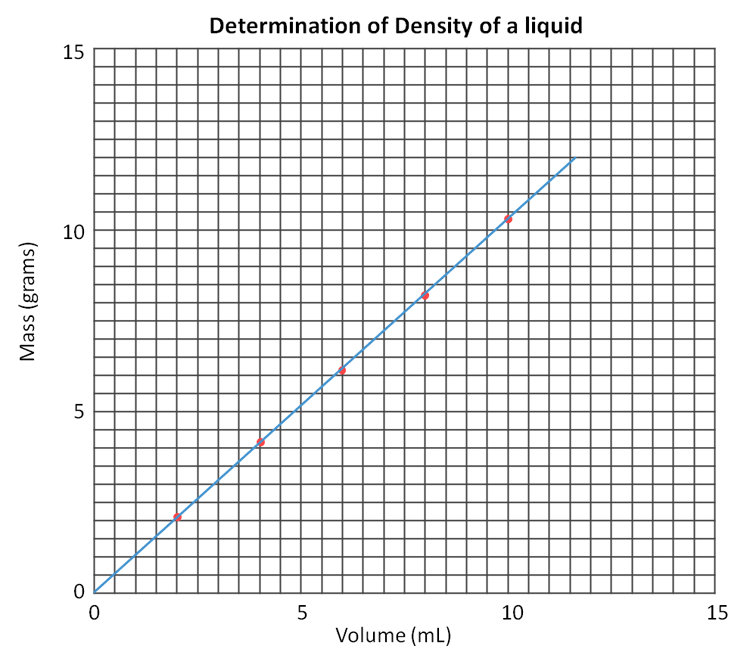
Part B is an alternative method for determining the density of a liquid. It is based on creating a graph the shows mass versus volume. The red data points are the readings of the mass at certain volumes. In Part A you just divided the mass by the volume to get density. That could be done here, but by increasing the volume by increments of 2.00 mL and then finding the mass, you get a graph of how much mass increase there is for a certain volume increase. That ratio (fraction) is the same thing as density. In other words, a density of 1.212 g/mL can be interpreted as an increase of 1.212 g causes an increase of 1 mL. This same ratio is also the slope of the line that is drawn to best fit the data points.
An advantage of graphing your data is that you can see trends better. The trend we see here is that as volume increase so does the mass. We also see that the increase is "linear" meaning the relationship between mass and volume moves in a straight line. In other words, if volume doubles, the mass doubles. Finding the line that best fits the data is similar to finding the average of the data points used to calculate density. Some programs like Excel can analyze the data points and create a line that represents a better average than if you simply found the average by adding all 5 density values and dividing by 5.
Procedure:
Obtain about 10 mL of the same unknown liquid that you used in Part A. (You may have that much left in your 100 mL beaker). Weigh a dry, clean small beaker or Erlenmeyer Flask. (Since you used the 125 mL Erlenmeyer flask for Part A, you can use it for Part B. Just pour the 10 mL of unknown solution from that last weighing back into the 100 mL beaker. Also, the flask doesn't need to be dry. Like before, any residual solution will be subtracted out with the mass of the flask.)
Total Volume of liquid |
Mass of flask plus liquid |
Mass of empty flask |
Mass of liquid |
Density of liquid |
2.00 mL |
g |
64.123 g |
g |
g/mL |
4.00 mL |
g |
64.123 g |
g |
g/mL |
6.00 mL |
g |
64.123 g |
g |
g/mL |
8.00 mL |
g |
64.123 g |
g |
g/mL |
10.00 mL |
g |
64.123 g |
g |
g/mL |
X - Axis |
Y-Axis |
To add 2.00 mL increments, you need a 2.00 mL pipette. Get the pipette from the same area where you got the 10.00 mL pipette. This pipette is also a "TD" (To Deliver) type of pipette.
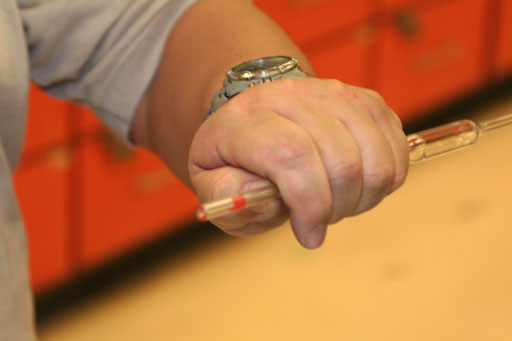
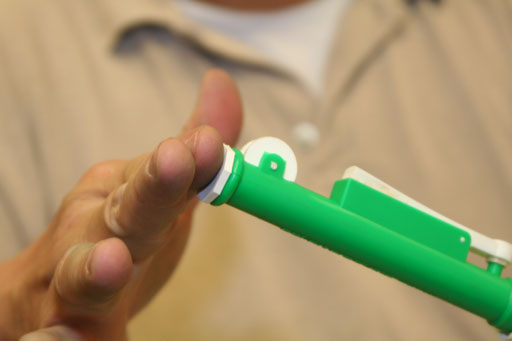
Remove the 10.00 mL pipette from the pipette pump by unscrewing the white collar. Attach the 2.00 mL pipette in the same manner as you did the 10.00 mL pipette. Be sure to to hold the pipette by the top end as shown in the image. These smaller pipettes are even more breakable so you want to do this properly. Push the pipette into the collar while twisting the green pipette pump as you push in the pipette.
Before you begin adding 2.00 mL increments to the flask, you need to rinse out the 2.00 mL pipette like you did for the 10.00 mL pipette. The pipette may have distilled water, some other unknown liquid inside of it, or some other contamination. Any of these could change the density of your unknown. So you need to rinse it out 3 times.
Draw the liquid so it is about an inch from the pipette pump (as shown). Then move it to the waste beaker and discard the liquid. Do this 2 more times to be sure it's clean.
In the same manner of working with the 10.00 mL pipette, draw up your unknown liquid about an inch above the 2.00mL mark. Push the release-lever to drop down the meniscus to be even with the 2.0 mL mark.
Add the liquid to your pre-weighed flask. Like usual, grab the flask with a paper towel and take it to the balance to weigh it.
The task for Part B is add increments of 2.00 mL of your unknown liquid to the flask. Then weigh it after each time you add 2.00 mL. (Don't add liquid to flask while sitting on balance. A spill could damage the balance). Let's say the first weighing after adding 2.00 mL was 66.156 g. That value, of course, would go in the first row under the "Mass of flask plus liquid". You can now subtract the mass of the empty flask to get mass of of the liquid added. In our example, it would be 2.033 g. Density is g/mL, so divide the grams (2.033 g) by the mL (2.00 mL) to get density (1.0165 g/mL).
Total Volume of liquid |
Mass of flask plus liquid |
Mass of empty flask |
Mass of liquid |
Density of liquid |
2.00 mL |
66.196 g |
64.123 g |
2.073 g |
1.0365 g/mL |
4.00 mL |
g |
64.123 g |
g |
g/mL |
6.00 mL |
g |
64.123 g |
g |
g/mL |
8.00 mL |
g |
64.123 g |
g |
g/mL |
10.00 mL |
g |
64.123 g |
g |
g/mL |
X - Axis |
Y-Axis |
Draw up another 2.00 mL in your 2.00 mL pipette. Add it to 2.00 mL that you already put into the flask. Remember to touch the tip to the edge of the flask to remove any drop that might be hanging onto the tip. Reweigh the flask, which should now have a total of 4.00 mL of your unknown liquid. Let's say the second weighing was 68.142 grams. Put that answer in the second row. You can now calculate the total mass of liquid (4.054 g) and the density (4.054g/4.00 mL) which calculates as 1.0135 g/mL.
Total Volume of liquid |
Mass of flask plus liquid |
Mass of empty flask |
Mass of liquid |
Density of liquid |
2.00 mL |
66.196 g |
64.123 g |
2.073 g |
1.0365 g/mL |
4.00 mL |
68.142 g |
64.123 g |
4.019 g |
1.0048 g/mL |
6.00 mL |
g |
64.123 g |
g |
g/mL |
8.00 mL |
g |
64.123 g |
g |
g/mL |
10.00 mL |
g |
64.123 g |
g |
g/mL |
X - Axis |
Y-Axis |
Total Volume of liquid |
Mass of flask plus liquid |
Mass of empty flask |
Mass of liquid |
Density of liquid |
2.00 mL |
66.196 g |
64.123 g |
2.073 g |
1.0365 g/mL |
4.00 mL |
68.142 g |
64.123 g |
4.019 g |
1.0048 g/mL |
6.00 mL |
70.247 g |
64.123 g |
6.124 g |
1.0207 g/mL |
8.00 mL |
72.205 g |
64.123 g |
8.082 g |
1.0103 g/mL |
10.00 mL |
74.364 g |
64.123 g |
10.241 g |
1.0241 g/mL |
X - Axis |
Y-Axis |
We could find the average of all of these densities like we did in Part A; however, by having a range of volumes and masses, it lends itself to graphing, which has some advantages. One is graphing reveals trends. Also, because we know that a zero volume of liquid will have zero mass, that gives us another data point in our graph. That increases accuracy. Furthermore, by finding a line that best fits the data points, you can get even a better measurement for density.
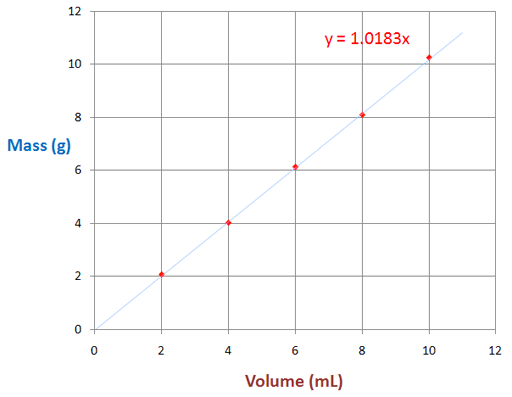
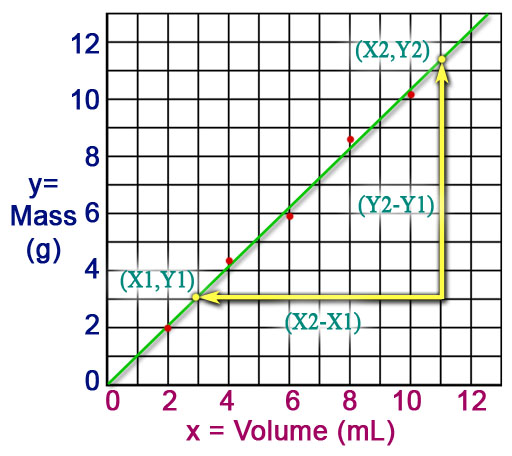
Below is what the graph looks like in the lab manual. The data above was plotted on that graph with red dots. A blue line was drawn to pass by all dots as close as possible (called best-fit line). Be sure to start line at the origin (0,0).
Selected Points on the Fitted Line:
(In theory any two points lets you find the slope; however, the more spread out they are the more difference the get, and you can get more accuracy). Roll cursor over image to see the two points selected as an example. Notice that it is convenient to pick points where one of the coordinates in right on a line. Here we used x values of 1.0 and 11.0 as accurate values for x.
Point 1: X1 = _______ mL Y1 = ________ g
Point 1: X2 = _______ mL Y1 = ________ g
Y2 - Y1 Rise = ________ - ________ = _______ g
X2 - X1 Run = ________ - ________ = _______ mL
Slope = Rise / Run = ________ g/mL
Using the data points from our example, the below data is filled in.
Point 1: X1 = 1.0 mL Y1 = 1.1 g
Point 1: X2 = 11.0 mL Y2 = 11.3 g
Y2 - Y1 Rise =11.3 g - 1.1 g = 10.2 g
X2 - X1 Run = 11.0 mL - 1.0 mL = 10.0 mL
Slope = Rise / Run =1.02 g/mL
Since our rise and run values had 3 significant figures, we are justified in leaving the answer in 3 significant figures.
