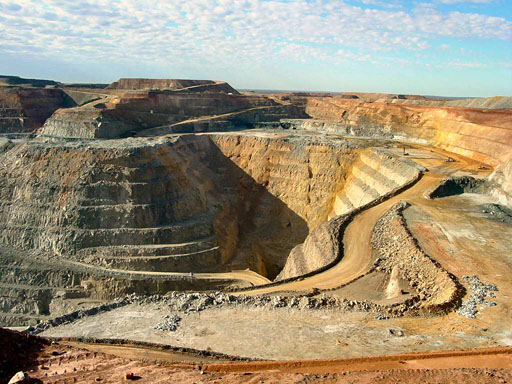
Learning how to separate the ingredients in a mixture allows us to separate out the valuable components from raw materials. For example, the whole purpose of mining is to take soil and rock and separate out the valuable ingredients such as gold, silver, copper, or other elements.
it's good to know how to separate out gold flakes from a gold and sand mixture. That skill depends on a knowledge of physical properties such as density and color. Another example, is separating the essential oils from flowers to make perfumes. The essential oils are responsible for the aroma that plants have. If concentrated, they are more valuable and useful.

This painting of elegant ladies with a refinery in the background is a rather unusual painting; however, the practice of separating the mixture of hydrocarbons in crude oil into their components of natural gas, propane, gasoline, diesel, motor oil, and asphalt is the basis for our energy hungry world.
Oil refineries always have tall distillation towers. By heating the crude oil at the bottom of the tower, the various components will evaporate and travel up the column to different heights. The ones that evaporate (boil) the easiest like natural gas and propane will go to the top. The ones that have high boiling points like oil and asphalt will end up near the bottom of the tower.
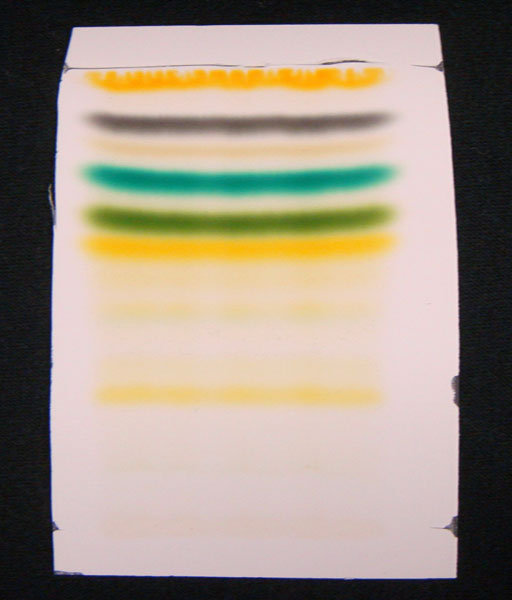
We have all seen the dark green leaves of spinach. We would naturally think that spinach has green pigments in its leaves. That's partially true. On the left is a separation of the mixture of pigments in spinach leaves. The leaves were ground up and a solvent like acetone was added to the ground up leaves. That dissolved the pigments. Some of that solution was spread across a sheet of paper or a plate with a thin film of silica (powdered quartz). The paper or film is set into a solution of acetone. Capillary action causes the acetone to creep upwards (like water will on a paper towel). The different pigments that dissolve the best in acetone will be carried higher up the paper (or film). The ones that are less soluble will move slower. These differences cause the various pigments to move upward with the acetone at different speeds, which means they end up being separated.
There are about 10 bands of colors here. So there are at least 10 different pigments in the leaves of spinach, and only one is green. By scraping off each of these bands, you can get a pure sample of each pigment, which can be further analyzed and identified.
This technique is called thin layer chromatography or TLC for short. It's called "thin layer" because it occurs on a thin sheet of paper or a thin coating of silica spread out on glass. "Chromatography" means written (graphy) with color (chroma). So when pigments are separated, they truly are colors written on the final sheet. Chromatography is also done in tubes (columns) with the solvent under pressure (high pressure liquid chromatography-HPLC), which is commonly used to separate (purify) and/or identify all types of chemicals.
The principles for separating the components in a mixture builds upon what was learned in the previous lab regarding physical and chemical properties along with physical and chemical changes. Since different substances have different physical and chemical properties, there is always a way to exploit those differences in order to separate one substance from another. For example, water evaporates and salt doesn't. So placing salt water in shallow ponds in the sunshine, the water will evaporate and you end up with just sea salt. No one buys salt water, so people take advantage of the physical property differences of salt and water to produce sea salt, which gets sold.
The physical change of water going from liquid to gas is what made this separation possible.
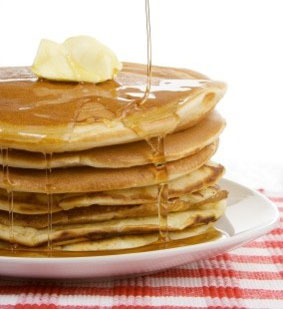
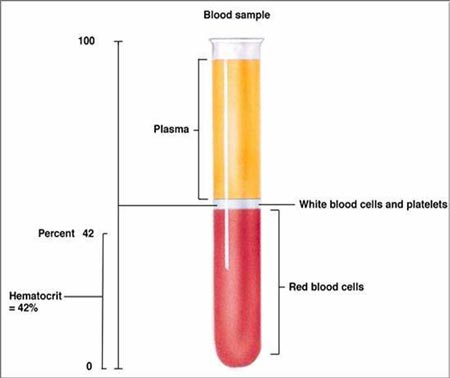
If the components of a mixture have differences in density, the spinning of a sample in a centrifuge will multiply those density differences. For example, when blood is placed in a centrifuge, the more dense red blood cells go to the bottom. The white blood cells and platelets (cell fragments) have less density than red blood cells but more density than the liquid part of blood (plasma). So they end up in between those layers.
Not only does the centrifuge separate these components of blood, the relative height of these layers can reveal various medical conditions. This kind of measurement is called a hematocrit. Hemato refers to blood. Crit is from Greek krinein meaning to separate.
Recall that density is a physical property.
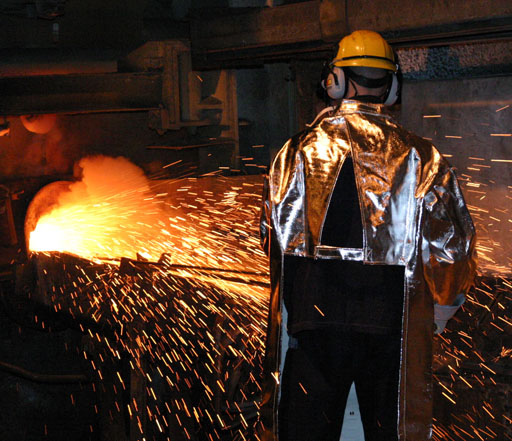
Often separation depends on the chemical properties of the components. Getting metals from their ores depends on the fact that carbon will react with the oxygen bound to the metals more so than it reacts with the metals. Below is a reaction showing carbon combining with the oxygen in iron(III) oxide to make carbon dioxide and iron metal.
2Fe2O3 + 3C → 4Fe + 3CO2
In general, when deciding how to separate the components of a mixture, find out some of the common physical and chemical properties of the components in the mixture. When there are differences in their physical or chemical properties, you can exploit those differences to separate them.
The CRC Handbook of Chemistry and Physics is famous for having a wealth of physical properties for thousands of chemicals. So that's one place to look.
Wikipedia also has physical properties listed for many chemicals.
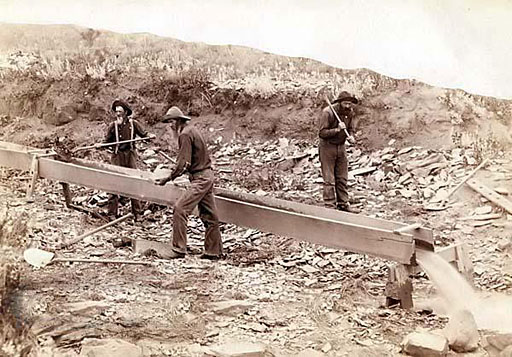
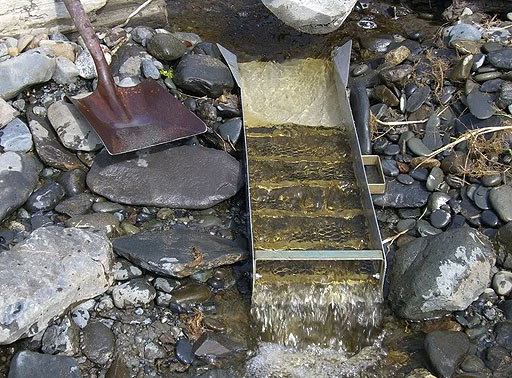
For thousands of years humans have dug along sandy river banks and placed that mixture into a stream of water moving down a box (sluice) as a method to separate the very dense gold from the less dense sand and gravel. The Spanish word for sandbank is "placer", so this is called placer mining.
The property of gold that makes this possible is its very high density (19.3 grams per cubic centimeter). The density of most sand is only about 2 to 3 grams per cubic centimeter. So water has an easier time pushing the sand farther downstream and out of the sluice box. Gold will remain in the sluice box.

In this experiment, we've created our own mixture which is similar to what is found in these sand banks along rivers. Your mixture contains white sand (mostly grains of quartz), black sand (grains of magnetite), salt (NaCl), chalk (calcium carbonate/CaCO3), and a few flakes of real gold.
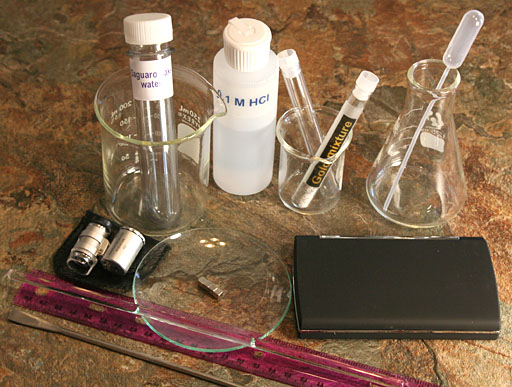
The image on the left are the items you will need to do this experiment. The circular watch glass will act as a miniature gold panning pan. The magnets in the watch glass will allow you to separate the gold from the magnetite in a manner more efficient than using the flow of water.
The large test tube labeled "Saguaro Lake water" (from lab 2) needs to be emptied if there is still water inside. It would also be good if the inside of that tube is dry.
If you find gold in the mixture, it would be beneficial to know the concentration of the gold. In other words, if you had a 5 gallon bucket of this mixture but tested a tablespoon of the mixture, you could calculate the amount of gold in the 5 gallon bucket based on how much you found in a tablespoon of the mixture. Instead of a knowing the volume of your mixture, you might have placed it on a scale and found out it weighed 500 lbs. If you tested 20 grams of the mixture and found a certain amount of gold, you could then calculate the amount of gold in the 500 lbs.
So this means you will need to find both the volume and the mass of the mixture in your sample.
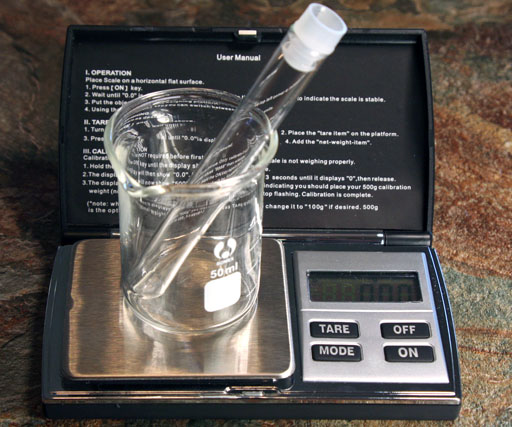
Let's first find the mass of the mixture. One trick is to place a beaker and an empty test tube that is just like the one with the mixture onto the digital balance and then press the TARE button. That will set the mass to zero.
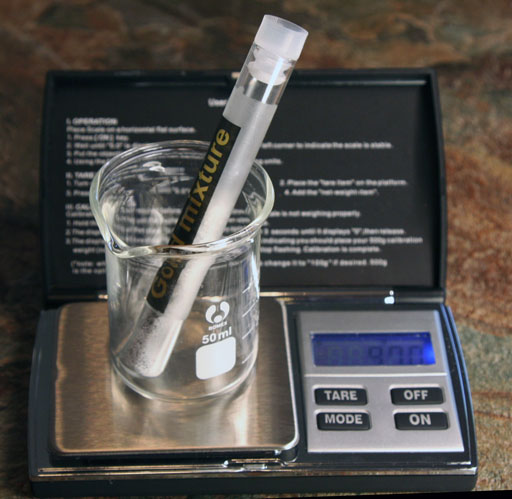
Now swap the empty test tube with the test tube containing the gold mixture. Since the beaker and test tube masses were zeroed out, the mass you read will just be of the mixture in the test tube.
Record the mass of the mixture.
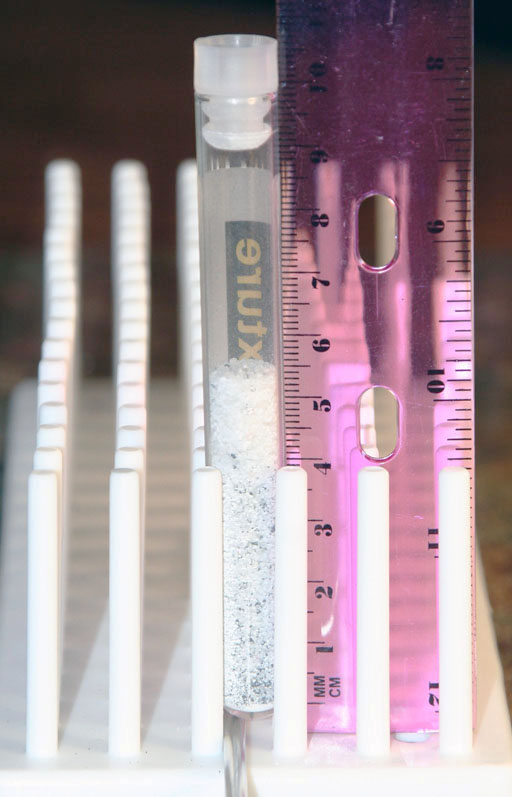
To find the volume of the mixture, you could dump the mixture into a 10 mL graduated cylinder. Another way is to realize that the full test tube is 9.8 centimeters tall and has a 9.1 mL volume (learned from a previous lab). In the sample in the photo, the mixture reaches 5.4 centimeters. So we could say that it fills 5.4/9.8 (or 55%) of test tube. Since the volume of the test tube is 9.1 mL, then the mixture would be 55% of the 9.1 mL volume, which is 5.0 mL.
Notice that the ruler here does not have centimeters begin at the bottom of the ruler, so we used the microspatula to raise up the test tube so the bottom was even with the zero mark on the centimeter ruler.
This method isn't as accurate as dumping the mixture into a graduated cylinder, but is accurate enough for this situation.
Note that our mixture is not homogeneous. In other words, the different ingredients of white sand, black sand, calcium carbonate, salt, and gold are not evenly distributed thorough the mixture. So it is a "heterogeneous" mixture. If we tested just the top half of this mixture, we could easily get different results than if we tested just the bottom half of the mixture.
Let's take a look at this heterogeneous mixture through a microscope. Your kit has a small microscope on the back panel.
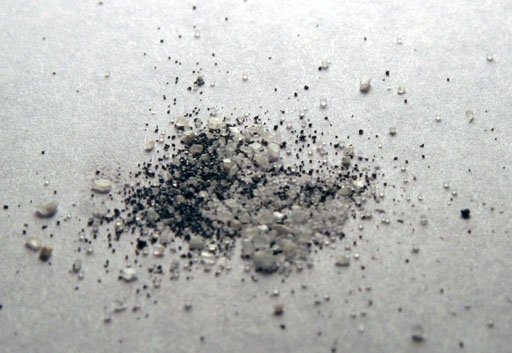
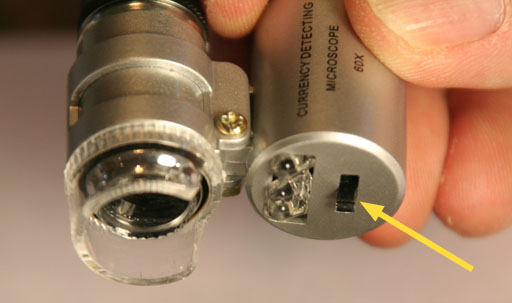

You have to hold the microscope very close to the mixture. You can even place it down right on the paper.
To focus, either lift the microscope off of the paper a little ways or slide the eye piece (yellow arrow) upwards a little.
Put your eye quite close to the eye piece to get a fuller view.
When finished viewing the powder, place it back into the test tube with the rest of the mixture.
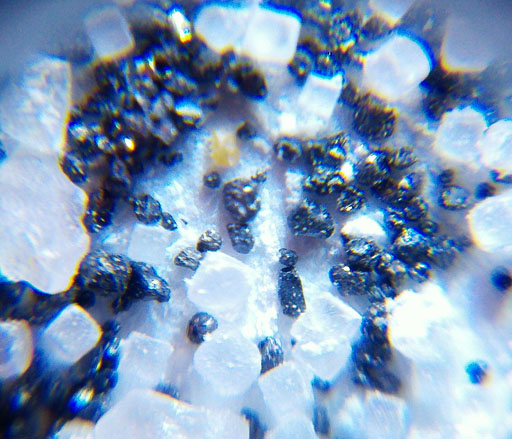
Through this microscope you can see the different particles. The black ones are of course the black sand (magnetite). The cubic white blocks are salt crystals (NaCl). The white sand grains are irregular in shape. The calcium carbonate particles are small dots of white powder that are seen on all of the particles. If you see any colored particles, they are likely grains of sand that are not made of quartz. It's unlikely that you will have a gold flake in this small sample you took from the mixture.
In your report, describe what you saw through the mini-microscope.
If you had a small enough tweezers and patience you could separate these from each other one by one. Of course that would be much too tedious. That's why chemists consider other methods. When confronted with this kind of task, it is a good idea to go down the list of physical and chemical properties that the components of the mixture have. You may find some differences that can be used to separate the gold from the rest of the mixture. Let's look at a few possibilities:
Let's begin with a convenient physical property, which is a chemical's solubility in water:
Salt: Soluble
Magnetite: Not soluble
Sand: Not soluble
Gold: Not soluble
Calcium carbonate: Only very slightly soluble
From this list, we see that water will dissolve salt. So that means we can use water to dissolve and wash away the salt. So now gold only has three other substances with it.
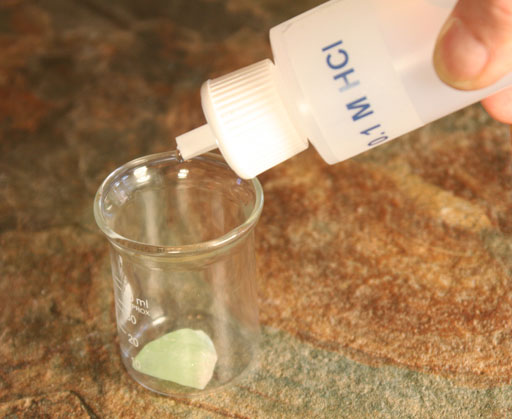
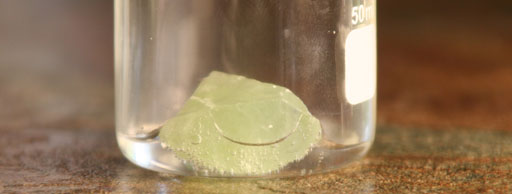
Let's look at chemical properties of these substances with respect to acid:
From lab 3, you learned that carbonates will dissolve and decompose in an acidic solution. You even tested HCl on calcite, which is a crystalline form of the powered calcium carbonate in this mixture.
Your kit has 0.1 M HCl, which is moderately strong acid. So you could use that to dissolve the calcium carbonate. Below are the reactions that would occur. The acid (H+) from our hydrochloric acid will combine with the carbonate (CO3) in CaCO3 to form bicarbonate (HCO3-). At this point the calcium carbonate is dissolved. If enough acid (H+) is present, the H+ will change bicarbonate into carbonic acid (H2CO3). Carbonic acid is unstable and is likely to decompose into water and carbon dioxide. So some CO2 bubbles might be seen.
H+(aq)+ Cl-(aq)+ CaCO3(s) → HCO3-(aq)+ Ca2+(aq)+ Cl-(aq)
↓
HCO3-(aq)+ H+(aq)→ H2CO3(aq)
↓
H2CO3(aq)→ H2O(l) + CO2(g)
Magnetite, sand, and gold will not be affected by this acid. So acid lets us dissolve the calcium carbonate powder.
So now we only have magnetite and sand mixed with the gold flakes.
Density is a physical property. So let's compare them.
Gold: 19.3 g/cm3
Sand is mostly quartz, which has a density of 2.2 g/cm3
Magnetite is 5.1 g/cm3.
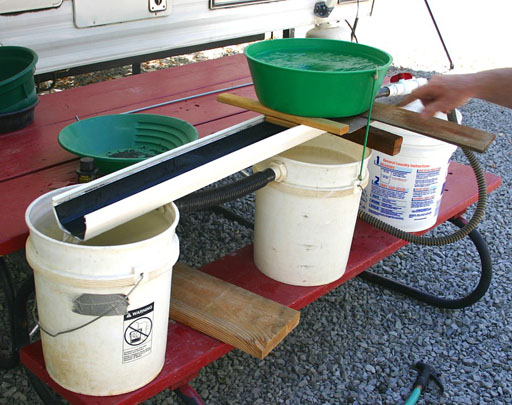
So gold is by far the most dense. So the force of water will have less affect on gold than it will on the other two. In the sluice box in the photo, water coming down the box will push out sand and gravel, leaving the black sand and gold flakes in pieces of carpet (or sponge) in the bottom of the sluice box. This concentrates the gold by washing away everything but the black sand.
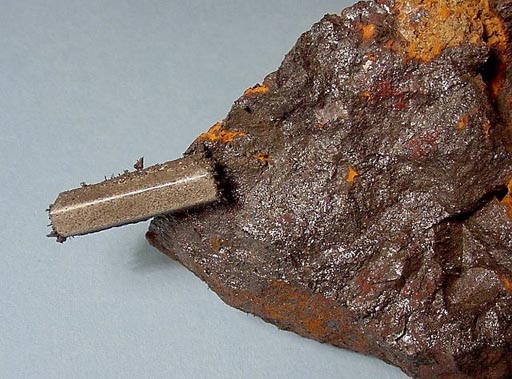
A magnet being attracted to a specimen of magnetite
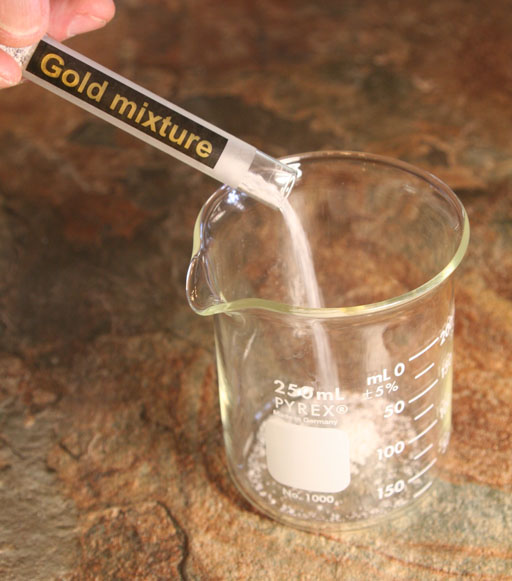
Let's get started in finding the gold.
Pour the contents of the gold mixture into your 250 mL beaker.
Add about 50 to 100 mL of tap water.
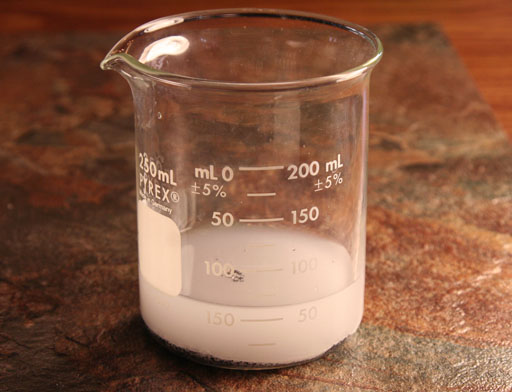
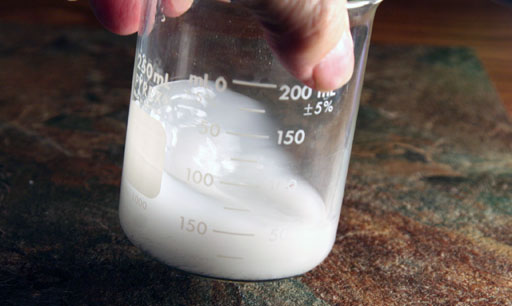
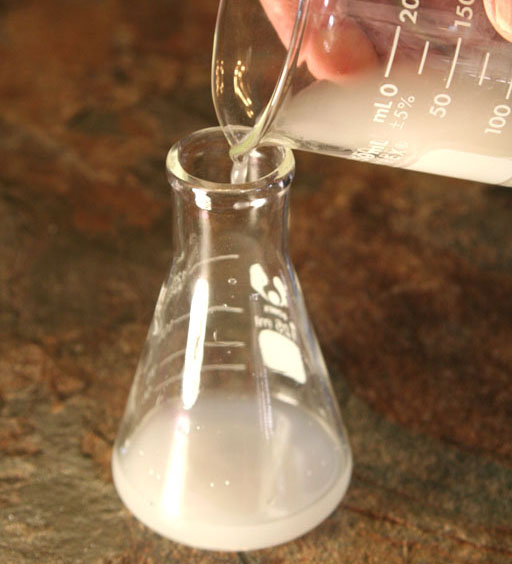
Pour the water that has the dissolved salt and the suspended calcium carbonate particles into the flask that's in your kit. We don't want to pour the liquid down the drain just in case we make a mistake and pour too much of our mixture and lose our gold.
When you pour out the liquid, make sure you don't pour out any of the sandy material at the bottom of the beaker.

Refill the beaker with 50 to 100 mL of water and stir some more. Even though the calcium carbonate is not dissolving, a lot of it becomes suspended in the water. If left alone, it will settle back to the bottom.
Again, pour the water from the beaker into the flask.
Repeat this one more time. That should get rid of most of the calcium carbonate.
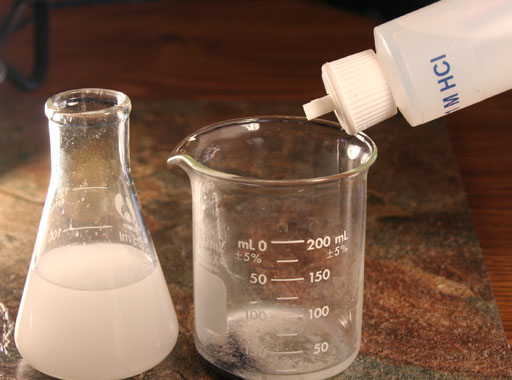
To get rid of all of the calcium carbonate, we can dissolve it using some of the 0.1 M HCl from the kit. Add the 0.1 M HCl to bring the liquid level to about half way to the 50 mL mark.
You will notice that the white cloudiness disappears as the acid causes these particles in suspension to dissolve. Here is the the reaction shown earlier. Solid calcium carbonate becomes dissolved calcium and bicarbonate ions.:
H+(aq)+ Cl-(aq)+ CaCO3(s) → HCO3-(aq)+ Ca2+(aq)+ Cl-(aq)
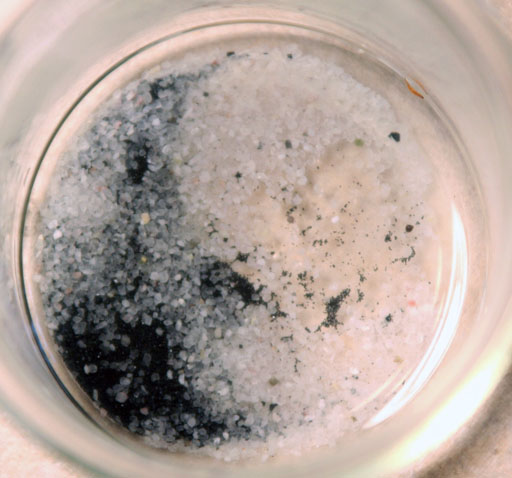
Here is a photo from the top. The cloudy calcium carbonate is gone and what is left is white sand, black sand (magnetite), and hopefully some flakes of gold.
Add more water to the beaker to bring the level up to about 50mL. Stir, then pour out the water into the Erlenmeyer flask if there is room. If not, use the 100 mL plastic beaker in your kit. Add another 50mL of tap water to the beaker with the sand mixture, stir, and pour out the 50mL. This will get rid of most of the hydrochloric acid that was added.
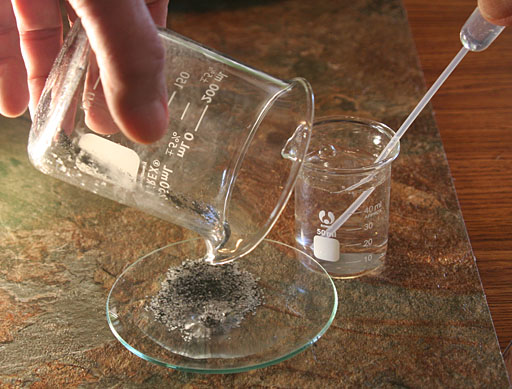
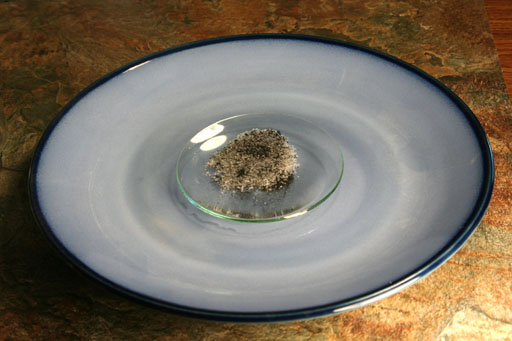
Set the watch glass onto a plate. If the black sand gets spilled, the plate can catch it and you can return the black sand back to the watch glass. We are concerned about the black sand because that's where the gold flakes are likely to be.
The watch glass is going to act as a miniature gold panning pan.
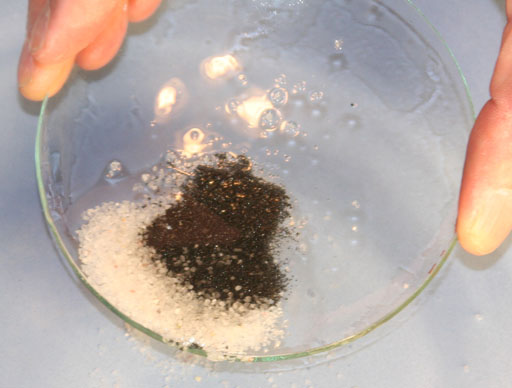
Using the small 50 mL beaker, fill the watch glass with water. Swirl the water in a circular motion and/or side to side motions. The goal is to let the water push the grains of white sand away from the black sand.
Remember to do this over the plate.
Allow the white sand to spill over the edge of the watch glass, but don't let the black sand spill over the edge. You will need to keep adding water to the watch glass and swirling the water to continue to get the white sand to separate from the black sand.
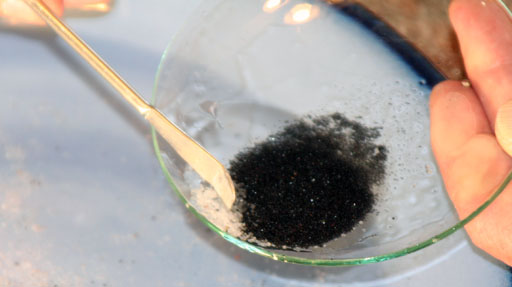
You can use your fingers or the microspatula to help rake the white sand over the edge of the watch glass.
It will take several minutes to develop the hand-eye coordination to swirl the water to get nearly all of the white sand away from the black sand. So be patient.
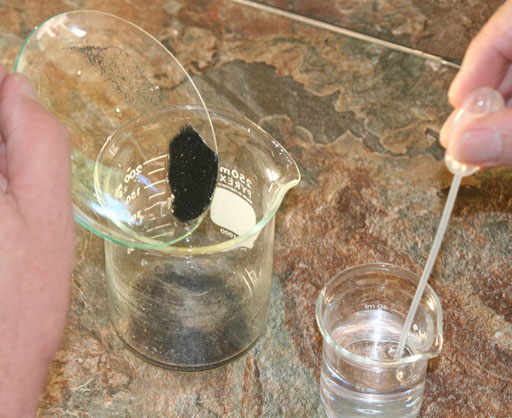
You can't get rid of all of the white grains of sand, but when nearly all have been removed, transfer the black sand to the large 250 mL beaker (make sure it is clean first).
You can use the disposable pipette to squirt water onto the watch glass to wash the black sand into the beaker.
We are now going to take advantage of the fact that these black grains of magnetite are attracted to a magnet and gold flakes are not.
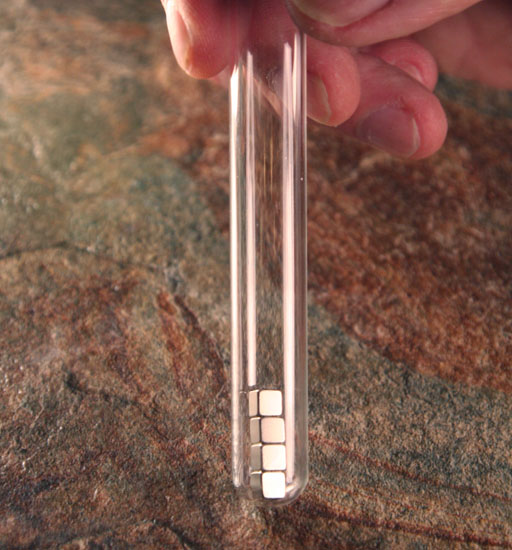
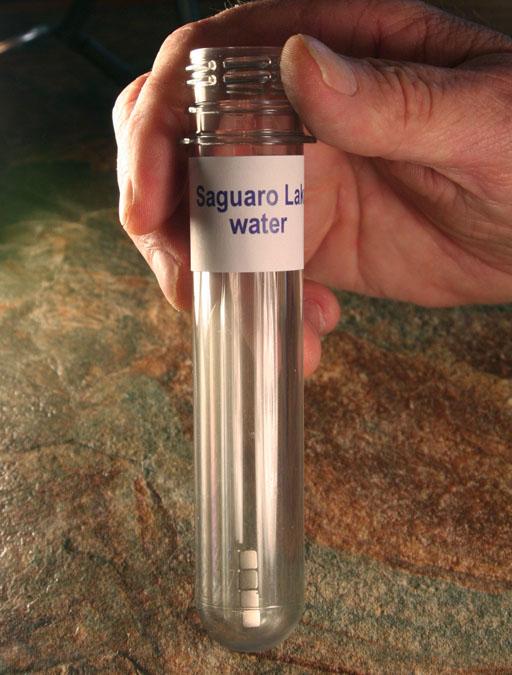
Now place the glass test tube (which has the magnets in it) into the larger plastic "Saguaro Lake water" test tube.
This allows us the use the magnets to attract the black sand to the bottom of the larger plastic test tube. Then by lifting the glass test tube with the magnets in it, we can release the black sand.
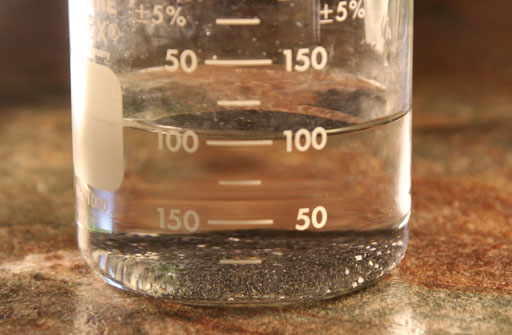
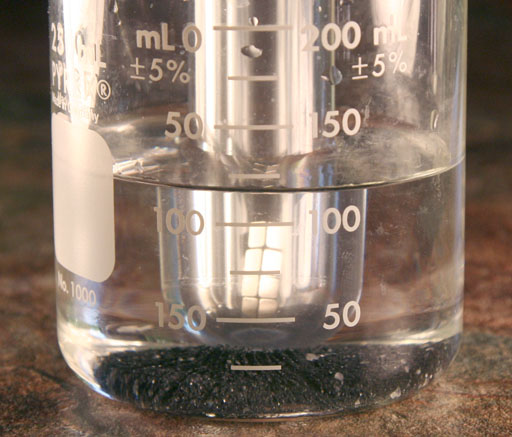
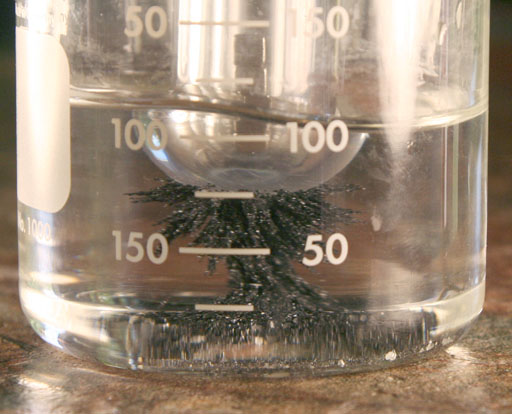
As you lift the large plastic test tube, some of the grains of black sand (the magnetite) will be held to it by the magnets in the glass test tube.
Swirl the large test tube and tap it against the side of the beaker. This will knock off any gold flakes that might be stuck to the black sand.
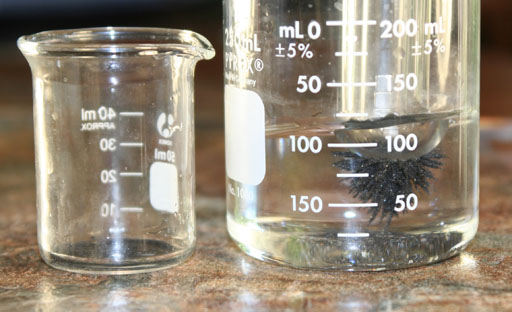
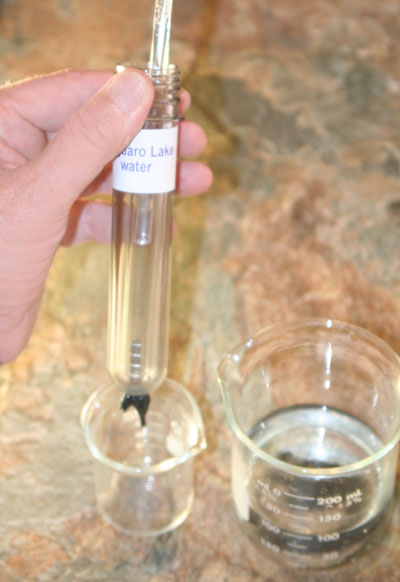
When you get the large test tube over the top of the 50 mL beaker, use the glass rod (or microspatula) to reach down into the glass test tube and press against the side of the glass test tube gently, then slide the glass test tube upwards in the plastic test tube. As the magnets in the glass test tube move away from the bottom of the large plastic test tube, the black sand will fall into the 50 mL beaker.
Lower the glass test tube back down into the larger plastic test tube and place it back into the large 250 mL beaker.
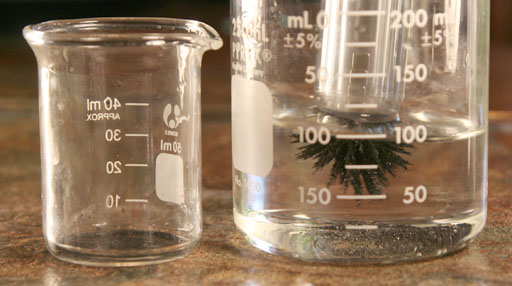
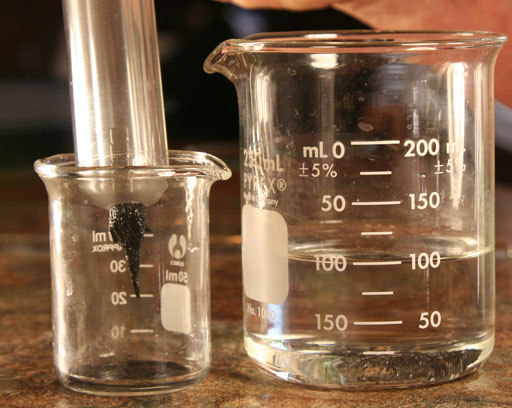
Again hold the large test tube over the 50mL beaker and, again, lift the glass test tube in the large plastic test tube so that the black sand falls into the 50 mL beaker.
Repeat this until all or nearly all black sand has been transferred.
Then pour most of the water out of the large 250 mL beaker. Again, pour it into a cup or bowl so that, in case you slip, you aren't pouring the flakes of gold down the drain.
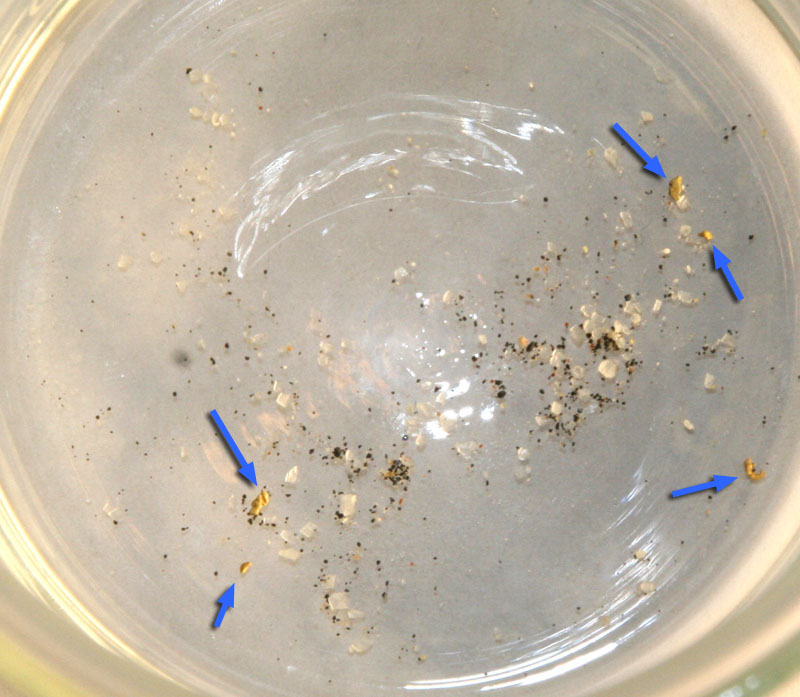
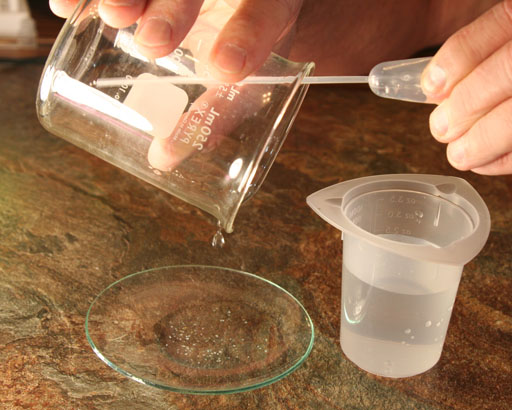
At this point you can transfer the gold flakes and the remaining grains of white sand and black sand onto the watch glass.
Like before, use the pipette to squirt water into beaker to wash out the gold flakes and residues of white and black sand.

Take a photo of what you transferred from the beaker into the watch glass. I doubt that gold will be visible in the photo even if visible to your eyes, but that's OK.
After the gold is transferred to the watch glass, you can rake the gold flakes into one spot and try to put them into one of the small empty vials that is in your kit.
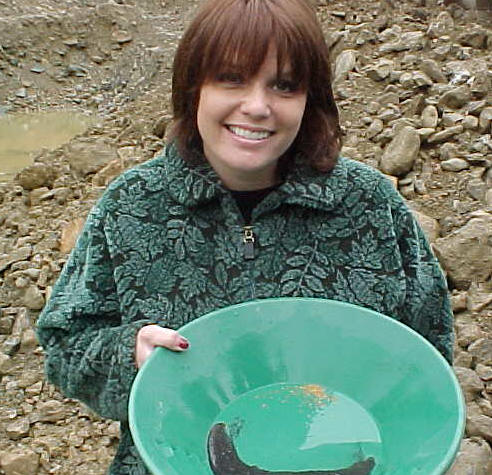
After you put the gold flakes into the vial, take a photo of yourself holding either the vial with gold flakes, or the watch glass with any gold flakes found. You can use either a thumbs up or thumbs down if you were able to find any gold.
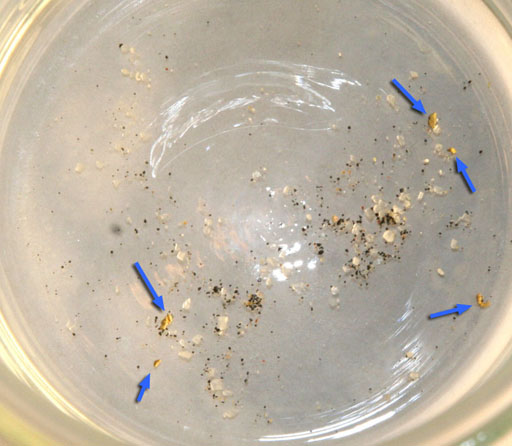
How many flakes did you recover from your mixture? If you recovered no flakes of gold, report zero. The few flakes of gold you found would be too light to weigh on your portable digital balance. However, we can do some estimations. Each gram of fine gold flakes purchased contained about 200 flakes of gold. So that averages about 1/200 g (or 0.005 g) per flake of gold). Even though the larger flakes are probably 10 times heavier than the small flakes (specs), the average is about 0.005 grams or 5 milligrams each. Using the count of the flakes you recovered, you can report the concentration of gold in the following different formats:
Percent by mass (weight)
First multiply the number of flakes by 0.005 g. In our sample here, we found 5 flakes of gold. So 5 x 0.005g is 0.025g of gold in the mixture. The mixture used in making the lab directions weighed 9.70 grams. So the fraction of gold in this mixture is 0.025g gold divided by the 9.70g of the mixture.
0.025 g gold x 100 = 0.26%w/w gold
9.70 g mixture 100
Notice that the "/100" is changed to "%" and the "g" on top and bottom is changed to "w/w" meaning weight to weight. 0.26% w/w means 0.26% of whatever mixture weight you have will be gold. Normally, we would round the 0.26% to 0.3%, which has one significant figure because our starting estimate of 0.005 g per flake only has 1 significant figure. However, we will keep this extra accuracy until we finish our calculations.
If this mixture sample came from a bucket that weighed 100 lbs, then 0.26% of 100 lbs would be gold. So that's 0.0026 x 100 lbs = 0.26 lbs of gold. One lb is equal to 14.58 troy ounces. So we would have 0.26 lbs x 14.58 troy oz/lb = 3.8 troy ounces of gold. If we looked up the price of gold and found $1680 for each troy ounce, then we would have 3.8 x $1680 = $6384 worth of gold. Now round that to 1 significant figure to be $6,000. That's the calculated value of gold in that bucket if the mixture sample is a good representation of the entire mixture in the bucket. Of course, taking another sample from the bucket and separating out the gold, would find out if we are consistently getting about 5 flakes of gold per 9 to 10 grams of mixture.
Using the number of flakes that you found, do the same math as above to first report the %w/w of gold in your mixture. Then do the math to find the dollar value of a 100 lb bucket of that mixture. Round the dollars to one significant figure.
Instead of reporting your concentration of gold as a % by weight, you will report it as a % weight to volume which is helpful when someone knows the volume of their mixture and not its mass.
The math is almost the same. Again, lets say we had 5 flakes of gold that weigh 0.025 g. In the sample used in these lab instructions, the volume was 5.0 mL. So we make a fraction with grams over volume. Reduce this to grams per 1 mL, then multiply by 100 to get grams per 100 mL. Then abbreviate.
0.025 g gold = 0.005 g gold x 100 = 0.5g gold = 0.5%w/v gold
5.0mL mixture 1 mL mixture 100 100mL mixture
In 0.5 %w/v, the "%" sign took the place of dividing by 100 because % means "per 100" or "/100". That means if you ever remove the % sign from a concentration, you have to put back in "/100". In other words, you must divide the concentration value by 100. The "w" takes the place of the grams on top (grams of gold in this case). The "v" is referring to the volume measured in milliliters. So a concentration of 0.5%w/v gold means that 0.5% of the volume (if measured in milliliters) will be the weight in grams of gold.

Instead of knowing the mass of the mixture that one collect, lets say you just know that the mixture filled up a 5 gallon bucket. Using the concentration of 0.5%w/v, we can find the grams and the value of gold in the 5 gallon bucket. First we will rewrite 0.5%w/v as 0.5g/100mL. Then multiplying by the 5 gallon volume converted to mL will give us grams of gold.
0.5 g gold x 5 gal mixture x 3785 mL = 95 g gold
100 mL mixture 1 1 gal
Notice that the word "mixture" cancels out as well as gallons and mL. So only the units of grams of gold is left over.
Our original question was the value of gold in a 5 gallon bucket contain a mixture that had 5 flakes for every 5.0 mL of mixture. We can take the 95 grams of gold and convert that to troy ounces. I go to http://www.onlineconversion.com/ to find these conversions. It says 1 troy ounce = 31.10 grams. It also says 1 gram=0.3215 troy ounces. It doesn't matter which one we use, we get the same answer. Again, if we look up the current value of gold and find $1680, then we can find the below value.
95 grams x 1 troy oz x $1680 = $5132 > $5,000
1 31.10 g 1 troy oz
So our value rounded to one significant figure is $5,000. Now you begin to see why people get gold fever. When they start finding gold flakes in their sample mixture, they can make a lot of money if they process that bucket and get the same amount of gold predicted by testing their sample.
Using the volume of your mixture and the number of flakes you found redo the above math to report the concentration of your gold in %w/v and the value of that gold in a 5 gallon container with the price of gold at $1680 per troy ounce.
If you wish, you can copy the below summary into your email (or Word document) and type your answers after the descriptions. The required photos can either be attached to the email or inserted in the Word document if going that route. Try to keep each image under 2 megabytes. If the first letter of your last name is between A and G, send your lab reports to Loree Cantrell-Briggs at Loree.Cantrell-Briggs@phoenixcollege.edu If the first letter of your last name is between H and Z, send your lab reports to Quinn Thacker at QRT2004@yahoo.com. Be sure to title the email "Lab 5".
Lab 5 Experiment 1: Separating Gold from a Mixture
1. Mass of the gold mixture:
2. Volume of the gold mixture (mL):
3. Description of what you saw when looking at the mixture with the mini-microscope:
4. All mixtures had 3 or more flakes of gold added to them. How many flakes were you able to recover? If none, write zero.
(Attach a photo of what you transferred from the beaker into the watch glass. Hopefully, the gold flakes will be visible in the mixture.)
(Attach a photo of yourself holding either the vial with gold flakes, or the watch glass with any gold flakes found. You can use either a thumbs up or thumbs down if you were able to find any gold.)
5. What is the concentration in %w/w of gold in your mixture using the average of 0.005 grams per flake and the mass of your mixture? (If you didn't find any flakes, use 3 flakes for the calculation.)
6. Using your calculated concentration in %w/w, what value of gold would there be in 100 lbs of a mixture having the same concentration? (Assume current value of gold is $1680 per troy oz.)
7. What is the concentration in %w/v of gold in your mixture using the average of 0.005 grams per flake and the volume of your mixture? (If you didn't find any flakes, again use 3 flakes for the calculation.)
8. Using your calculated concentration in %w/v, what value of gold would there be in 5 gallons of a mixture having the same concentration? (Assume current value of gold is $1680 per troy oz.)
Post-Lab questions and problems are on the Sapling Learning website. http://www2.saplinglearning.com/