
Humans having a desire to classify things so they are more understandable. The Periodic Table of the Elements grouped elements according to their increasing mass (a physical property) and by columns (similar chemical properties). So the Periodic Table is a quick way to see some physical and chemical properties of elements. Compounds and solutions also have physical and chemical properties.
Objective 3. Distinguish between physical and chemical changes.
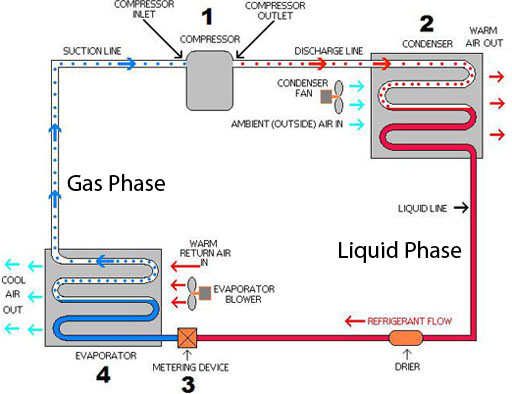
Physical Change Desired: Air Conditioning
The freon in air conditioners (home or car) and refrigerators changes from gas to a liquid and back to a gas, which then repeats. This is a physical change because the freon does not change its chemical makeup, just its state (liquid versus gas). A physical change is easily reversible. So the process can repeat and continue and keep us and our food cool.
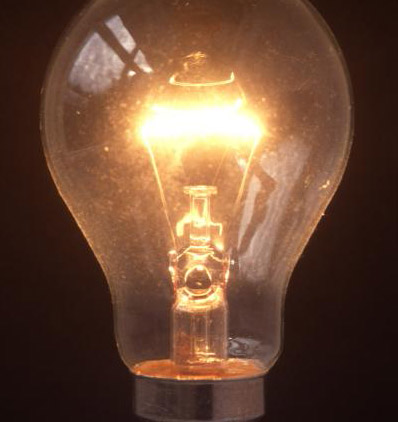
Physical Change Desired: Lighting
Most lighting depends on a physical change. The traditional light bulb has a filament that heats up and glows. That is a physical change. When the electricity is off, the filament cools down to its original physical state. This physical process repeats every time the light is turned on and off. However, if the bulb is cracked and air is introduced, the oxygen in the air reacts with the tungsten filament which then undergoes a chemical change. Tungsten oxide is brittle and doesn't conduct electricity well. So the filament breaks and the light bulb stops working. In this situation, we don't want a chemical change. So the bulbs are engineered to prevent chemical changes.
Lighting that depends on chemical change are light sticks and candles. Notice that light sticks can only be used once, and after a candle burns, there is no way of getting the wax back.
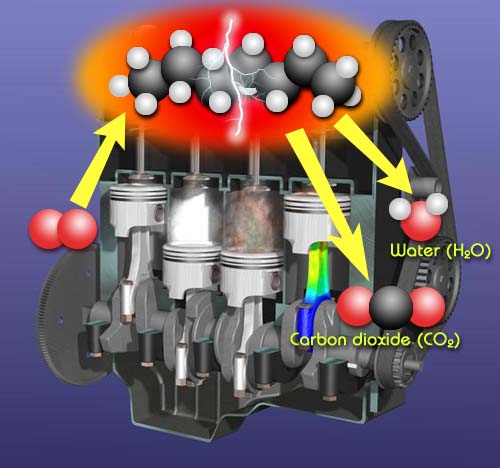
Chemical Change Desired: Combustion for engines and stoves.
Whether it is combustion in the engine of a car or on the stove, combustion requires a chemical change. In these cases, it is a hydrocarbon (compound made from carbon and hydrogen atoms) that is combining with oxygen to form carbon dioxide and water. Energy is released and we get heat to build up pressure in the engine's cylinders or heat to cook our food. A chemical change is desired in this situation because that's what will produce heat.
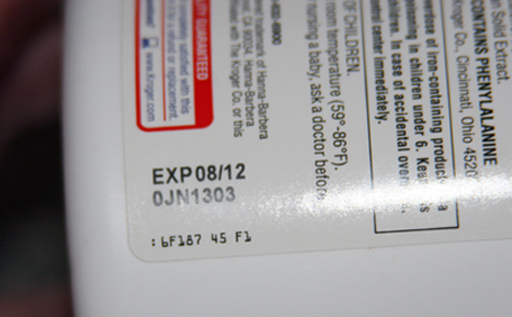
Chemical Change Not Desired: Food and Medicine Expiration dates
Why do food and medicine have expiration dates? It's because there is a slow chemical process going on. After the expiration date, a significant portion of the ingredients in medicine may have undergone chemical change and converted to some other chemical. Food has the same problem. Protein, fat, sugar, starches, and vitamins that make up food will chemically break down or react with other ingredients in the food or air. Bacteria will also alter the chemical makeup. So in these situations, spoilage or degradation is occurring because of chemical changes. Preservation of food and medicine is designed to slow down or prevent chemical change.
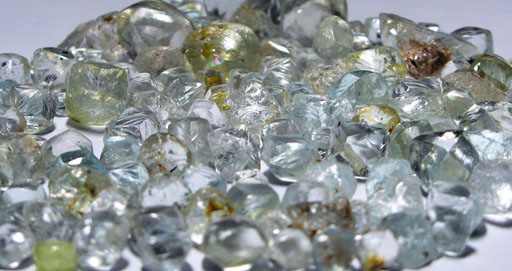 Physical properties of a natural diamond:
Color: Can be most any color.
Density: 3.5-3.53 g/cm3
Index of Refraction: 2.418
Hardness: 10 on the Mohs scale
Physical properties are properties of the substance itself. Physical properties do not mention how the element or compound reacts with another substance. That belongs to chemical properties.
Some physical properties are color, form (gas/liquid/solid), odor, melting point, boiling point, malleable (easy to bend or reshape), crystalline, amorphous (no crystal structure), density, electrical conductivity (good conductor or insulator), index of refraction (how much it bends light), and more. Even without using equipment, you can identify the physical properties of substances such as color, form, taste, and odor. However, taste is not a good idea for checking most chemicals.
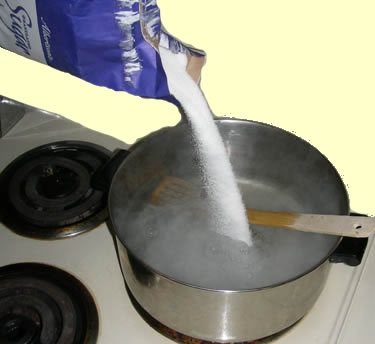
Solubility:
Solubility is usually called a physical property. Solubility does require mention of another substance, such as water. That lends itself to more of a chemical property because the solubility requires a mention of the solvent (a second substance). However, in dissolving, the substance does not normally change its composition. For example, sugar dissolves in water, but it doesn't change its formula. When the water evaporates away, the sugar returns to its previous state. So dissolving is more like a physical change and therefore "being soluble in a water" is more like a physical property.


Built into most gas barbecue grills (and some cigarette lighters) is a push-button or dial that creates a spark to ignite the gas. Pushing on the buttons or dial causes a spring to tighten which then releases a small hammer that then impacts onto a crystal. Under the pressure of the hammer, the physical properties of the crystal changes. Before it was hit, the crystal had a neutral charge. Under pressure, it has opposite charges at both ends of the crystal, which creates thousands of volts of electricity. That voltage creates a spark which ignites the gas. Substances that create a voltage when pressure is applied are said to have the physical property of being "piezoelectric". The common mineral quartz has this physical property.

The needles of the old record players also contain a crystal that has the piezoelectric property. As the needle slides across microscopic ripples in the record's grooves, the resulting pressure on the crystal creates a voltage that would vary in sync with the ripples. The variations of voltage was turned into the sound or music.
Like most physical changes, the changes are easily reversible. The piezoelectric crystals would quickly change their property to uncharged to charged and back to uncharged over and over. The chemical make up of the crystals never changed which is a requirement for a physical change.
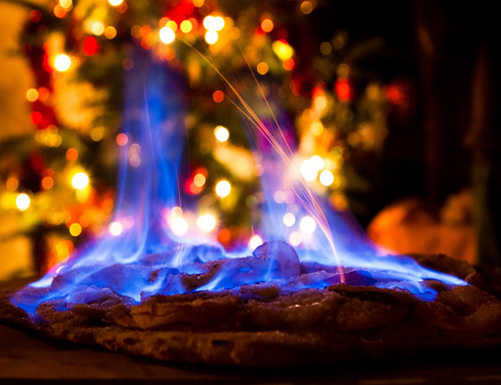
Chemical properties describe how a substance will react with other substances. For example, saying something is flammable is saying it will react with oxygen. So being flammable is a chemical property.
Here are some desserts that are heated by pouring alcohol on them and then setting the alcohol on fire. This proves that ethanol is flammable because it reacts quickly with oxygen. Being flammable is a chemical property.
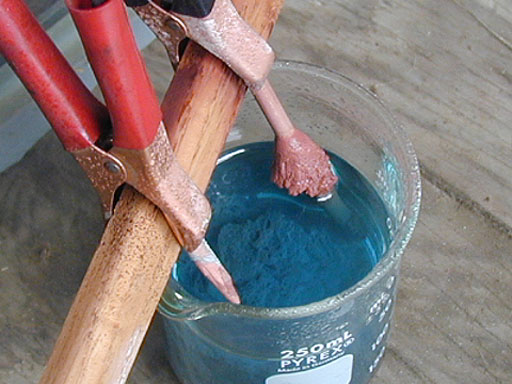
"Strong acids dissolve metals". This is a general statement of a chemical property for strong acids. Notice that it is mentioning a different substance (metals in this case). Chemical properties tell you how a substance (acid in this case) will react with another substance.
The image is of copper tubing being dissolved in sulfuric acid with the help of electricity. Two chemical changes are being shown. The first one is the clear sulfuric acid turns blue as the copper from post with the red positive clamp dissolves (Cu → Cu2+ + 2 electrons). Cu2+ ions are blue. The second chemical change we can see are Cu2+ ions turning back into metallic copper particles on the copper tubing connected to the black negative clamp. Here Cu2+ ions are picking up 2 electrons from the negative tubing and turning back into copper metal. (Cu2+ + 2 electrons → Cu).
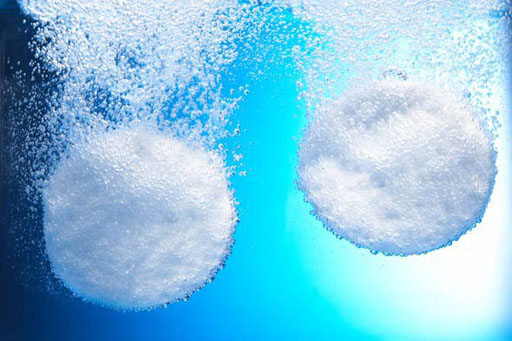
"Sodium bicarbonate neutralizes acids." This is a chemical property statement for sodium bicarbonate.
"Citric acid is incompatible with alkaline carbonates and bicarbonate." A statement that uses the word "incompatible" is stating a chemical property. In other words, it is saying that this substance will react with these other substances. It's incompatible because citric acid will no longer stay citric acid if in contact with the other substances mentioned.
In the image we see a chemical change taking placed based on certain chemical properties of sodium bicarbonate and citric acid.
If we know the chemical properties of two substances, we are likely to predict what kind of reaction they will undergo when in contact with each other.
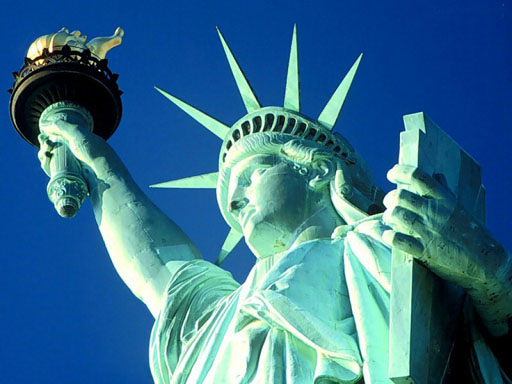
Color Change: A chemical change means the substance changes into another substance. In other words, its chemical formula changes. If a substance decomposes that is a chemical change. If a substance reacts with another substance, that's a chemical change.
For example, when the Statue of Liberty was erected in 1886, the copper metal was copper in color. However, by 1900, it had turned a turquoise color. The copper underwent a chemical change, going from metallic copper to a mixture of copper oxides, copper carbonates, copper sulfates, and copper chlorides due to exposure to various chemicals in the air and rain.
Again, the formula for copper was simply Cu but became CuO, CuCO3, CuSO4, and various other compounds due to chemical change.
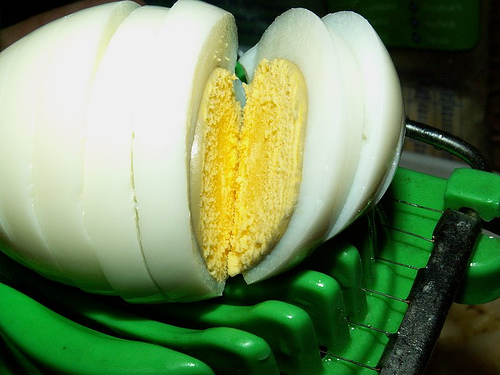
Sometimes there is no obvious change to a formula, but bonds within the substance are broken and the substance takes on a different shape which doesn't reverse back to its original shape. That is also a chemical reaction. Boiling an egg is an example of that.
As you know, boiling an egg causes a permanent change in the egg because when the egg cools down it doesn't look the same as it did before you heated it up. The heating of the egg causes the protein in the egg to change shape by breaking bonds and forming some new ones. An analogy would be a basket. Toss it gently back and forth and there's no change to the basket (warming); however, if you throw it too fast (high temperature), the woven fibers in the basket will break and rearrange themselves. The basket is not going to return to its original shape after such vigorous handling. That's like this type of chemical change.
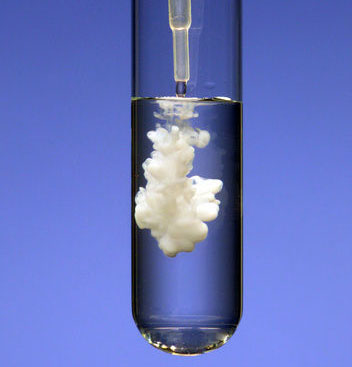
Precipitate (verb and noun):
A precipitate forming is a good sign of a chemical change. The liquid in the photo has barium ions (Ba2+) in it. The liquid being added has sulfate ions (SO42-). When these mix, the barium ions combine with the sulfate ions to form solid barium sulfate (BaSO4).
When a person is poisoned by a barium compound such as barium hydroxide, the treatment is to give the person a solution of Epsom salts, which is magnesium sulfate heptahydrate. The sulfate in Epsom salts will grab onto the barium ions to form barium sulfate, which is not toxic.
The word, precipitate, is both a verb and a noun. For example, in this sentence, "Adding sulfate ions will precipitate out barium sulfate, which is a white precipitate." The "-ate" in the verb rhymes with "fate". The "-ate" in the noun is pronounced as "it".
Bubbles can indicate either a physical change (a liquid is boiling and changing from liquid to a gas) or a chemical reaction taking place. This image is of a gun where the serial number has been filed off. By adding hydrochloric acid to the that area, the serial number can often be restored. The bubbles are of hydrogen gas which is formed by the acid pulling electrons off of the metal. The chemical change is H+ in the acid becoming H2 gas and the iron (Fe) in the gun becomes an ion (Fe3+) and when dries, becomes an salt of iron.
The bubbles seen when boiling water is not a chemical change. That's a physical change. So bubbles can indicate a chemical change but sometimes it just a liquid that's boiling or some dissolved gases coming out of solution.

Substance (Formula) |
| Sugar (C12H22O11) |
| Salt (NaCl) |
| Citric acid (C6H8O7) |
| Unknown liquid (B): This is actually mineral oil (a hydrocarbon with 15 to 40 carbons) |
| Epsom salts (MgSO4*7H2O) or magnesium sulfate heptahydrate |
The physical properties you will identify are color, form (solid or liquid), odor (if it has one), and solubility.
You will also observe these chemicals when they are heated (see below) to recognize chemical properties and more physical properties.
Locate the items in your kit that are in the photo.
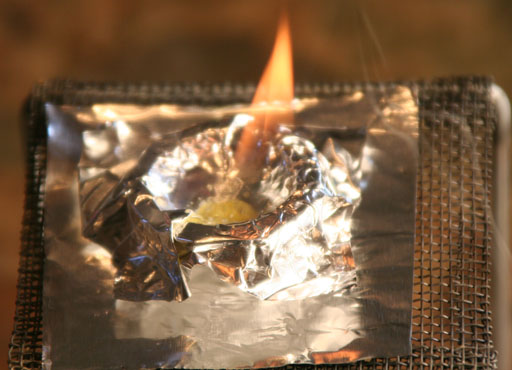
Heating up a substance can reveal both physical and chemical properties. For example, if a solid substance melts at a certain temperature, then its melting point temperature is one of its physical properties. You won't be measuring the melting temperature in this lab, but just noting that the substance does melt draws your attention to one of its physical properties.
If a substance burns, then we know it reacts with oxygen. So being flammable is a chemical property because it says how the substance reacts with a different substance (oxygen in this case).

Be sure to have your protective tile under the stand. Keep the metal tongs handy, too.
(Your kit only has one stand. This photo used two stands just to show the two options for the heat source.)
Before using the alcohol burner, check to see if it is about 3/4 full using the fuel supplied in the kit. If you ever run out of fuel in the middle of an experiment, let the whole thing cool for 10 minutes before trying to touch it and refill it.
If you ever run out of the fuel in the kit, buy some 91% rubbing alcohol (not 70%, but 91%).
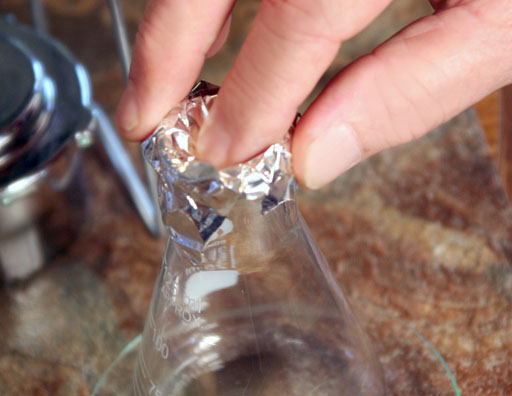
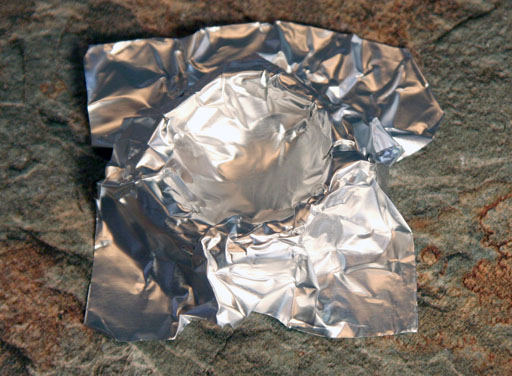
Bend out the corners to make feet. Make 4 of these aluminum crucibles if you are using the alcohol burner as the heat source. If using the candle, just leave the aluminum foil squares flat.

PHYSICAL PROPERTIES: Before subjecting these chemicals to heat or checking their solubility in water, first record their color, form (solid or liquid), and odor, which are all physical properties.
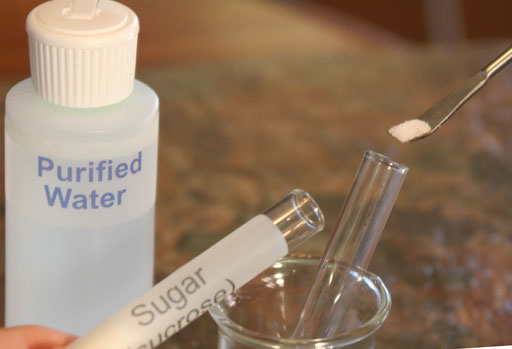
SOLUBILITY IN WATER: Add a small amount of sugar to an empty test tube and fill the test tube about half full with purified water. Place a cap on the test tube and shake it to see if sugar is soluble in water. If most or all of it dissolves, then report sugar as having the chemical property of being soluble in water.
Do the same thing for the other solids (Citric acid, table salt, and Epsom salts). For the Unknown liquid (B), just pour a few drops into an empty test tube, because the microspatula won't work for that. Again, report if that substance is soluble or not in water. Solubility is usually called a physical property.
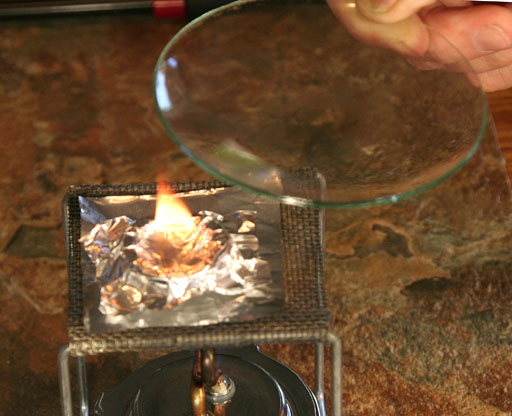
SAFETY PROCEDURES FOR HEATING:
If you add too much chemical, it might start a fire that is a larger than you would like it to be. Have your watch glass handy and a wet paper towel.
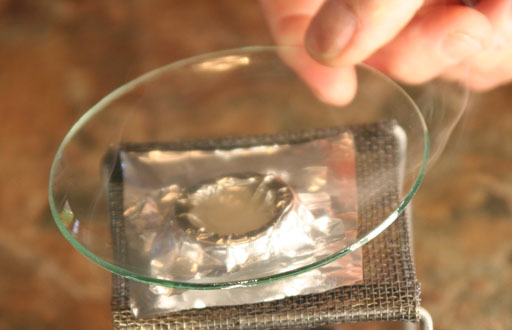
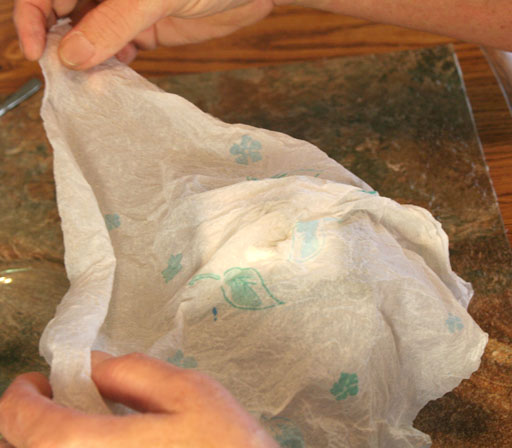
BEHAVIOR UPON HEATING:
If using the alcohol burner, place a flat sheet of aluminum foil over the screen of the stand. The foil keeps the flame from heating up the sample too quickly.
If using the alcohol burner, place an aluminum crucible on the sheet of aluminum foil.
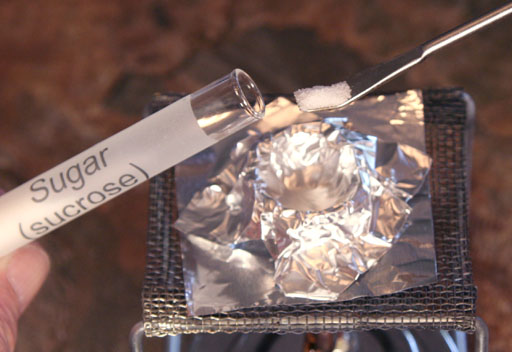
Now add a small amount of sugar to one of the aluminum crucibles (amount like shown).
Light the burner, put on goggles, and see what happens to the sugar.
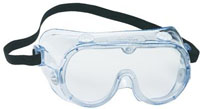
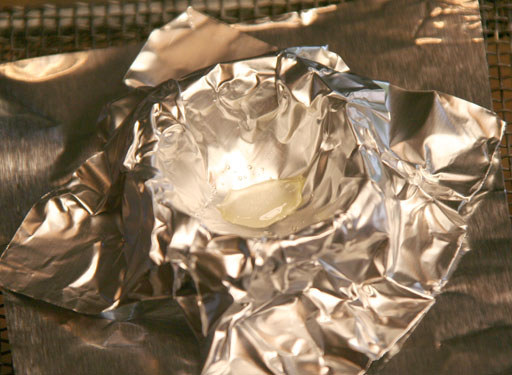
In a less than a minute you should notice that the sugar melts. If you knew the melting temperature, you would report the melting point as a physical property. At least you notice there is a physical change occurring because sugar has a physical property of melting at the current temperature of the crucible.
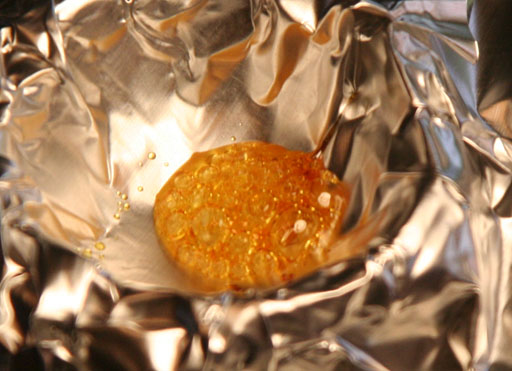
When sugar is close to its melting point, it begins to darken in color. That's a sign that some chemical reaction is occurring.
When sugar is heated to the point of darkening, it said to be caramelized. Caramelization starts with a chemical break down of sugar (sucrose) into the two sugars that make it (fructose and glucose). Then dozens of different reactions occur that produce hundreds of different compounds. So caramel candy is not a simple mixture.
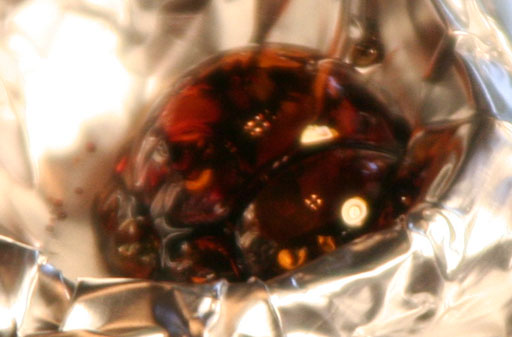
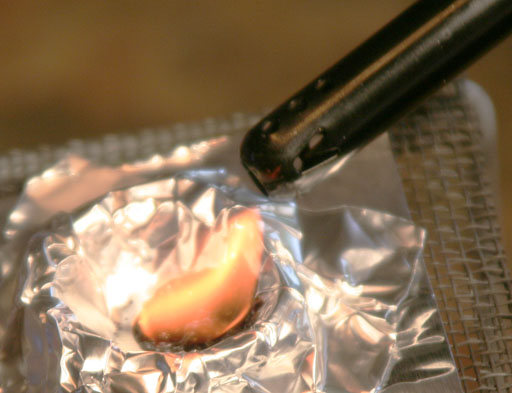
If the sugar is smoking, use your lighter to see if the smoke will catch fire.
If it catches fire, "being flammable" is a chemical property of sugar that should be listed.
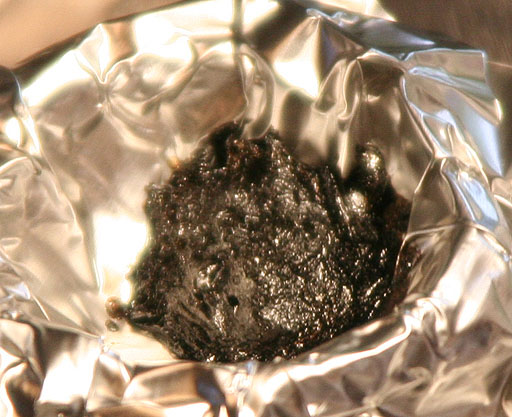
Watching sugar burn allow you to witness hundreds of types of chemical reactions in a matter of seconds. The physical change you noticed is when the sugar reached its melting point (which is a physical property). Then the color change indicates a chemical reaction. So the chemical property of sugar is that it decomposes when heated near its melting point. The other chemical property is being flammable.
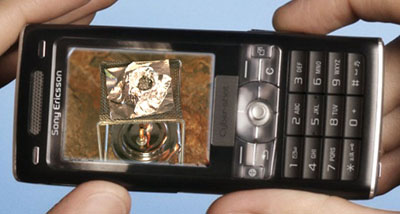
Take a picture of your setup with the burnt sugar residue.
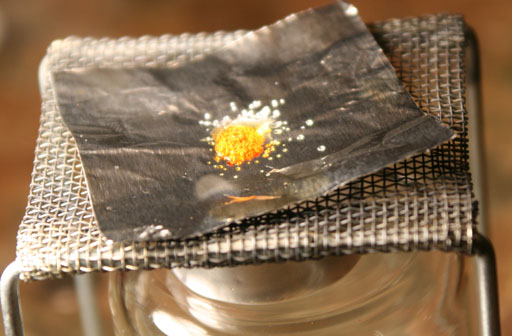
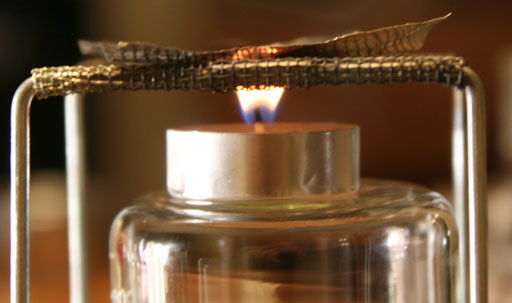
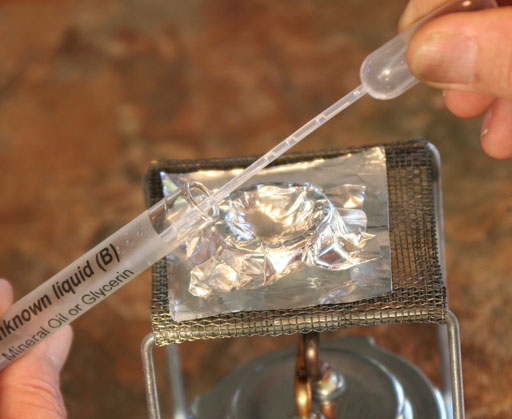
The Epsom salts will be heated differently than the others. Read those instructors below.
| Sugar (C12H22O11) |
| Salt (NaCl) |
| Citric acid (C6H8O7) |
| Unknown liquid (B): This is actually mineral oil (a hydrocarbon with 15 to 40 carbons) |
| Epsom salts (MgSO4*7H2O) or magnesium sulfate heptahydrate |

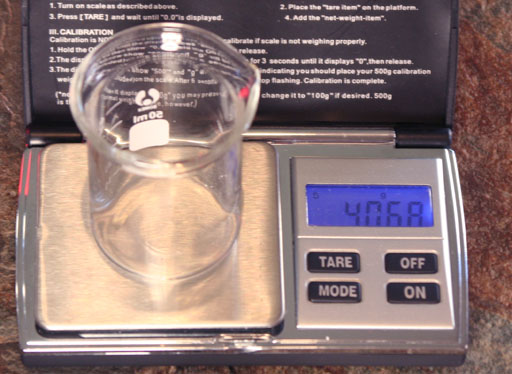
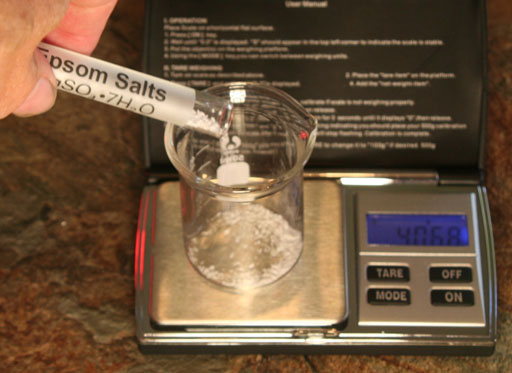
Pour most of the contents of the Epsom salts in the test tube into the beaker. Leave about a 1/4 or less of the Epsom salts in the test tube.
Write down the mass of the Epsom salts plus the beaker. Of course, by subtracting the mass of the beaker from this total, you will have the mass of the Epsom salts in the beaker.
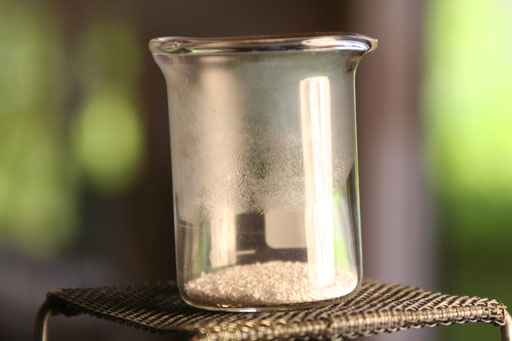
Upon heating, you may notice condensation on the inside of the beaker. Eventually, when the beaker gets quite hot the condensation will go away. At that point blow out the flame to the alcohol burner (or candle if using the candle as heat source).
The formula for Epsom salts is MgSO4• 7H2O. So where do you think the water came from to form the condensation?
Before you can weigh the beaker again, you have to let the beaker cool.
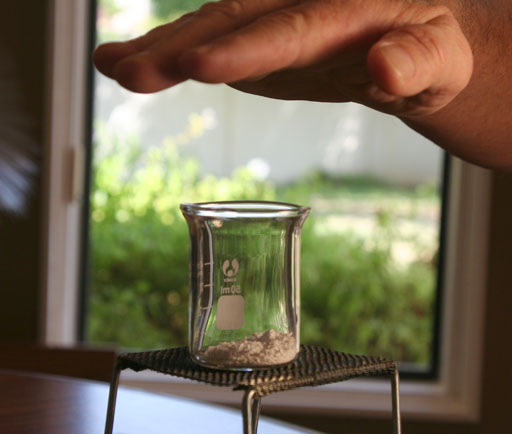
A good way to see if something is hot is by holding hand over the item. In this case, you can check the beaker to see if it is cool. If the beaker is still hot, hot air will be felt coming up from the beaker.
After the beaker is cool, weigh it again and record its new mass. subtract the mass of the beaker to find the mass of the Epsom salts after heating. Is its weight more, equal, or less than when it started? If less or more, how do you explain the difference in mass?
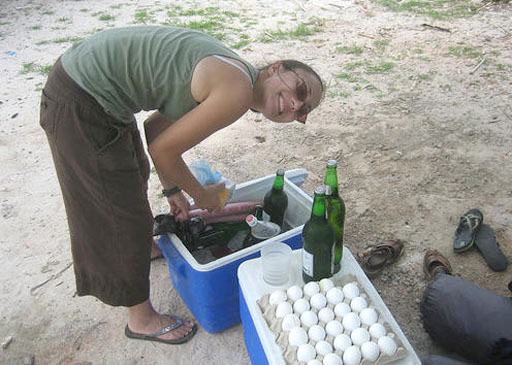
Sublimation is a physical change where a solid goes directly to a gas without melting first to make a liquid. Not many solids do that. The most common one mentioned is dry ice (frozen carbon dioxide). Campers like dry ice to keep food cold because as the dry ice warms up it simply becomes a gas. If ice is used, it turns to water and gets the food all soggy.
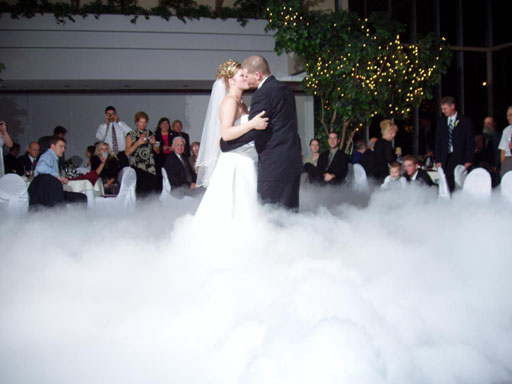
The cloud seems harmless enough, but carbon dioxide will suffocate people. So someone underneath this cloud could be at danger.
Sometimes the cloud is not droplets of water but droplets of oil or glycerin (a sweetener). Oil or glycerin is heated until it vaporizes. This creates clouds of "fog" but this doesn't stay near the ground but fills the room. However, if the fog is passed over dry ice, it will cool and stay close to the ground. So these "clouds" may be drops of oil and not drops of water like in real clouds.
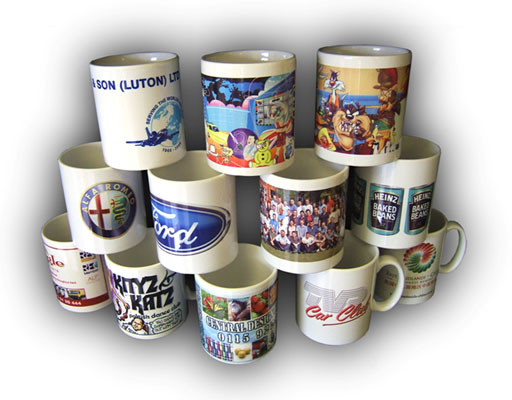
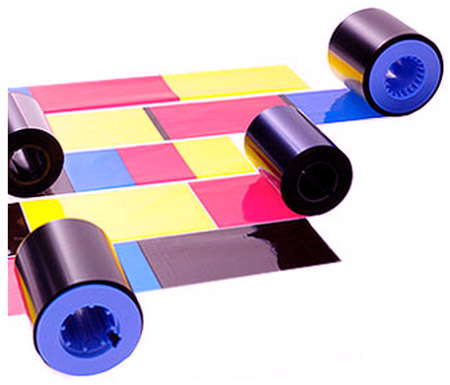
There are 3 colors used in dye-sublimation printing: cyan (blue-green), yellow, and magenta (a reddish purple).
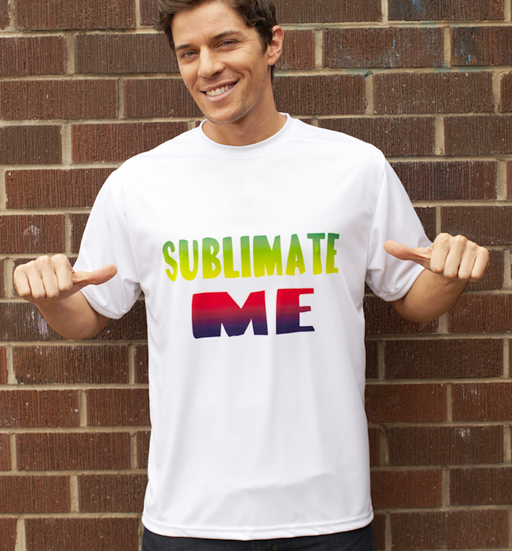
Ink-jet printers spray the ink onto the paper, but dye-sublimation printers have a small heated tip that heats the dye which then turns into a gas. The hot gaseous dye floats up and cools as it touches the paper (or whatever surface is being printed on). As it cools it turns back to a solid.
Some printers use dye-sublimation inks that are dissolved in water. These are sprayed on a thin film in the same way as an ink-jet printer. Then this film is pressed up against a fabric or some other object and heated. The ink will then turned to vapor and condense on the cooler fabric or object. This is the heat transfer method of using dyes that sublimate.

Your kit has a sample of the ribbons used in dye-sublimation printing. The ribbon (a piece of clear film with a coating of dye) is sandwiched between aluminum foil and the paper that is normally used for dye-sublimation printing.
This ribbon is yellow, but yours may be cyan (bluish) or magenta (purplish).
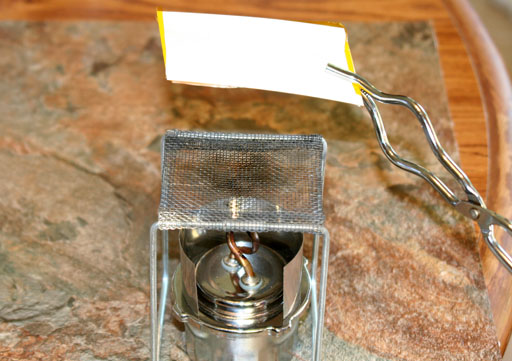
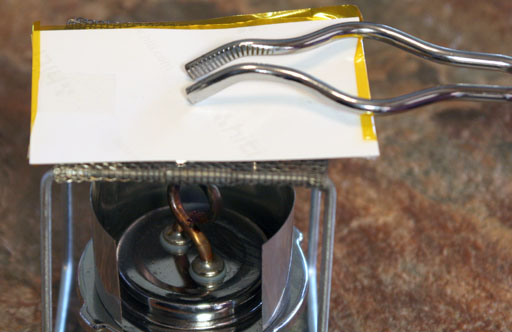

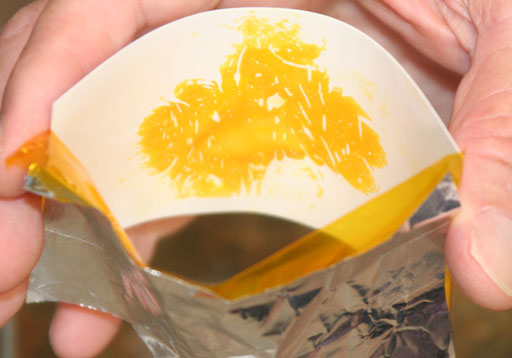
After a half minute of cooling, squeeze the dye sublimation film sandwich to see the pattern created as the dye turned from a solid coating on the film to vapor, which then condensed back to a solid as it touches the cooler paper.
If you see nothing, then the foil didn't get hot enough. Light the flame again and put the sandwich back onto the screen (foil side down) and wait longer. Use the tongs again to hold it against the hot screen. Look for evidence that would suggest the dye is turning to vapor. Another possibility for not seeing a pattern is that the film may have been placed in "sandwich" with the dye on the wrong side. That's not a mistake you made but a mistake during assembly. Take a photo of your results anyway.
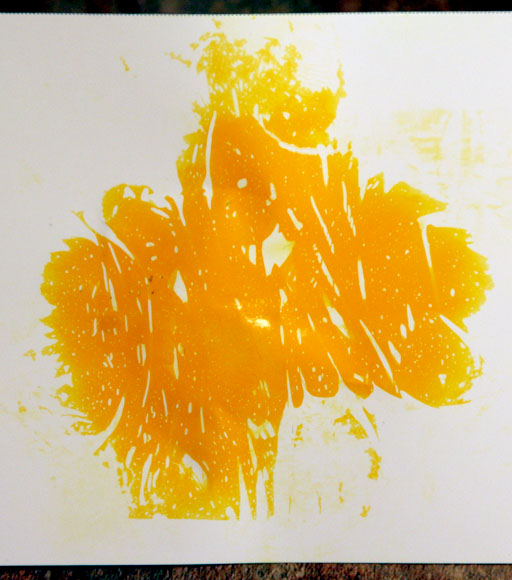
Look at the pattern made by the dye, and try to guess why or how your pattern was created. If you weren't successful in getting any dye to transfer to the paper, try to explain the pattern in the photo.
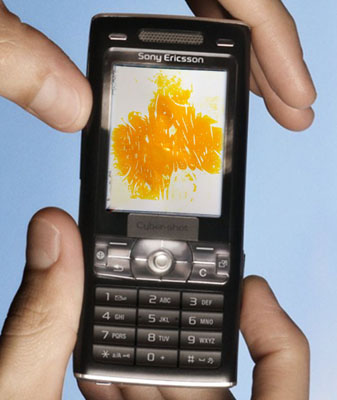
Take a picture of the pattern that your dye sublimation sandwich made. Even if you got no transfer of dye, take a picture of the paper that faced the film.
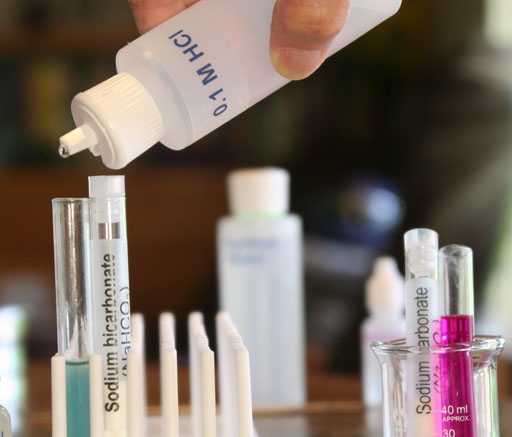
Adding an acid to a compound and observing bubbles is a indicator that your compound has the carbonate (CO32-) ion. This is useful in helping to identify compounds in forensics and geology.
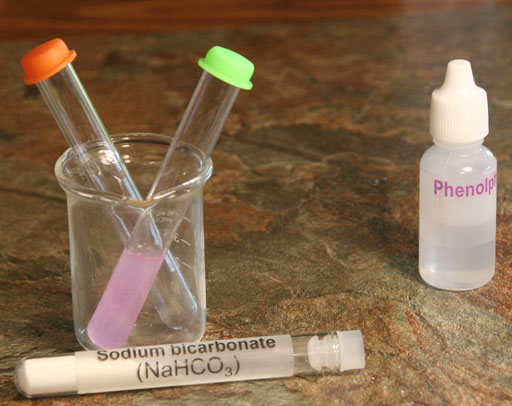
In your kit, NaHCO3 and Na2CO3 are in test tubes.
Also, locate the 0.1 M HCl bottle.
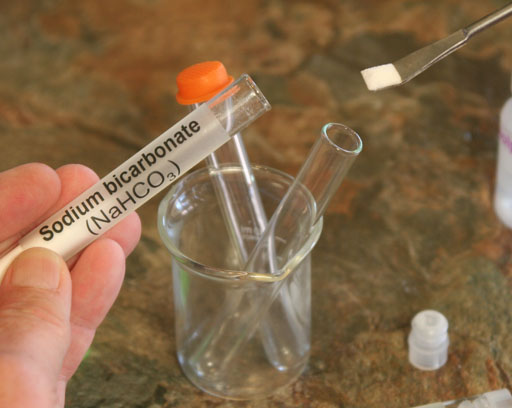
Take a small amount of the sodium bicarbonate (also called sodium hydrogen carbonate) from its test tube and place in an empty test tube.
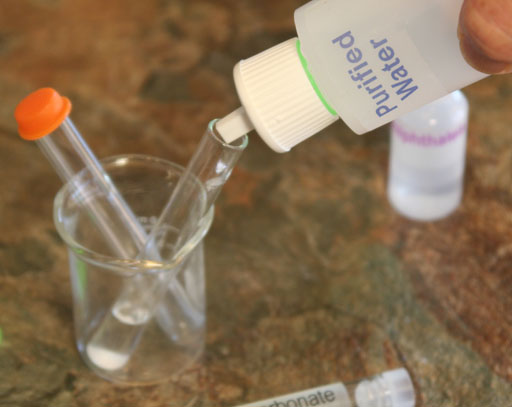
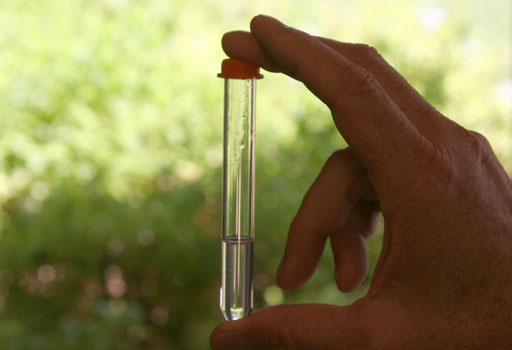
SOLUBILITY: When NaHCO3 is placed in water, it simply dissolves. So it went from a solid to a liquid. That appears to be just a physical change. Also, if the water is allowed to evaporate, the NaHCO3 powder will return to the way it was before it was dissolved. So that reinforces the idea that is it a physical change because it is easily reversible. However, it might be argued that when NaHCO3 is introduced to water, there is a chemical change because water causes the NaHCO3 to break up into Na+ ions and HCO3- ions. So its formula isn't exactly the same. Also, there is another subtle chemical change occurring that can't be seen but can be shown using a pH indicator such as phenolphthalein.
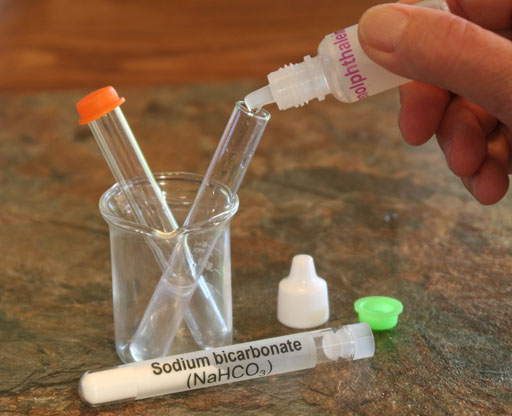
Locate the phenolphthalein in your kit and add a couple of drops to the dissolved sodium bicarbonate.
If you see a pinkish color, then an hydroxide (OH-) ion is causing the phenolphthalein to turn pinkish (light purple). So where is the OH- coming from? See below.
NaHCO3(s)-->Na+(aq)+ HCO3-(aq)
The (s) means it is a solid and (aq) means it is in an aqueous (water) solution. Now the bicarbonate ion (HCO3-) will react with water according to the below chemical equation (the second equation is the same but water is written as HOH instead):
HCO3-(aq) + H2O(l) --> H2CO3(aq) + OH-(aq)
HCO3-(aq) + HOH(l) --> H2CO3(aq) + OH-(aq)
What happens is that the bicarbonate ion pulls a H+ ion off of a water molecule leaving an OH- ion behind. The OH- ion causes the phenolphthalein to turn pinkish. So this part of what happens is a chemical change because there was a change in the formula for the bicarbonate ions (HCO3- became H2CO3).
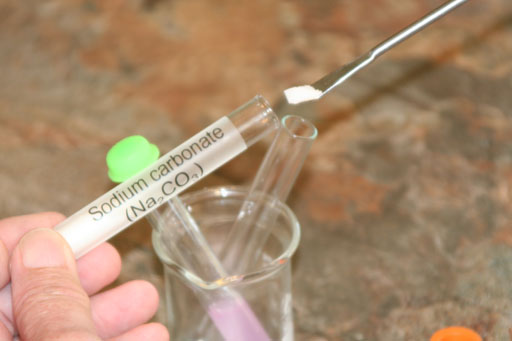
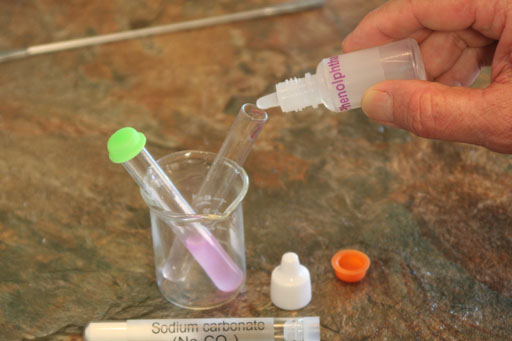

Below is the reaction with bicarbonate ion as shown before:
HCO3-(aq) + HOH(l) --> H2CO3(aq) + OH-(aq)
Now look at the reaction with the carbonate ion that's in sodium carbonate (Na2CO3):
CO3-2(aq) + 2HOH(l) --> H2CO3(aq) + 2OH-(aq)
Notice that one CO3-2 ion is capable of pulling the hydrogen atoms off of two water molecules and making 2 OH- ions. So it produces more OH- ions, which will make the phenolphthalein more purple.
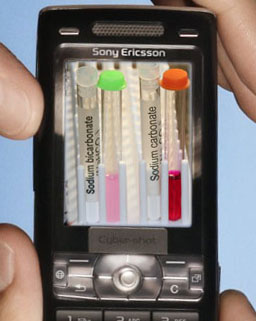
Take a photo of your test tubes that have the dissolved sodium bicarbonate and sodium carbonate with phenolphthalein.
Locate the 0.1 M HCl bottle in your kit. "0.1 M HCl" is read as "point one molar hydrochloric acid". A mole of hydrochloric acid weighs 36.5 grams (same as 7 nickels). This is 0.1 mole, which is 3.65 grams. When 3.65 grams of HCl (0.l mole of HCl) is dissolved in one liter of water, it is called "0.1 molar." This strength is about the same strength of hydrochloric acid in your stomach. So a 0.1 molar acid not considered a strong or weak. It's in between. If you get some on your hands, don't panic; it's not that strong, but I would go wash it off before waiting too long. If the 0.1 M HCl got into my eyes, I would immediately go flush my eyes out with water. You can grab a cup or glass and fill it with tap water and then pour the water into the eye. Do that several times until the eye feels fine.
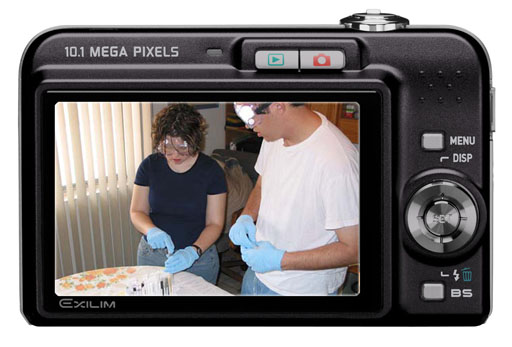
Rather than taking the chance of an acid getting into your eyes, you need to wear the goggles that come with the kit when handling 0.1 M HCl. Your don't really need gloves, but you can wear them if your skin is sensitive. Take a photo of yourself wearing the goggles in preparation for the next few steps where you are using 0.1 M HCl.
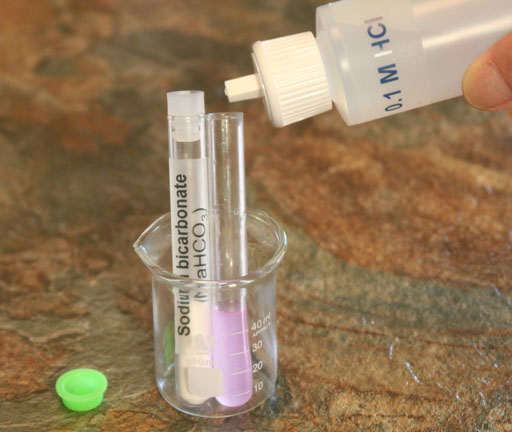
SODIUM BICARBONATE: Add 0.1 molar hydrochloric acid solution to the test tube with the dissolved sodium bicarbonate. Add enough to bring the test tube to about half way full.
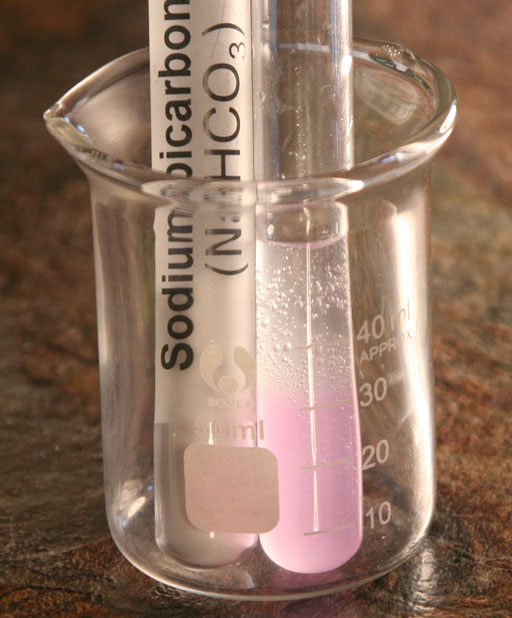
What is present are the following: NaHCO3, water (H2O), and HCl. What possible gases (bubbles) can we get from these chemicals?
Hydrogen gas (H2), oxygen gas (O2), ozone (O3), chlorine gas (Cl2), carbon monoxide (CO), carbon dioxide (CO2), methane (CH4), and water vapor (H2O). In theory, a rearrangement of the atoms in the 3 compounds in the test tube could create the above gases.
In general, a chemical reaction will produce products that are the most stable (have the least amount of energy). Let's go down the list:
Hydrogen gas (H2): This is a high energy compound that will easily burn or explode in the presence of oxygen. .
Oxygen gas (O2): Oxygen is reactive and will combine with many elements causing them to burn or "rust".
Ozone gas (O3): Ozone is very reactive, which is why even small amounts are bad for breathing.
Chlorine gas (Cl2): Chlorine is very reactive and is poisonous. It also reacts with metals and nonmetals.
Carbon monoxide: This compound is reactive and is used to pull oxygen atoms off of metal ores.
Carbon dioxide: This compound is quite stable and non-toxic. In contact with water it does form carbonic acid, which usually decomposes back to carbon dioxide.
Methane (CH4): This is a high energy molecule that is the main ingredient of natural gas, a fuel used for heating.
Water vapor (H2O): Water vapor is very stable and doesn't react with many things.
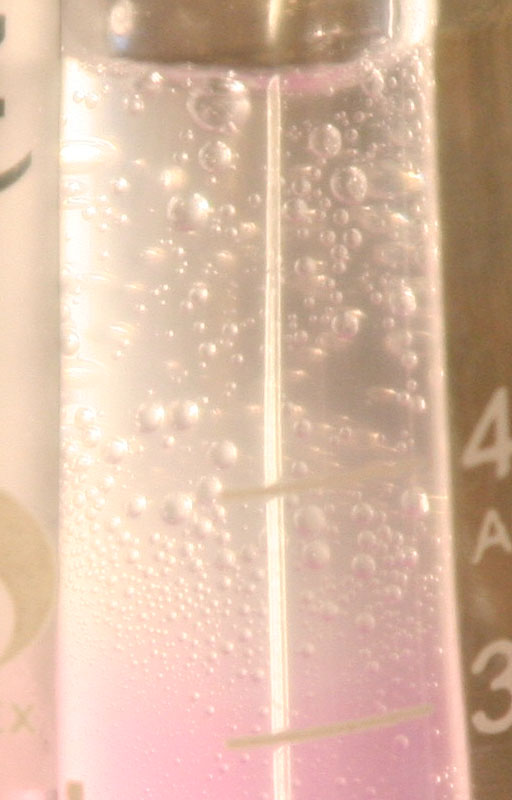
From the list above, we see that carbon dioxide and water vapor are the most stable compounds and therefore the best candidates for the bubbles we see. If the bubbles are water vapor, then the water must be at boiling point temperature (100°C or 212°F). If you checked the temperature of the test tube, you would notice its not hot at all. So that eliminates water vapor. So that leaves carbon dioxide as the best guess and the right choice. Below is the chemical change occurring:
To explain why the phenolphthalein is now clear, the acid (H+) in HCl neutralized the OH- which was causing the phenolphthalein to turn pinkish: In water HCl is H+ + Cl-.
H+ + Cl- + OH- --> H2O + Cl-
The H+ and OH- neutralize each other to form water. This explains why the phenolphthalein is no longer pink. Now how about the bubbles of carbon dioxide?
H+ + Cl- + Na+ +HCO3- --> H2CO3 + Na+ + Cl-
The acid (H+ ions) in HCl causes a lot of carbonic acid (H2CO3) to form; however carbonic acid is not that stable so the next reaction occurs:
H2CO3(aq) --> H2O(l) + CO2(g)
So we see the two hydrogen atoms gets one oxygen atom from CO3 to make H2O and CO2. CO2 is the gas that is seen as bubbles.
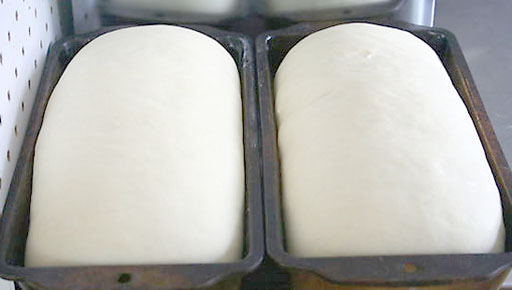
Sodium bicarbonate (NaHCO3) is also called baking soda because it helps the bread or pastries rise (get fluffy). That's because acidic foods like fruits in the ingredients will react with the bicarbonate ion (HCO3-) to make water and carbon dioxide. The bubbles of carbon dioxide forms pockets in the flour. That makes the dough rise and become fluffy. The "soda" part of "baking soda" is named after sodium (Na).
Baking Powder has baking soda (sodium bicarbonate) plus some weak acid, which will guarantee that the sodium bicarbonate will create carbon dioxide in the wet dough.
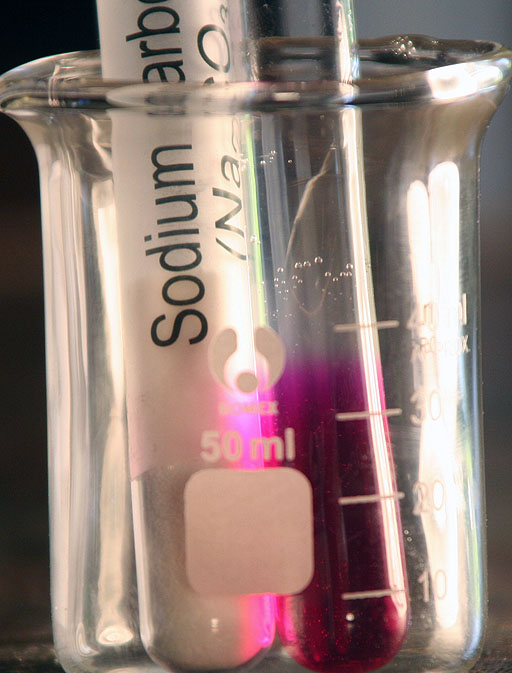
First of all there are many more OH- ions in the sodium carbonate solution than there were in the sodium bicarbonate solution. So those extra OH- ions neutralize more of H+ ions in HCl. Also, to get carbon dioxide to form, the carbonate ion (CO32-) requires two H+ ions before it becomes the unstable carbonic acid (H2CO3), which then decomposes in carbon dioxide.
2H+ + 2Cl- + 2Na+ + CO32- → H2CO3 + 2Na+ + 2Cl-
↓
H2CO3(aq) → H2O(l) + CO2(g)
Remember, sodium bicarbonate only required one H+ ion to make carbonic acid. See below:
H+ + Cl- + Na+ + HCO3- --> H2CO3 + Na+ + Cl-
↓
H2CO3(aq) → H2O(l) + CO2(g)
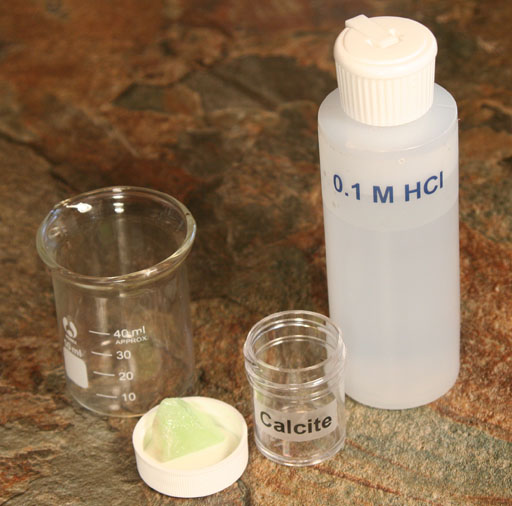
Adding an acid to a compound and observing bubbles is a indicator that your compound has the carbonate (CO32-) ion. This is useful in helping to identify compounds in forensics and geology. This experiment focuses on geology and the identification of a class of minerals called "carbonates." The mineral, calcite, is example of a carbonate. Notice that the word, carbonate, has some different meanings. The carbonate ion is . A carbonate mineral has the carbonate ion in it. Also, the word, carbonate, can be used as a verb, which means to use carbon dioxide gas to make carbonic acid (which also has the carbonate ion). So these different meanings all revolve around the carbonate ion.
If the mineral labeled "Calcite" is truly calcite, then it has the formula of CaCO3. CaCO3 is made of two ions, a calcium ion (Ca2+) and the carbonate ion, . The carbonate (CO32-) ion should create carbon dioxide if exposed to an acid like hydrochloric acid (HCl) just like it did for sodium bicarbonate and sodium carbonate.
The calcite crystal is in one of the small plastic jars.
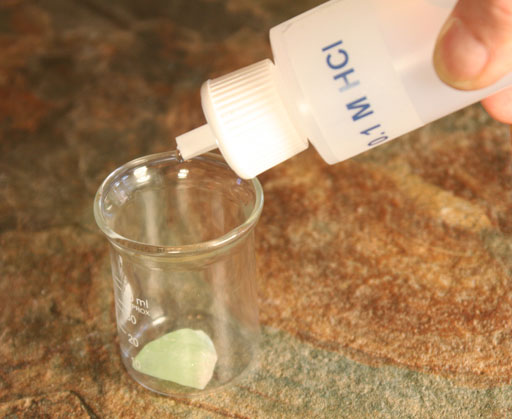
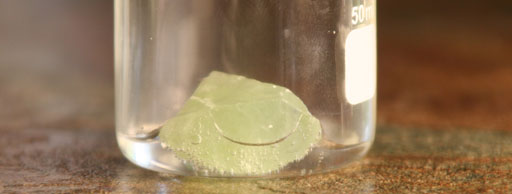
Look close and and determine if there are any bubbles coming from your sample of "calcite". If so, then bubbles created by an acid is helping to confirm the sample is calcite. If your sample does not form bubbles, then it can't be calcite.
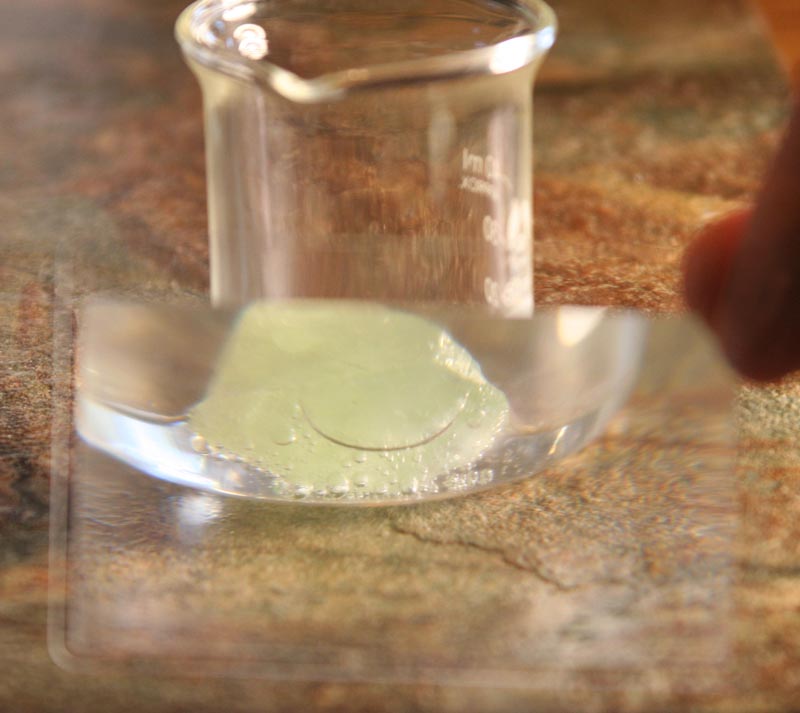
Remember to rinse out the beaker and rinse off the calcite with some tap water when finished.
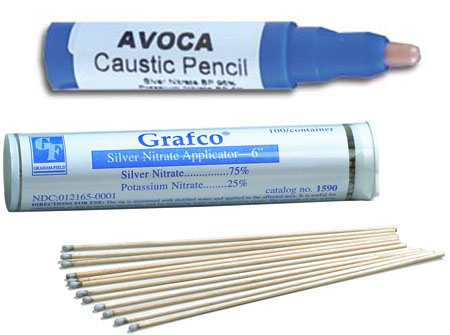
It has been used to chemically burn off moles and to stop bleeding of small blood vessels. The word, cauterize, meant to stop bleeding by using a very hot instrument to burn the vessels to stop bleeding. Silver nitrate is a chemical method of cauterizing vessels to stop bleeding. Doctors have used it for nose bleeds and for babies' umbilical cords that are leaking blood. Speaking of babies, a silver nitrate solution was commonly put into the eyes of newborn babies to kill bacteria that might have been picked up from the mother during the birth.
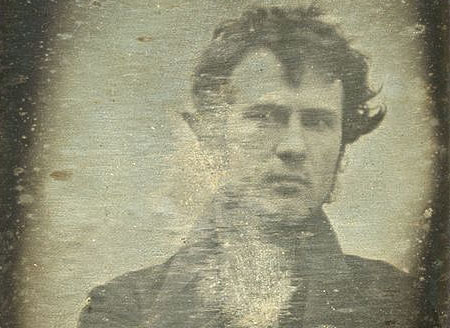
PHOTOGRAPHY: Silver nitrate mixed with table salt (NaCl) was the basis of making photographic paper. This experiment shows what happens when those are mixed.
The photo on the left is claimed to be the first photo ever taken of a human face. The photographer took a self portrait back in 1839. The process used silver nitrate, iodine, mercury, and sodium chloride in that order.
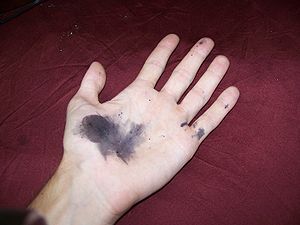
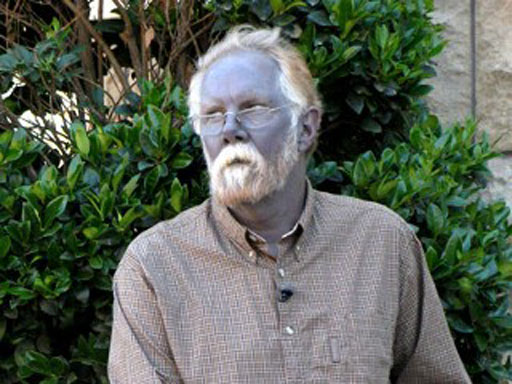
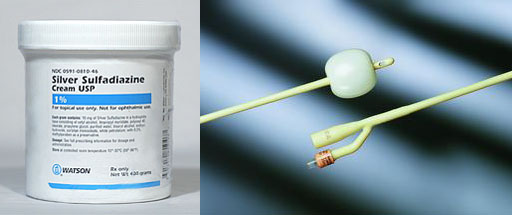
ANTIBIOTIC: Silver ions are known to be antibiotic. One compound called silver sulfadiazine is usually used in dressing burns to kill bacteria.
Catheters coated with a silver alloy claim to reduce urinary infections. They slowly release silver ions that will kill bacteria.
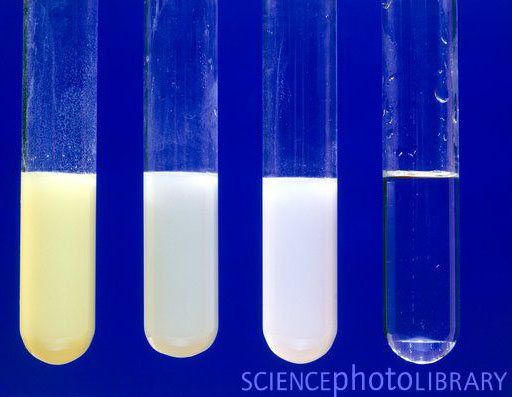
The image shows the precipitates of AgI, AgBr, and AgCl from left to right. The clear test tube was silver nitrate mixed with fluoride ions. No precipitate occurred with fluoride ions.
The reaction of silver nitrate reacting with sodium chloride is below:
NaCl(aq) + AgNO3(aq) → AgCl(s) + NaNO3(aq)
(aq) means the compound is dissolved in water. Because these are dissolved in water, the ions are not together but floating around separately. That is often indicated with a full ionic equation shown below.
Na+(aq) + Cl-(aq) + Ag+(aq)+ NO3-(aq)→ AgCl(s) + Na+(aq)+ NO3-(aq)
Notice that sodium and nitrate ions (Na+ and NO3-) remain dissolved in water (aq), but AgCl (silver chloride) forms a solid (s). The solid that forms in a solution is called a precipitate. The precipitate is normally heavier than the solution, so it will sink.
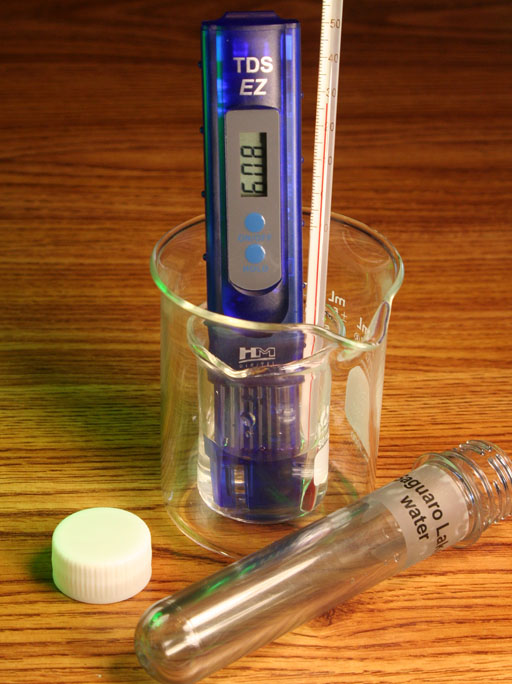
TDS METER AND CHLORIDE SALTS: Chloride ions are more common than the other ions in water sources and in the body. So silver nitrate is often used to measure the concentration of salt (sodium chloride) in water samples. This is similar to what the TDS meter does (lab 2), except the test with silver nitrate is more specific to common chloride salts like sodium chloride and calcium chloride.
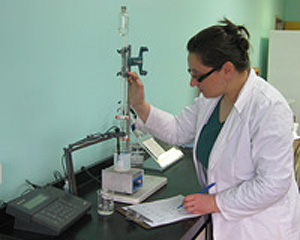
ACCURATE MEASUREMENTS OF CHLORIDES: The image shows a sample of concrete being tested to see how much road deicing salts (like NaCl and CaCl2) have penetrated the concrete. If the concrete lets too much chloride into it, the steel rebar in the concrete will corrode and weaken the concrete bridge or road. The measurement of the levels of chloride is done with a solution of silver nitrate.
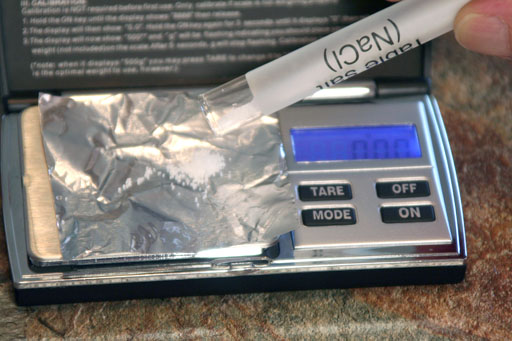
SILVER NITRATE REACTION WITH SODIUM CHLORIDE:
Place one of the 2.5 inch squares of aluminum foil on the balance and TARE it to zero out the mass of the foil. Weigh out between 0.20 grams and 0.30 grams of salt (NaCl).
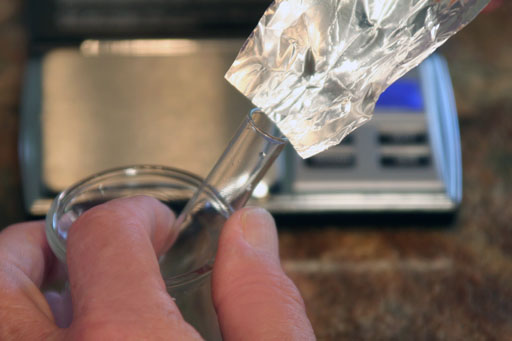
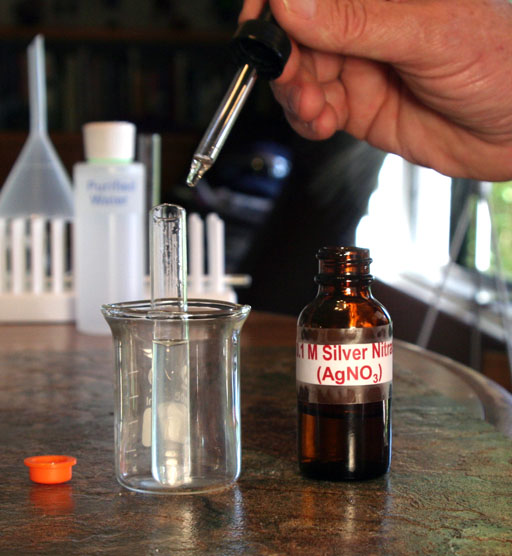
SILVER NITRATE AND SALT WATER: Locate the silver nitrate solution in your kit. It's the amber colored bottle.
Add about 5 drops of the 0.1 M AgNO3 solution. Answer the below questions.
What do you see when the drops of silver nitrate contact the NaCl salt solution?
(If nothing happens (no white solution forming), then your batch of silver nitrate may be too old. Contact your instructor for a replacement. You can skip this section of the lab that requires silver nitrate.)
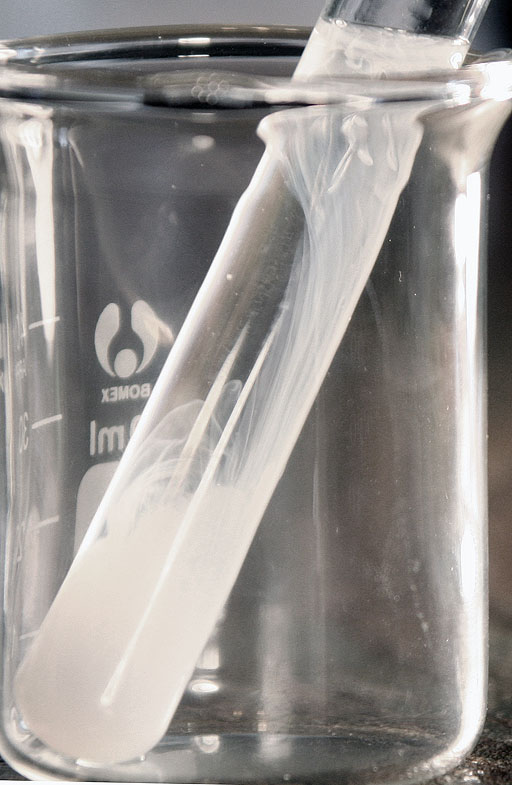
Now take another test tube and fill it about half way with regular tap water. Add about 5 drops of the 0.1 M silver nitrate solution. Record what you see.
With my tap water, I was rather shocked with how much precipitate formed. The TDS meter had shown that my tap water had high dissolved solids (about 530 milligrams per liter). But that was just a reading on the screen. Seeing this precipitate makes most of those salts visible, which make you realize just how salty our drinking water has become. A few years ago, when this lab was done, there was only a white cloudiness in the water, not a heavy precipitate sinking to the bottom of the test tube.
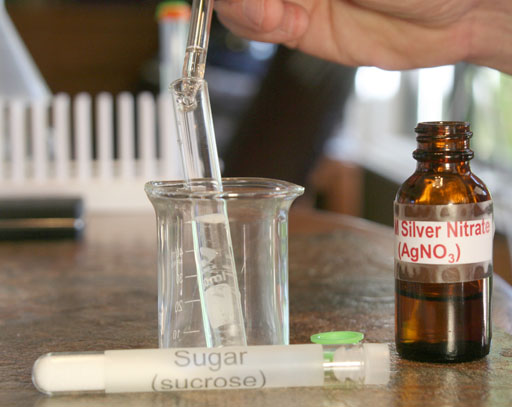
Repeat the process with sugar. Weigh out between 0.20 grams and 0.30 grams of sugar. Then place in a clean test tube and add purified water. Shake it to dissolve the sugar. Then place a few drops of the silver nitrate into the sugar solution and report what you see.
We could repeat the process with purified water, but you would see that it doesn't produce any precipitate. Purified water was used to dissolve the silver nitrate powder to make up the solution in the 0.1 M Silver Nitrate bottles. No precipitate is in the bottle, so it doesn't react with pure water.
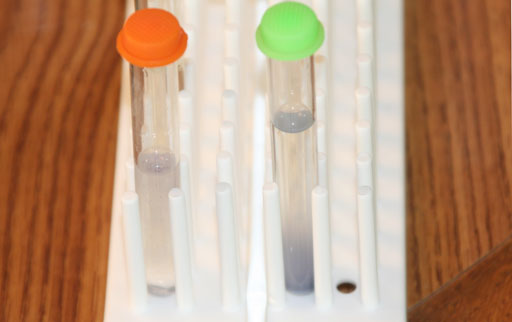
You may notice the white precipitates produce by the salt solution and the tap water turning dark. That's because light is causing the silver in the silver chloride (AgCl) to split away from AgCl and become small silver metal particles (Ag). A block of silver metal looks like silver, but tiny particles of silver metal look black.
If you take the samples out into the sunshine, that will speed up the process of turning AgCl into silver metal (see below).
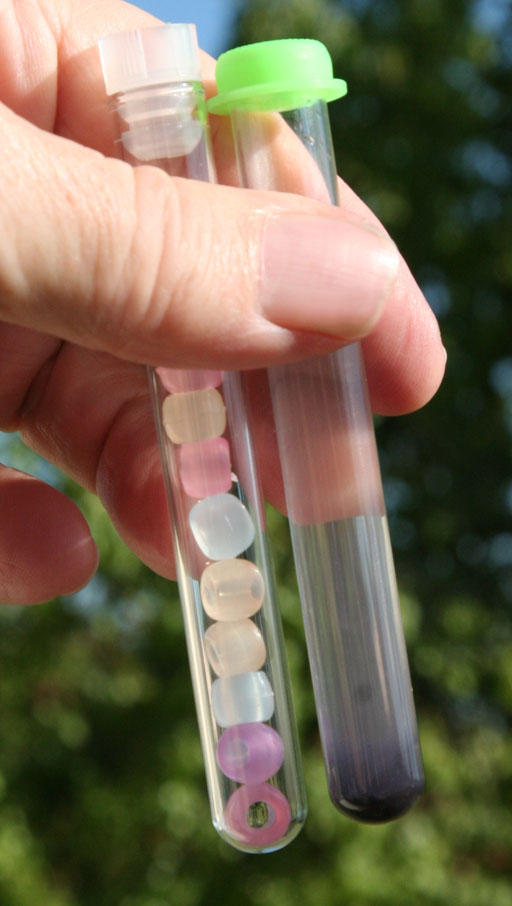
Your kit has a test tube with UV detection beads. The beads will turn from white to a color when exposed to UV light. UV light has more energy than visible light and is better at initiating reactions. In the image you can see the UV beads have color, so UV light is striking them. The other test tube is the one with the tap water which had a few drops of silver nitrate added. The silver chloride precipitate has turned black, which indicates metallic silver is being created from the silver salt, silver chloride (AgCl).
Again, the sensitivity of silver chloride to light was the basis of photography.
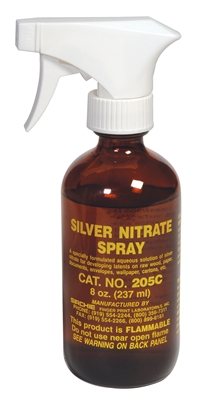
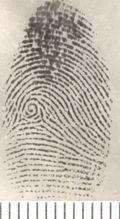
Below is an excerpt from the below blog regarding using silver nitrate to reveal invisible (latent) fingerprints.
http://blog.makezine.com/laboratory-84-revealing-latent-fing
"Silver nitrate development is based on the reaction of soluble silver nitrate with the sodium chloride (salt) that is present in most latent fingerprints to form insoluble and light-sensitive silver chloride. Exposing the silver chloride produced by this reaction to sunlight or an ultraviolet lamp causes the silver chloride to be reduced to metallic silver, making the latent prints visible as black or dark gray traces. Because sodium chloride is not volatile, even very old latent fingerprints retain it and can be developed by silver nitrate...
Silver nitrate development is destructive, so if it is to be used, it must be used after all other methods have been attempted. Iodine fuming, ninhydrin, and most other development methods don’t interfere with silver nitrate, so forensics labs often use silver nitrate development as the final step, in the hope of revealing latent prints that were not revealed by the other methods."
OPTIONAL EXPERIMENT: The solution of silver nitrate is usually made with methanol rather than water, plus it is sprayed onto a surface. So your results are not as good as they could be, which is why this lab is options. However, you can still try to use the silver nitrate solution in the kit to make fingerprints visible by reacting with the chloride in the salt (NaCl) that is in the fingerprint.
Find some white paper that you want to use to try to develop fingerprints.
Place the protective tile under the paper. If the silver nitrate soaks through the paper, it could stain whatever is below it. So use extra paper and the protective tile under the paper where you place the silver nitrate.
The surface tension of water makes water want to bead up. So if you add some of the fuel for the alcohol burner, that will reduce the surface tension. So in an empty test tube, add about 5 drops of the fuel for the alcohol burner. Then add 5 drops of the 0.1 M silver nitrate solution. Use a disposable pipette to mix them.
Draw some circles where you want to put your fingerprints on the white paper. Place your fingers or thumb on your forehead (one way to get extra oils and sweat) and the press them into the circles of the paper. That way you will know where to drop on the silver nitrate solution.
Use the pipette to transfer some of the silver nitrate solution (with added fuel) to the places where you placed your fingerprints. Drip the silver nitrate solution onto the paper. Let it soak in and dry. (Remember, silver nitrate will stain things, so don't put the paper onto a table or counter where it can soak through and stain it.).
The silver nitrate on the fingerprints has to be exposed to UV light for it to turn dark. So they need to be placed in sunlight for a few minutes. If you have one of those UV flashlights used to find scorpions, that will work also.
If you wish, you can copy the below summary into your email (or Word document) and type your answers after the descriptions. The required photos can either be attached to the email or inserted in the Word document if going that route. Try to keep each image under 2 megabytes. If the first letter of your last name is between A and G, send your lab reports to Loree Cantrell-Briggs at Loree.Cantrell-Briggs@phoenixcollege.edu If the first letter of your last name is between H and Z, send your lab reports to Quinn Thacker at QRT2004@yahoo.com. Be sure to title the email "Lab 4".
Lab 4 Experiment 1: Physical and Chemical Properties. Physical and Chemical Changes.
a. PHYSICAL PROPERTIES:
1. What is the color, form, and odor of sugar?
2. What is the color, form, and odor of salt?
3. What is the color, form, and odor of citric acid?
4. What is the color, form, and odor of mineral oil (Unknown B liquid)?
5. What is the color, form, and odor of Epsom Salts?
b. SOLUBILITY:
1. Is sugar soluble in water?
2. Is salt soluble in water?
3. Is citric acid soluble in water?
4. Is mineral oil soluble in water?
5. Is Epsom salts soluble in water?
c. Physical and Chemical Properties and Changes during heating
1. What heat source did you use (alcohol burner or candle)?
2. Describe what you saw when you heated sugar. Also, mention any physical properties or chemical properties that became evident when sugar was heated?
(Remember to include a photo of the end result of heating sugar.)
3. Describe what you saw when you heated salt. Also, mention any physical properties or chemical properties that became evident when salt was heated?
4. Describe what you saw when you heated citric acid. Also, mention any physical properties or chemical properties that became evident when citric acid was heated?
5. Describe what you saw when you heated mineral oil. Also, mention any physical properties or chemical properties that became evident when mineral oil was heated?
6. What was the mass of the beaker used to heat the Epsom salts?
7. What was the mass of the Epsom salts in the beaker before it was heated?
8. What was the mass of the Epsom salts in the beaker after it was heated?
9. If the mass is more or less than it started with, how do you explain the difference in mass?
10. The formula for Epsom salts is MgSO4•7H2O. So where do you think the water came from to form the condensation?
d. Lab 4 Experiment 2: Sublimation (a physical change)
1. Look at the pattern made by the dye, and try to guess why or how your pattern was created. If you weren't successful in getting any dye to transfer to the paper, try to explain the pattern in the photo.
(Attach a picture of the pattern that your dye sublimation sandwich made. Even if you got no transfer of dye, take a picture of the paper that faced the film.)
e. Lab 4 Experiment 3: Physical and Chemical Changes with Carbonates in water and acid
SOLUBILITY:
1. Was sodium bicarbonate (sodium hydrogen carbonate/NaHCO3) soluble in water?
2. Was sodium carbonate (Na2CO3) soluble in water?
3. How would you describe the color of the sodium bicarbonate solution after you added phenolphthalein?
4. How would you describe the color of the sodium carbonate solution after you added phenolphthalein?
(Attach a photo of colors of these two solutions with the phenolphthalein.)
(Attach a photo of yourself wearing goggles as you get ready to add 0.1 M HCl to the sodium bicarbonate).
5. Did you see bubbles in the sodium bicarbonate solution after you added 0.1 M HCl?
6. If you saw bubbles, what are the bubbles made of?
7. Did you see bubbles in the sodium carbonate solution after you added 0.1 M HCl?
8. If you saw bubbles, what are the bubbles made of?
f. Lab 4 Experiment 4: Chemical Changes with Calcite
1. Did your calcite mineral sample create bubbles when exposed to 0.1 molar hydrochloric acid?
g. Lab 4 Experiment 5: Silver nitrate and chloride ions
1. What did you see when the drops of silver nitrate contacted the NaCl salt solution?
2. What did you see when the drops of silver nitrate contacted your tap water?
h. Lab 4 Experiment 6 (optional): Silver nitrate to develop fingerprints
1. If you did this experiment, did you see any evidence of prints after adding silver nitrate and exposing it to UV light (sunlight)?